Hi there! Thanks for watching my talk (or flipping through the slides here).

I’m Tom Black, and I make software and other digital things as a developer, designer, and product strategist. Along with [my website](http://www.blacktm.com) you're on now, you can find me on [Twitter](https://twitter.com/blacktm) and [GitHub](https://github.com/blacktm). You can also send me an old-fashioned [email](mailto:tom@blacktm.com) if you like.

I use Ruby for both work and fun — here, I'll be focusing more on the latter 👾

I'd like share some thoughts on how we can reimagine 2D graphics and game development, and how **Ruby** is the perfect language to do just that.

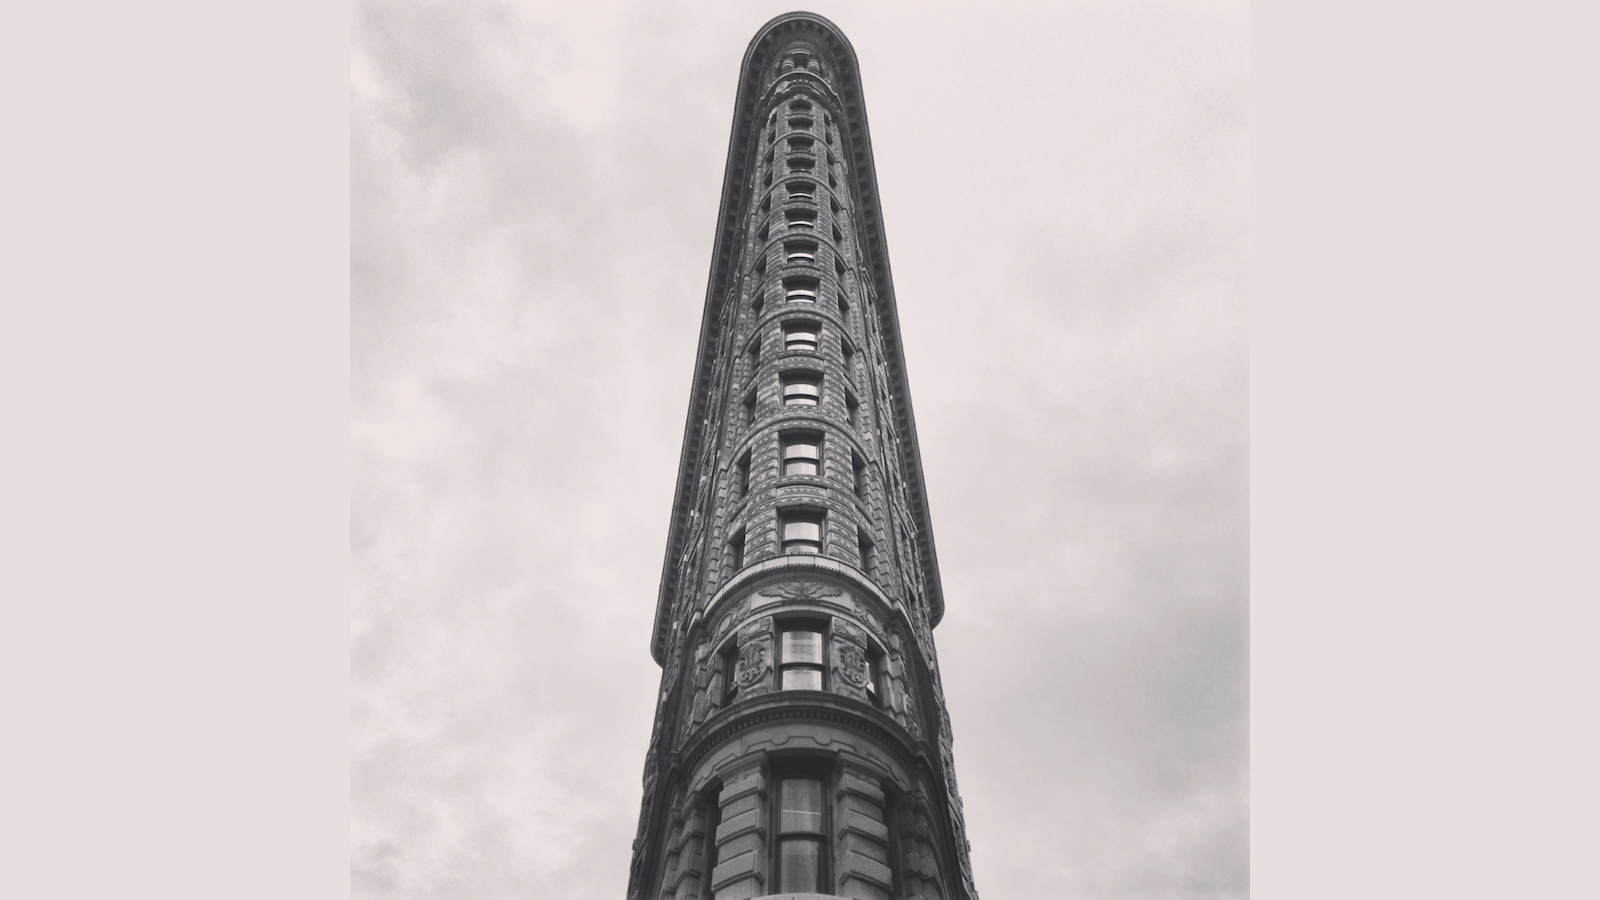
For me, this journey started in the [Flatiron District](https://en.wikipedia.org/wiki/Flatiron_District) of New York City. I was new to the city and taking it all in, meeting people, getting connected to the tech community, and excited to see what everyone was working on.

It was 2012 and the "learn to code" movement was in full swing. Everyone was learning to code, even [the mayor](https://twitter.com/mikebloomberg/status/154999795159805952) himself! Despite all the hype, I was looking forward to the opportunity to teach others, be a mentor, and provide them with tools, resources, and connections that I never had when I was learning way back in 2003 (there were no blogs, podcasts, or YouTube, just really thick books, yeesh! 📚).

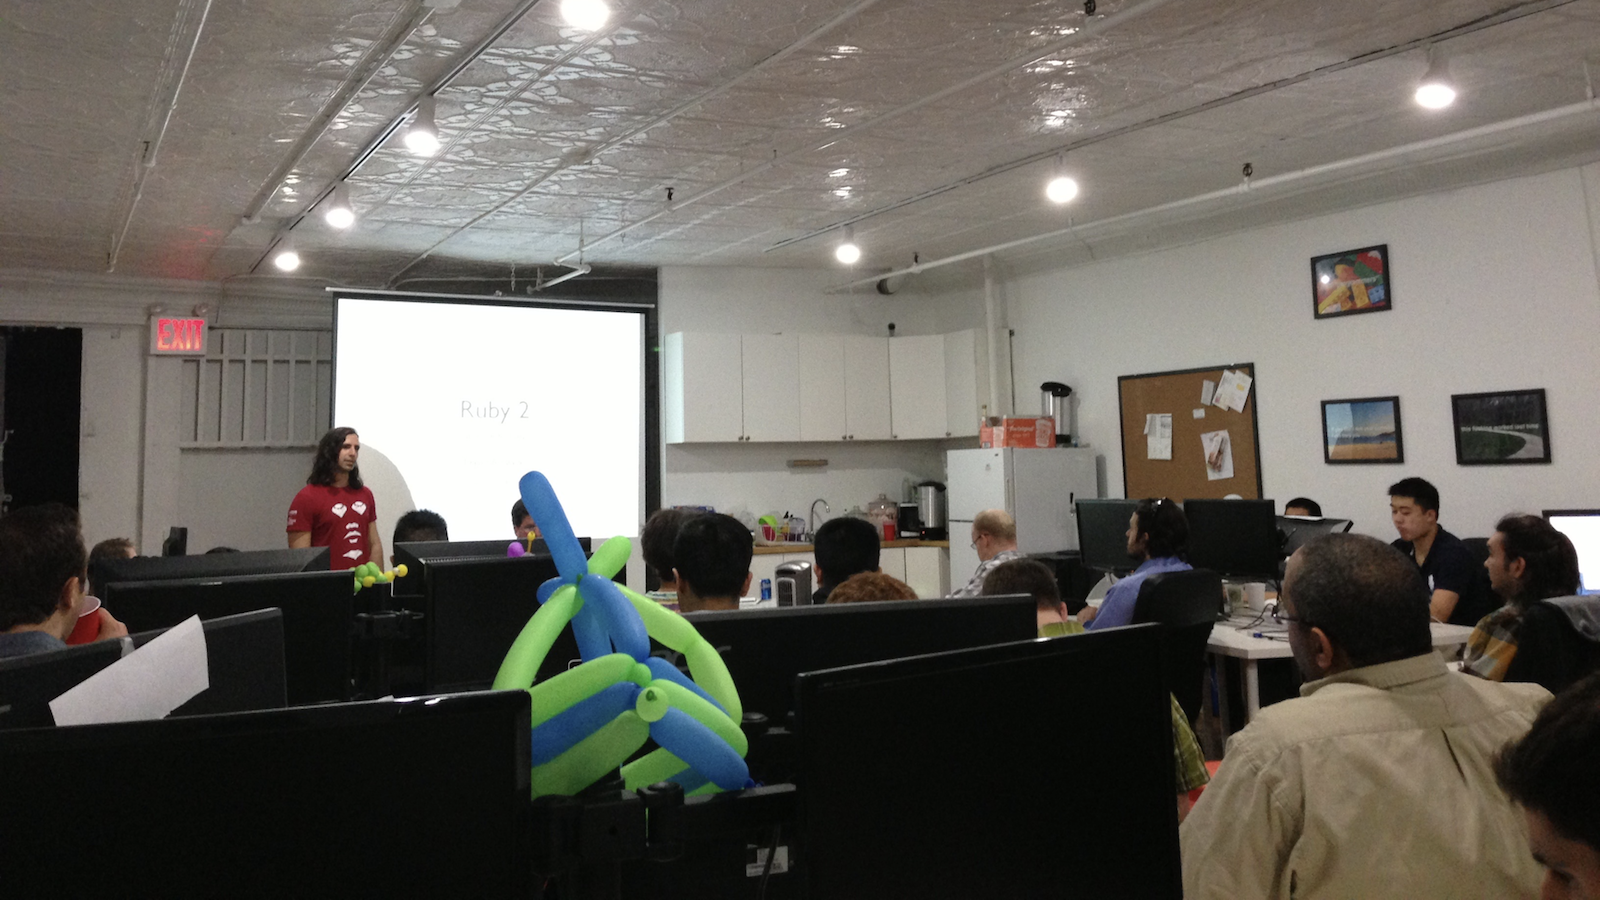
Every chance I had, I tried to get involved. This led me to meetups like [Hacker Hours](http://hackerhours.org), after school programs organized by [ScriptEd](https://scripted.org), and bootcamps like the [Flatiron School](https://flatironschool.com), pictured here (looks like we were talking about Ruby 2.0 back then, and here's a [Rack and Sinatra lesson](https://speakerdeck.com/blacktm/building-web-apps-with-rack-and-sinatra) I gave around that time).

Being able to give back and help people learn was great, but it wasn't without its challenges. While teaching and observing students struggle to grasp difficult programming concepts, I noticed something...

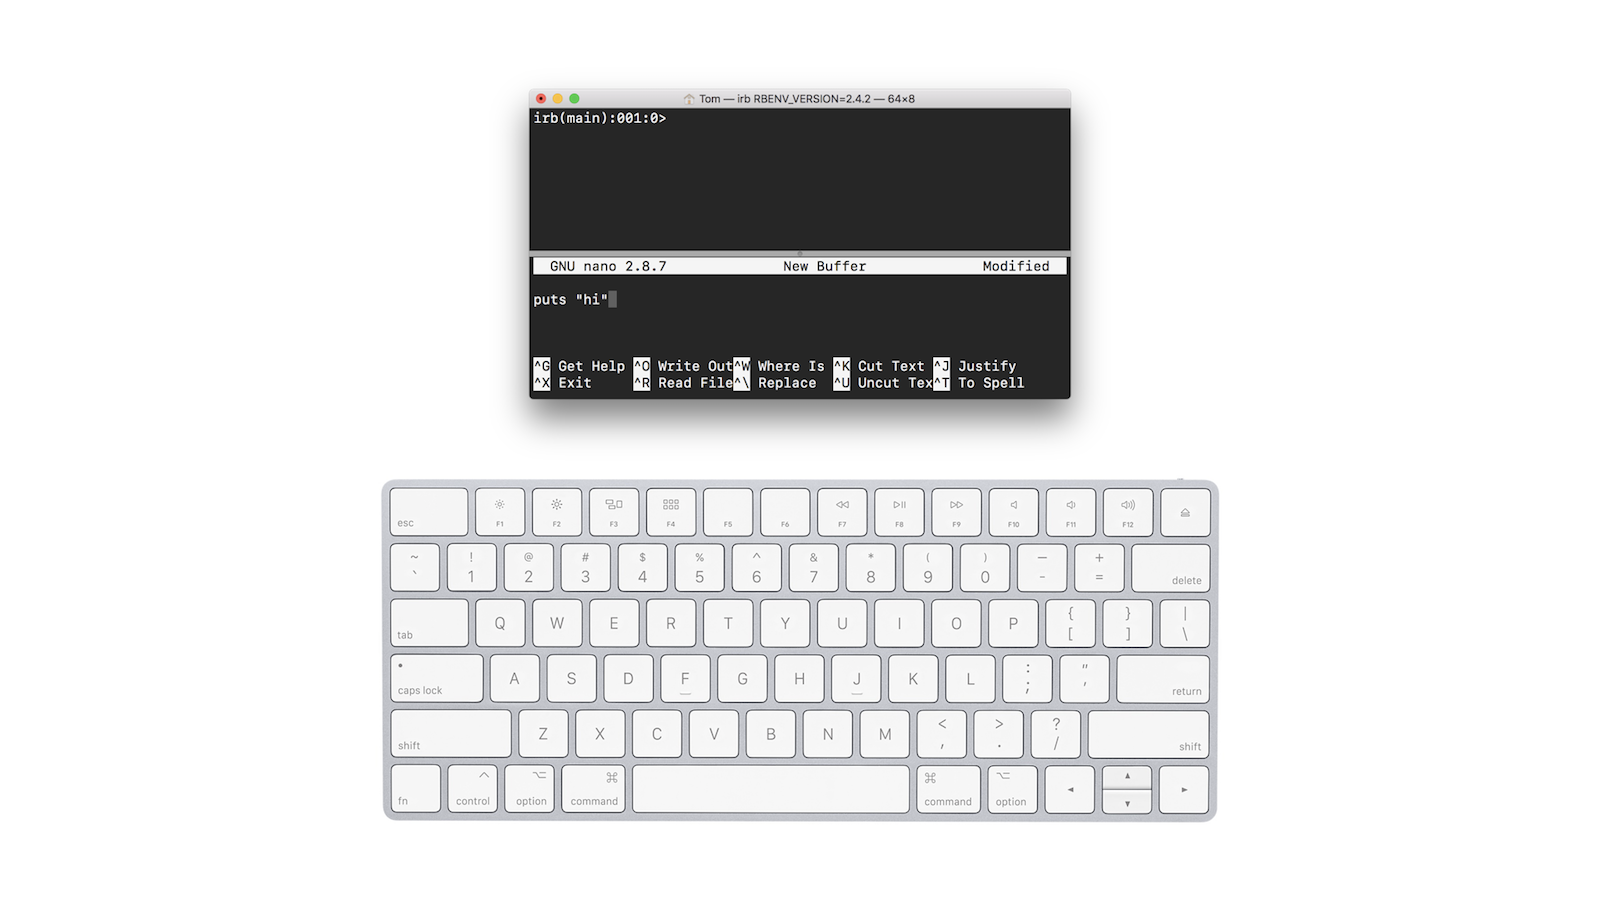
The paradigm we were using to teach was a bit...lacking. It was all centered around the keyboard and terminal, with text as the primary medium for telling the computer what to do and how it would provide its response.

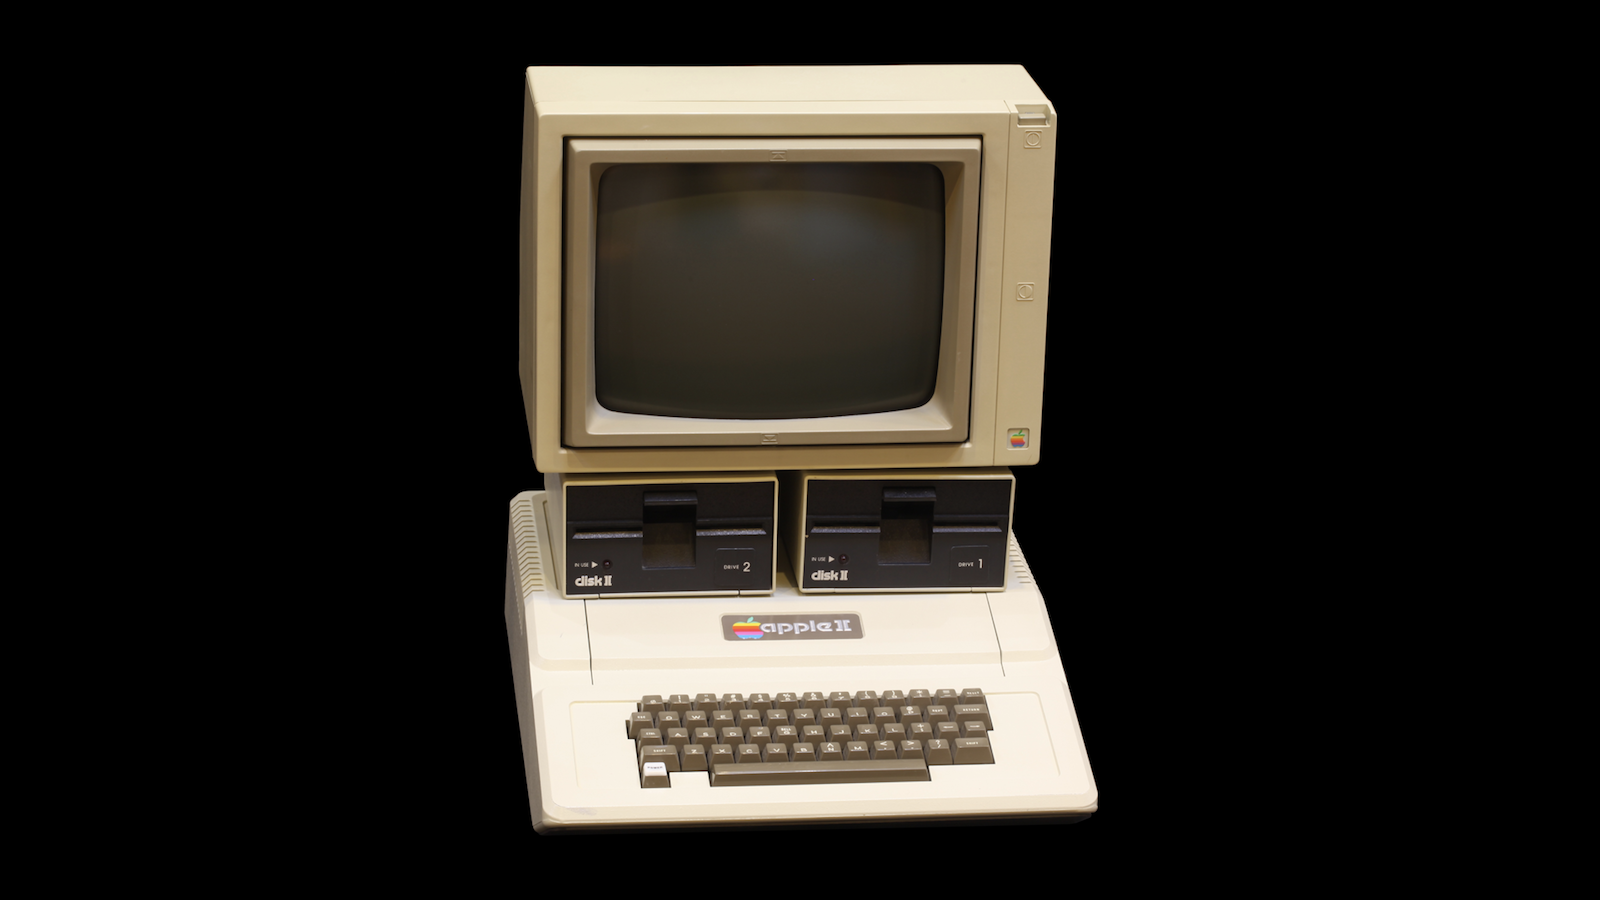
I thought about it, and it reminded me of those early computers — that same old keyboard and terminal. (This is an [Apple II](https://en.wikipedia.org/wiki/Apple_II) from 1977. That's 40 years ago!) Have things really changed since then?

Well, of course!

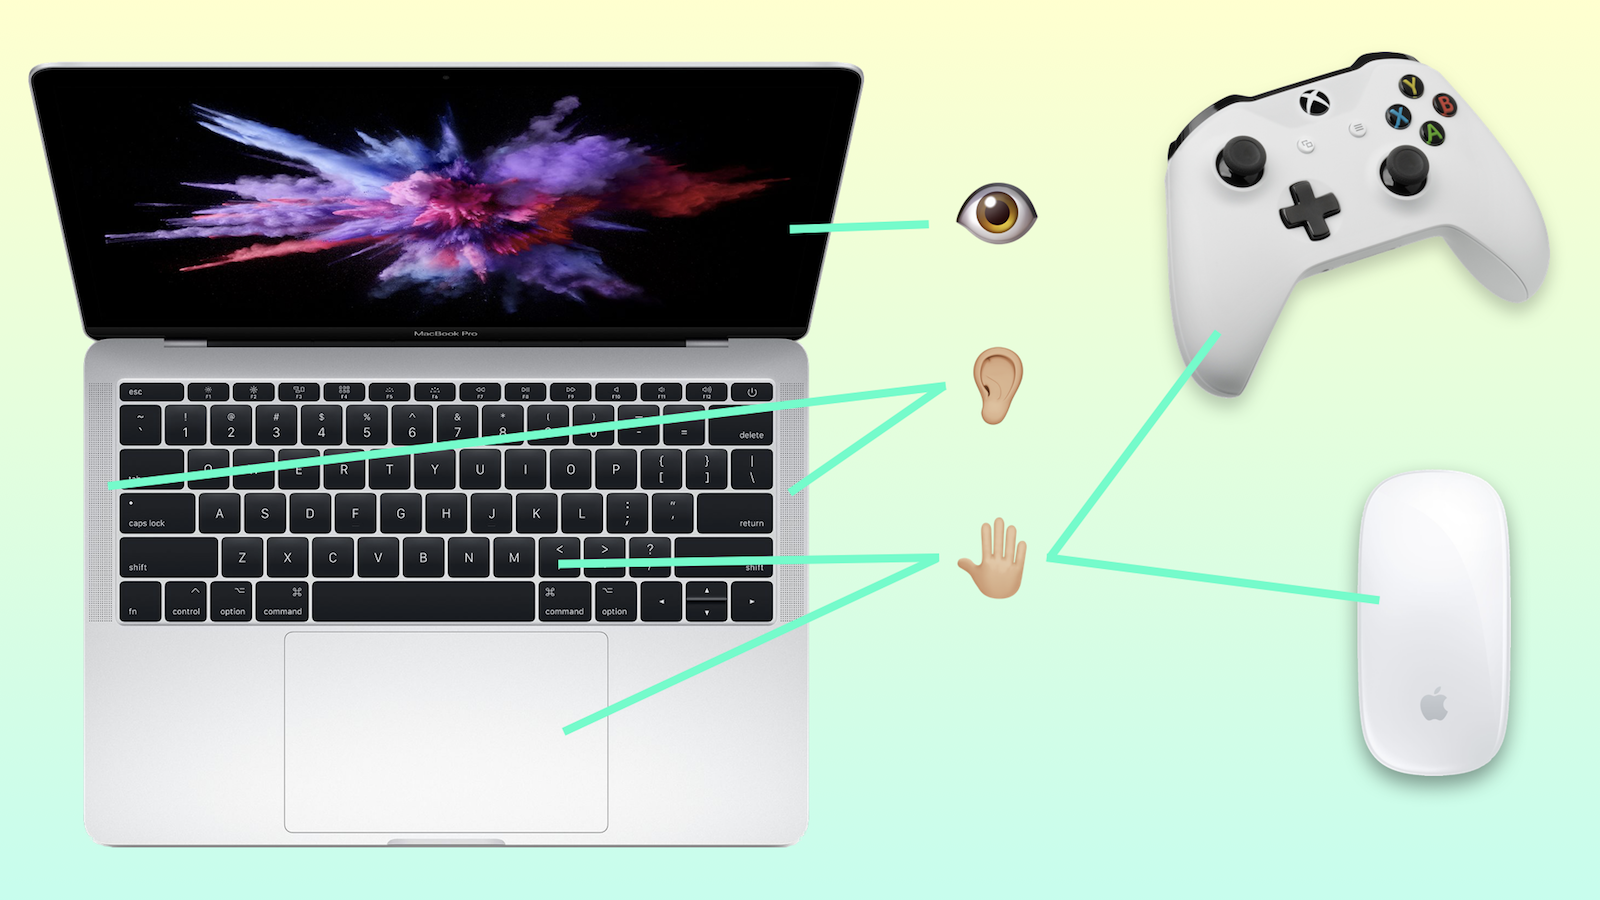
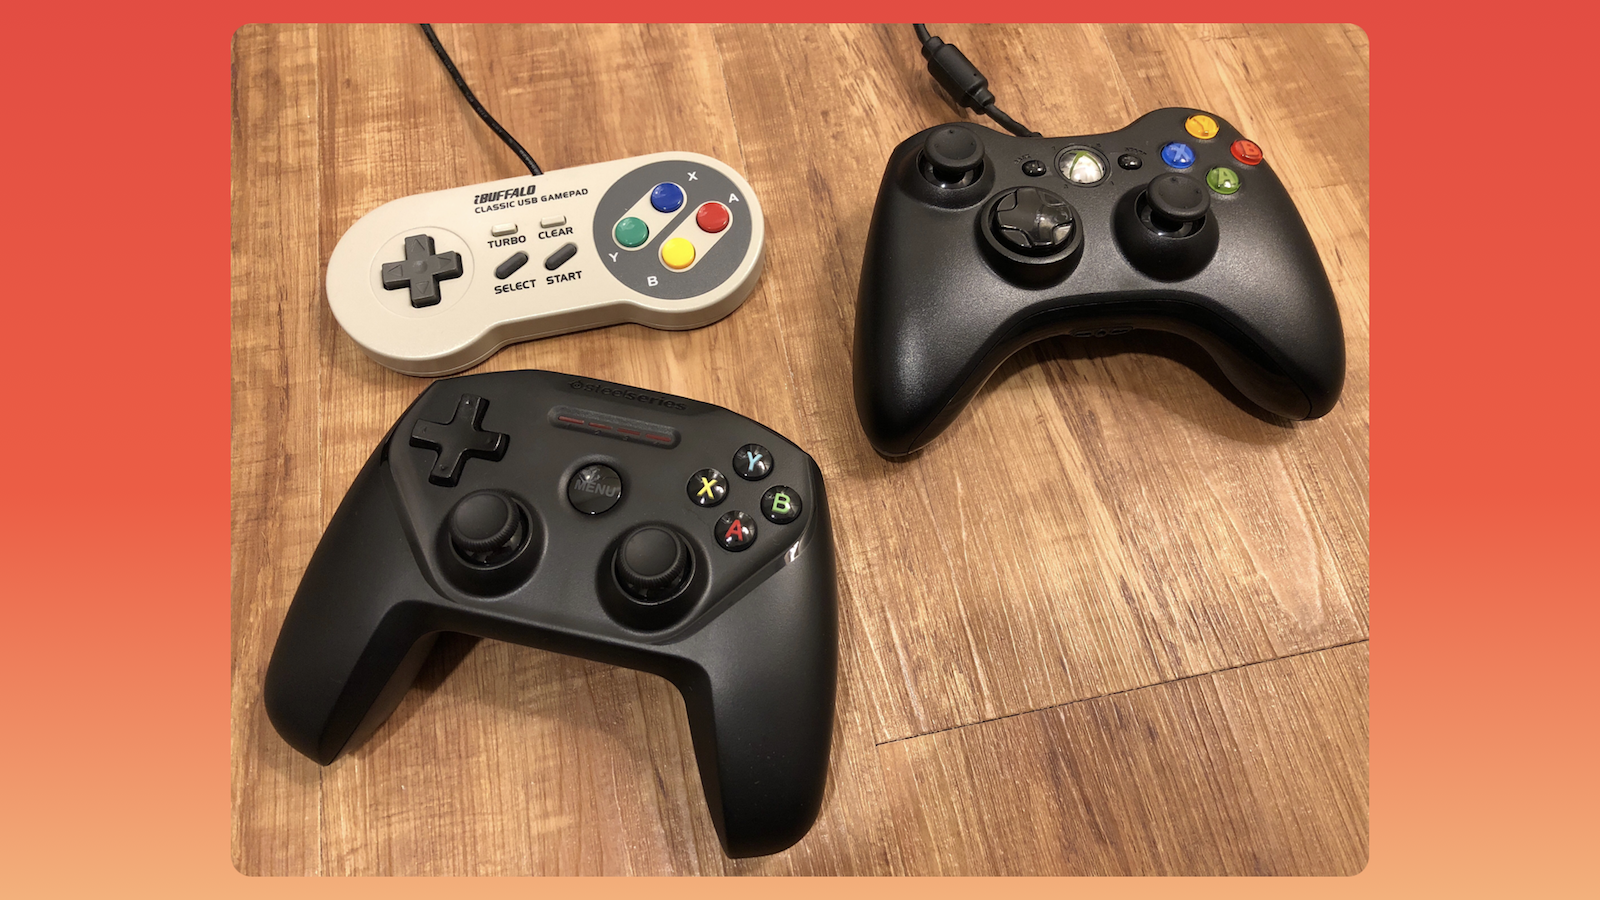
Look at the modern laptop: it can produce way better visuals, with millions of colors and pixels we can't even discern with our eyes; sounds are deep, rich, and dynamic, with high-quality speakers _built right in_ (amazing, I know); and yes, we still have our trusty keyboard, but also many new kinds of input devices, like mice and touchpads that capture gestures and nuanced movement, and game controllers with their abundance of buttons and joysticks.

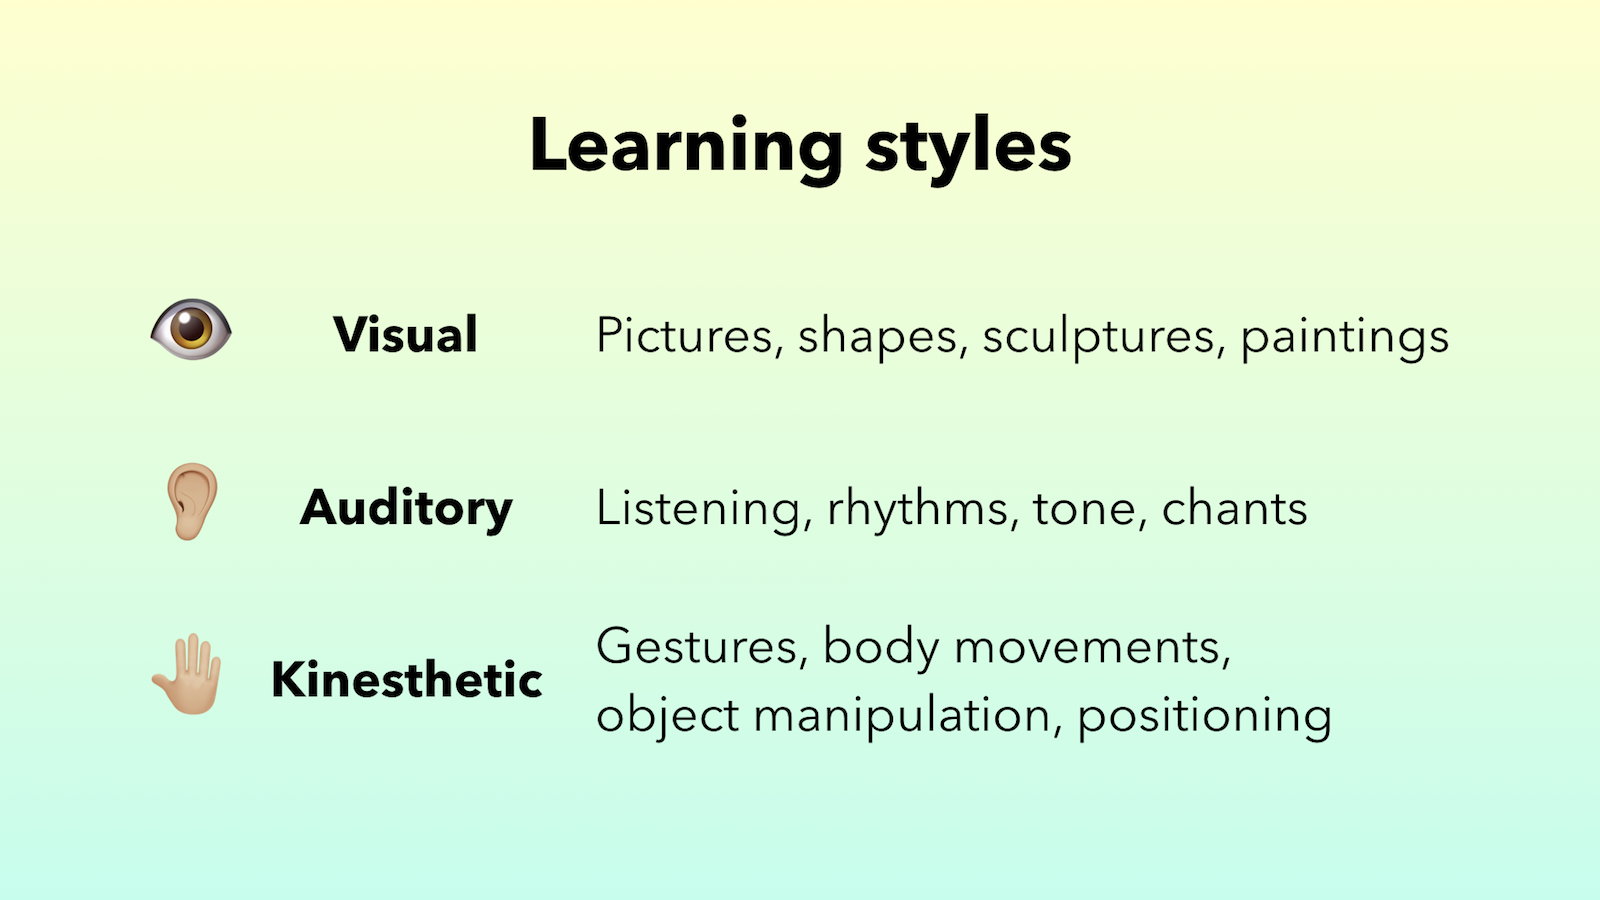
The modern computer really can do a lot, and it just so happens that these sensory capabilities map nicely to well established [learning styles](https://en.wikipedia.org/wiki/Learning_styles): visual (what we see 👁), auditory (what we hear 👂🏼), and kinesthetic (what we can touch and manipulate 🤚🏼).

Text might be the primary mode we build software in as professional developers, but do we have to be limited to text for teaching and learning?

I got to thinking: how might we use the full potential of the modern computer to make the learning experience much more vibrant and effective?

Later that year, I set out to develop a prototype of what a new kind of experience could look like. I centered it around learning Ruby, my favorite programming language and one that's had an enormous impact on my career, but also a favorite of many developer schools because of its natural elegance, expressiveness, and productivity. It's a near perfect language for newbies, one that will get them to fall in love with making things with code.

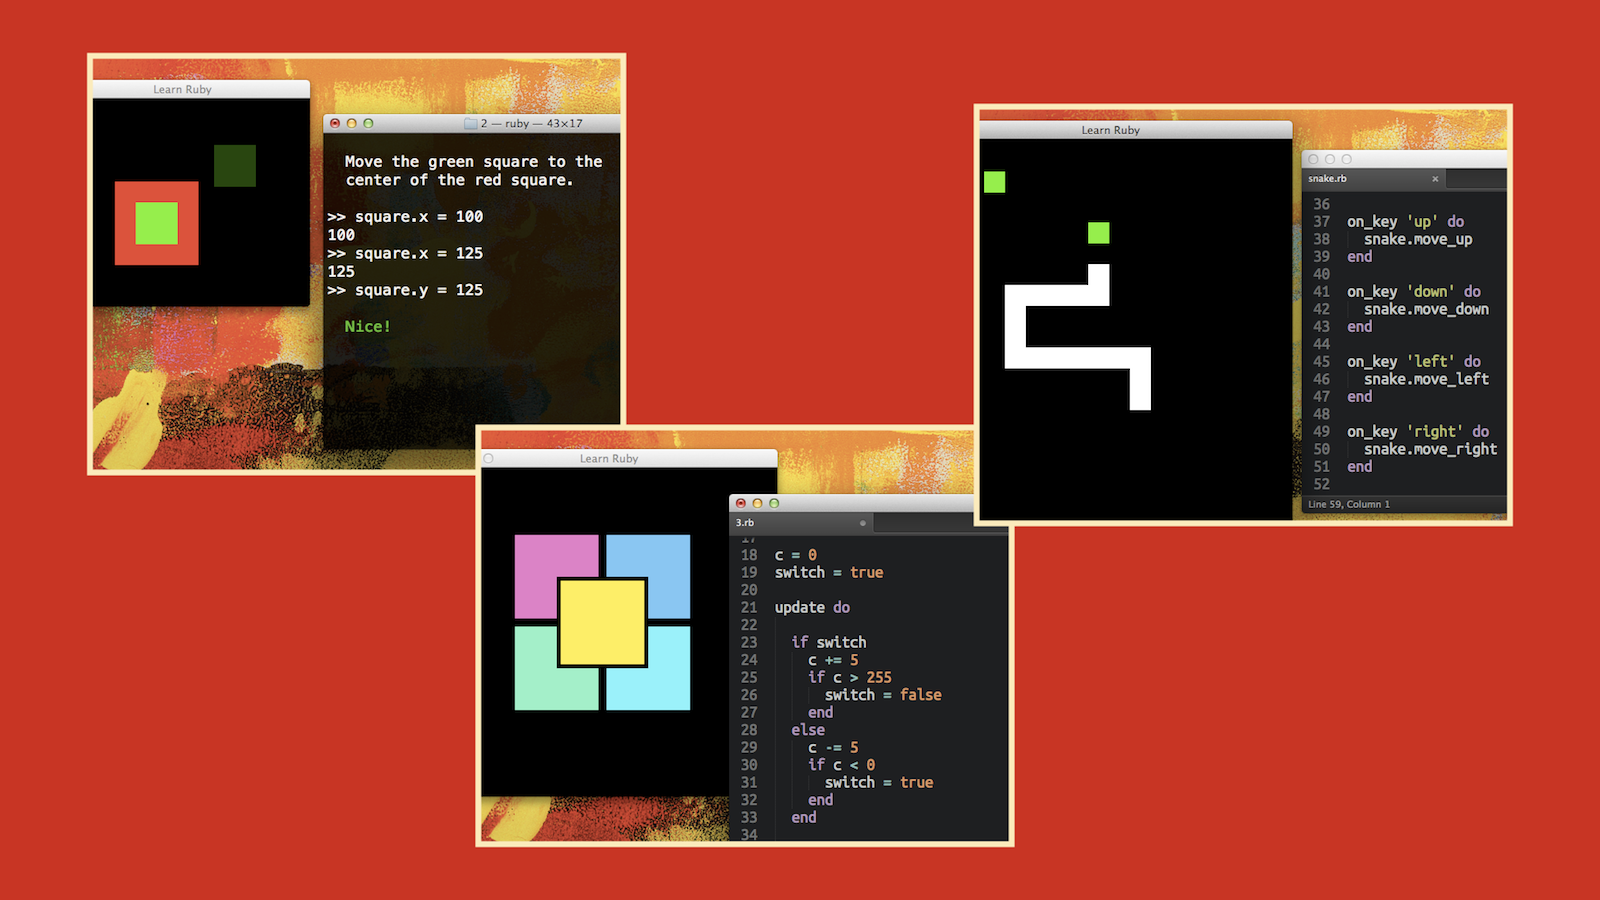
The ["Learn Ruby" demo](https://www.youtube.com/watch?v=I9Aladc7H-c) (👈 watch it here) showed off a bunch of ideas, like using an interactive terminal to test basic knowledge, drawing and interacting with graphics programmatically, and the ability to gradually add complexity and master more difficult skills. Learners could build mini games, connect and program game controllers, and share their creations with friends. The possibilities seemed limitless!

Like every good prototype, it helped validate ideas to see if they were even worth pursuing, and some of the early feedback was encouraging. We could use this to teach, build real games, and code creatively.

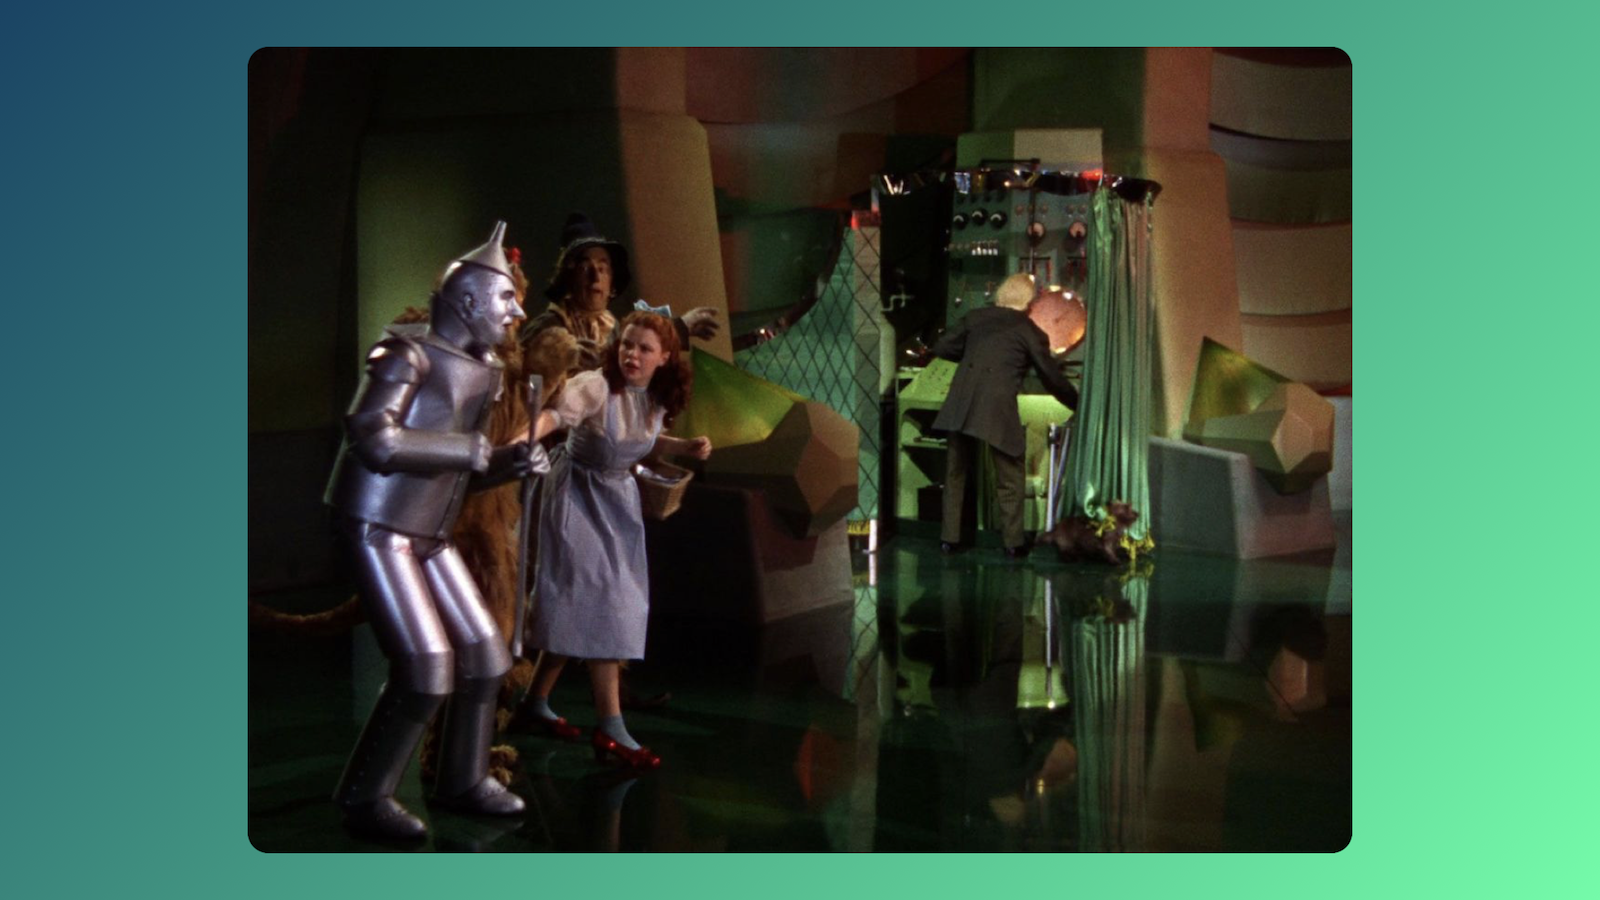
It all seemed so exciting, but it was in fact just a prototype, a facade — ["pay no attention to that man behind the curtain."](https://www.youtube.com/watch?v=YWyCCJ6B2WE) If this were to become a reality, we would have to get to work and go further.

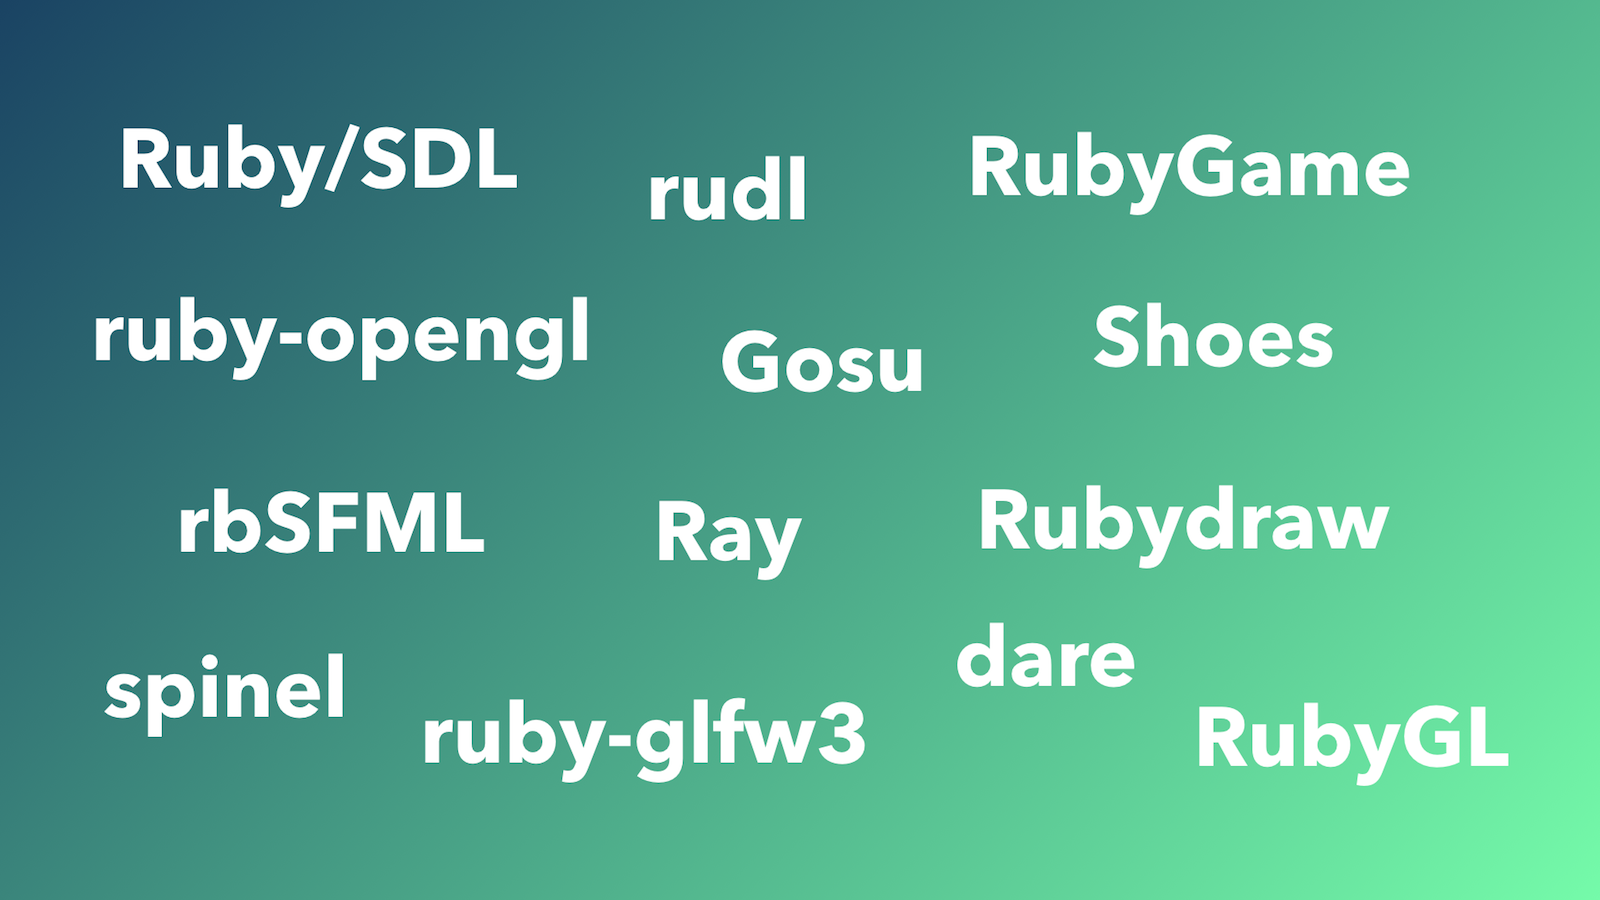
I started doing some research to see if others were thinking about graphics and game development in Ruby, and was suprised and delighted to find a handful of projects, dating back to the year 2000! You check them out here: [Ruby/SDL](https://github.com/ohai/rubysdl), [rudl](https://github.com/matozoid/rudl), [RubyGame](https://github.com/rubygame/rubygame/), [ruby-opengl](https://github.com/drbrain/opengl), [Gosu](https://github.com/gosu/gosu), [Shoes](https://github.com/shoes/shoes4), [rbSFML](https://github.com/Groogy/rbSFML), [Ray](https://github.com/Mon-Ouie/ray), [Rubydraw](https://github.com/awostenberg/rubydraw), [spinel](https://github.com/cadwallion/spinel), [ruby-glfw3](https://github.com/nilium/ruby-glfw3), [dare](https://github.com/domgetter/dare), [RubyGL](https://github.com/GGist/RubyGL)

Some were high level, some down to the metal. Some focused on GUI programming, and some exclusively on gaming. It was fascinating to see the different perspectives and opinions expressed in each project.

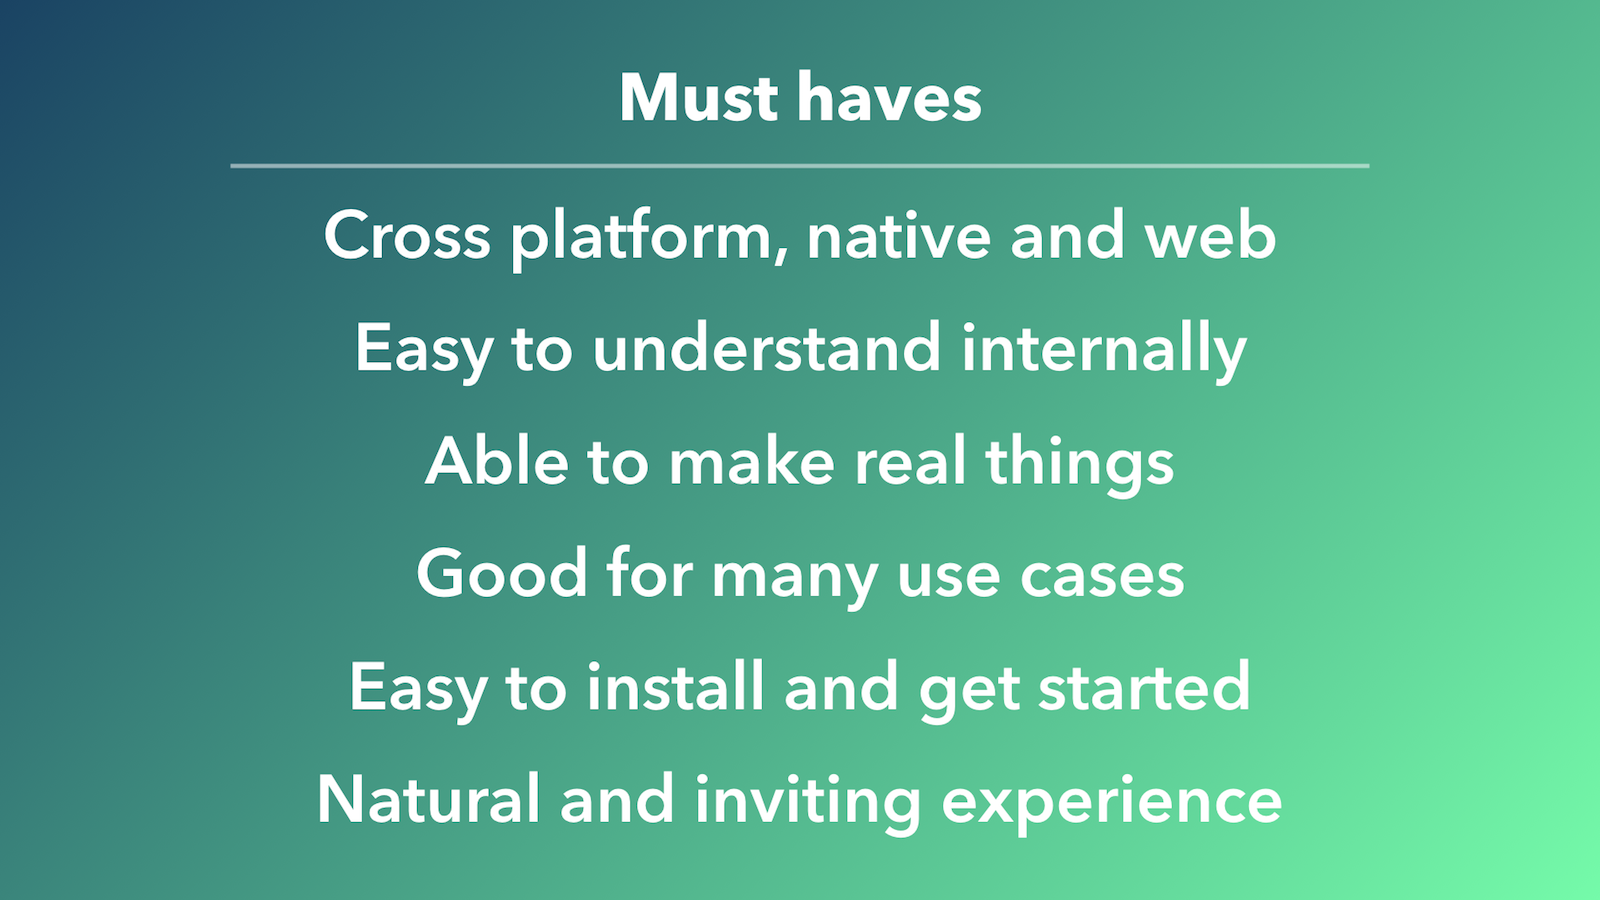
With some context and appreciation of prior efforts, we had a big decision to make: should we build on or extend an existing project (not all were still active), do we start something entirely new, or do something in between. To help answer this, we thought about what our requirements, or "must haves" might be to achieve the vision.

First, we didn't want to leave anyone behind, so it must work across all platforms, ideally natively _and_ on the web. It should be easy to understand internally, not only to attract contributors, but also so that interested students could dive in deeper to learn how the code works. We should be able to make real applications, not things that can only run in some special sandbox. And furthermore, the tools and libraries should be useful for not just education, but other applications too, like game development and creative coding. It must be easy to install, set up, and get started — time from idea to result on screen should be minimal. And finally, all this should be wrapped in a nice, inviting package.

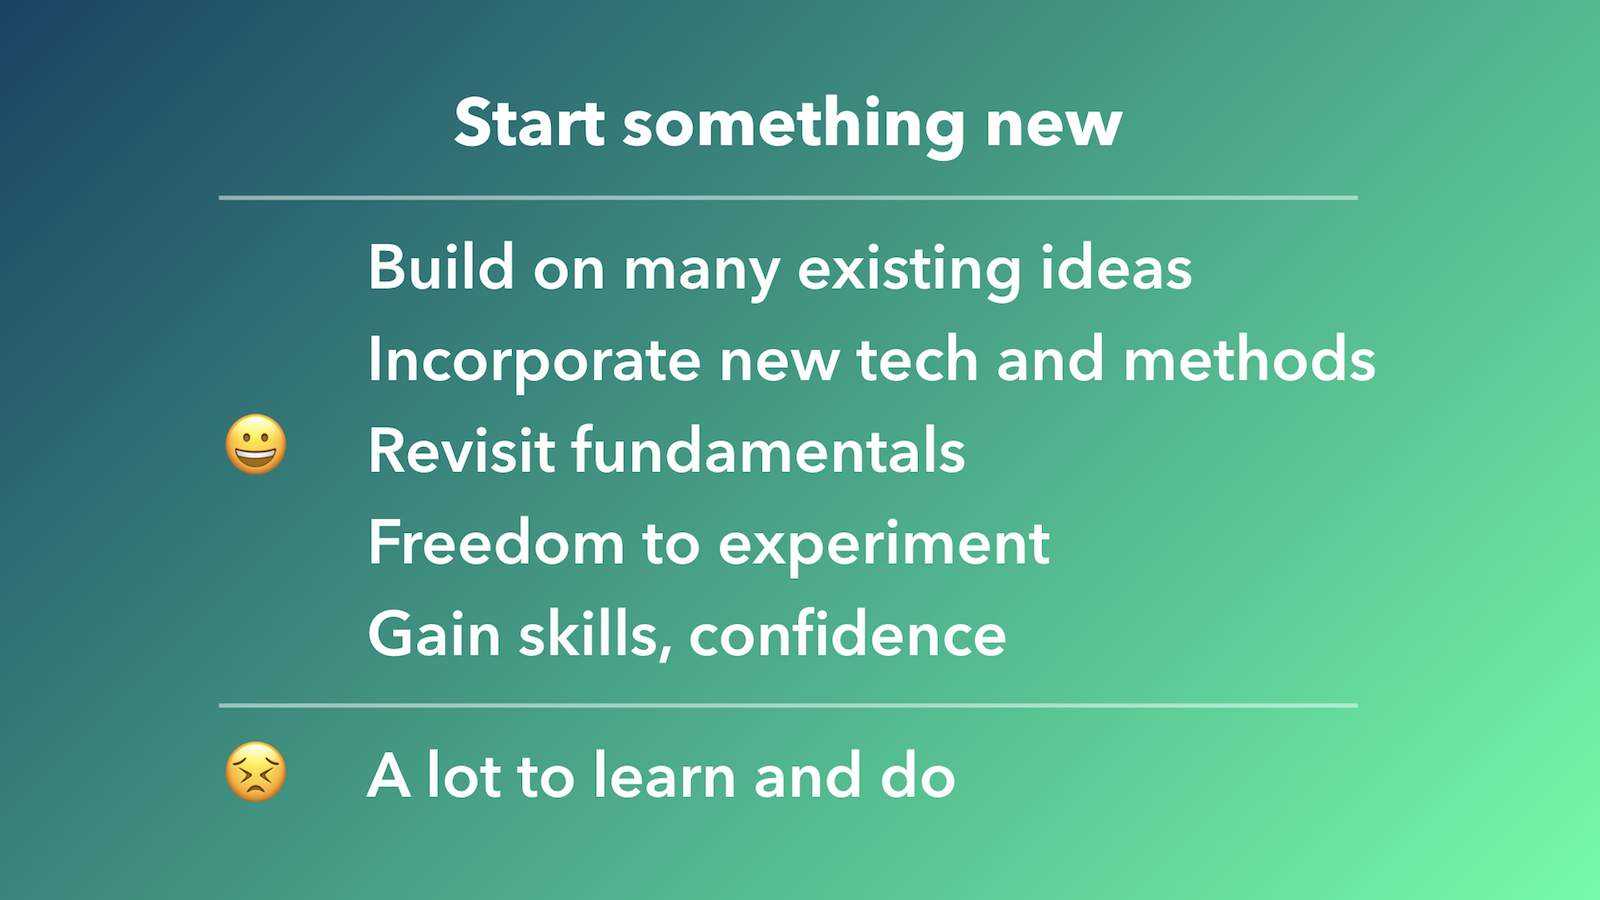
Those were the goals, and lofty ones at that. After a fair amount of deliberation and experimentation, it became clear there may be an opportunity to start something new.

Now, there are a number of benefits to starting something new, like: being able build on and mix ideas from different places, try out new technology and approaches, rethink foundational components and dependencies, have the freedom to try out radical concepts (which might be risky for established projects), and to stretch yourself and gain new technical skills and experience.

There's also a big downside to starting fresh, namely, that there is _a lot_ to learn and make, ugh! With this in mind, we could prepare ourselves for the major task at hand.

We had a vision and some goals, but where to go from here? How do we actually get started?

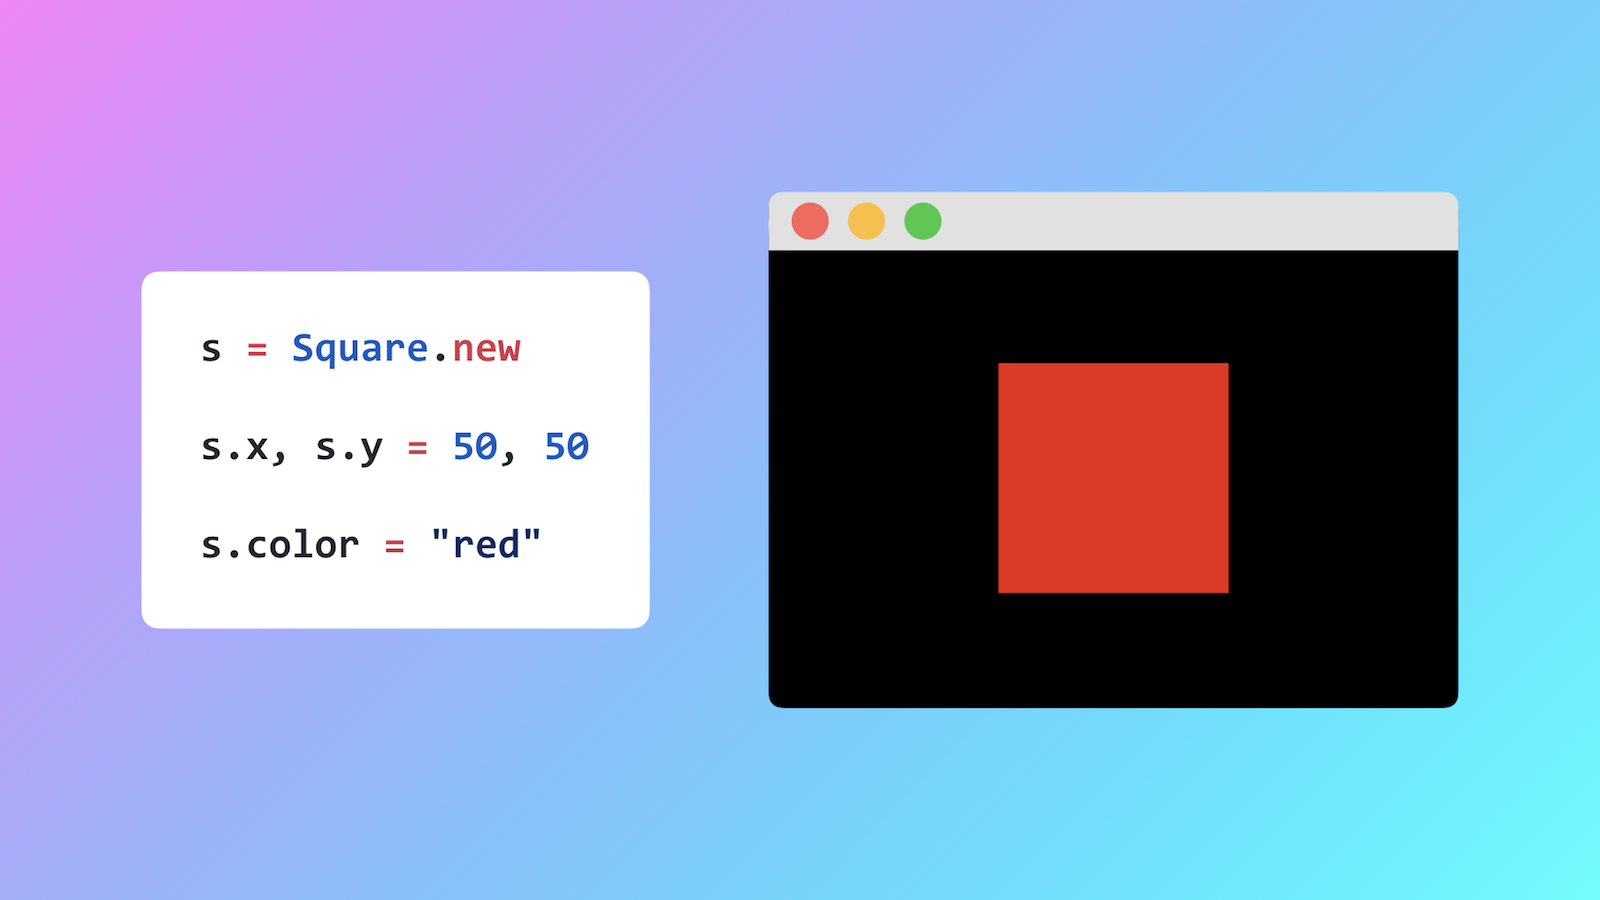
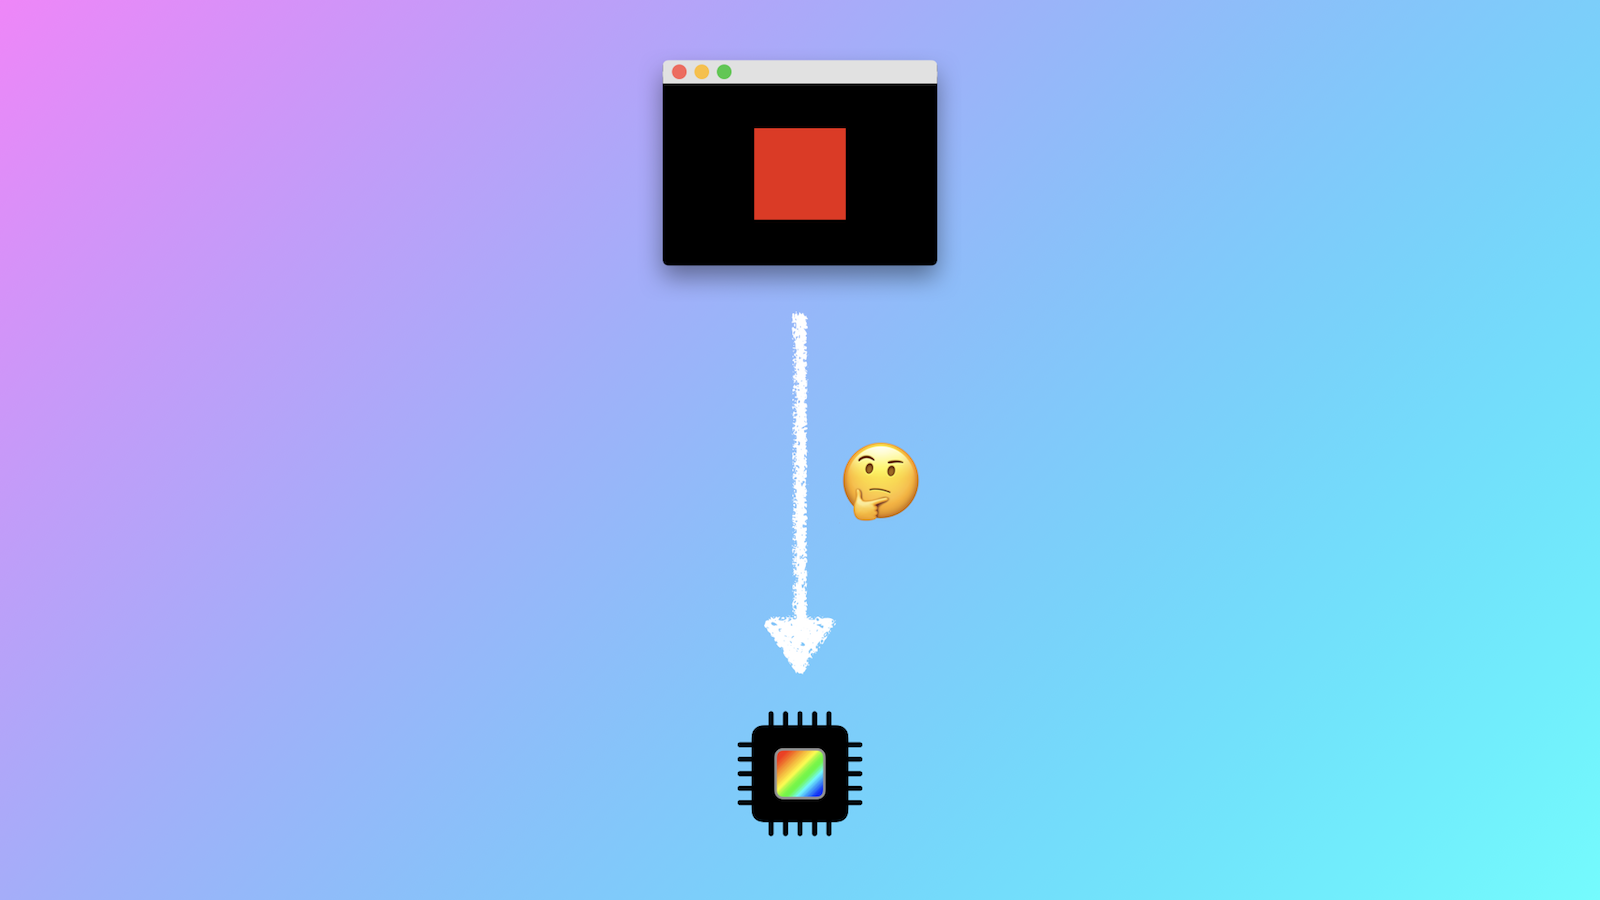
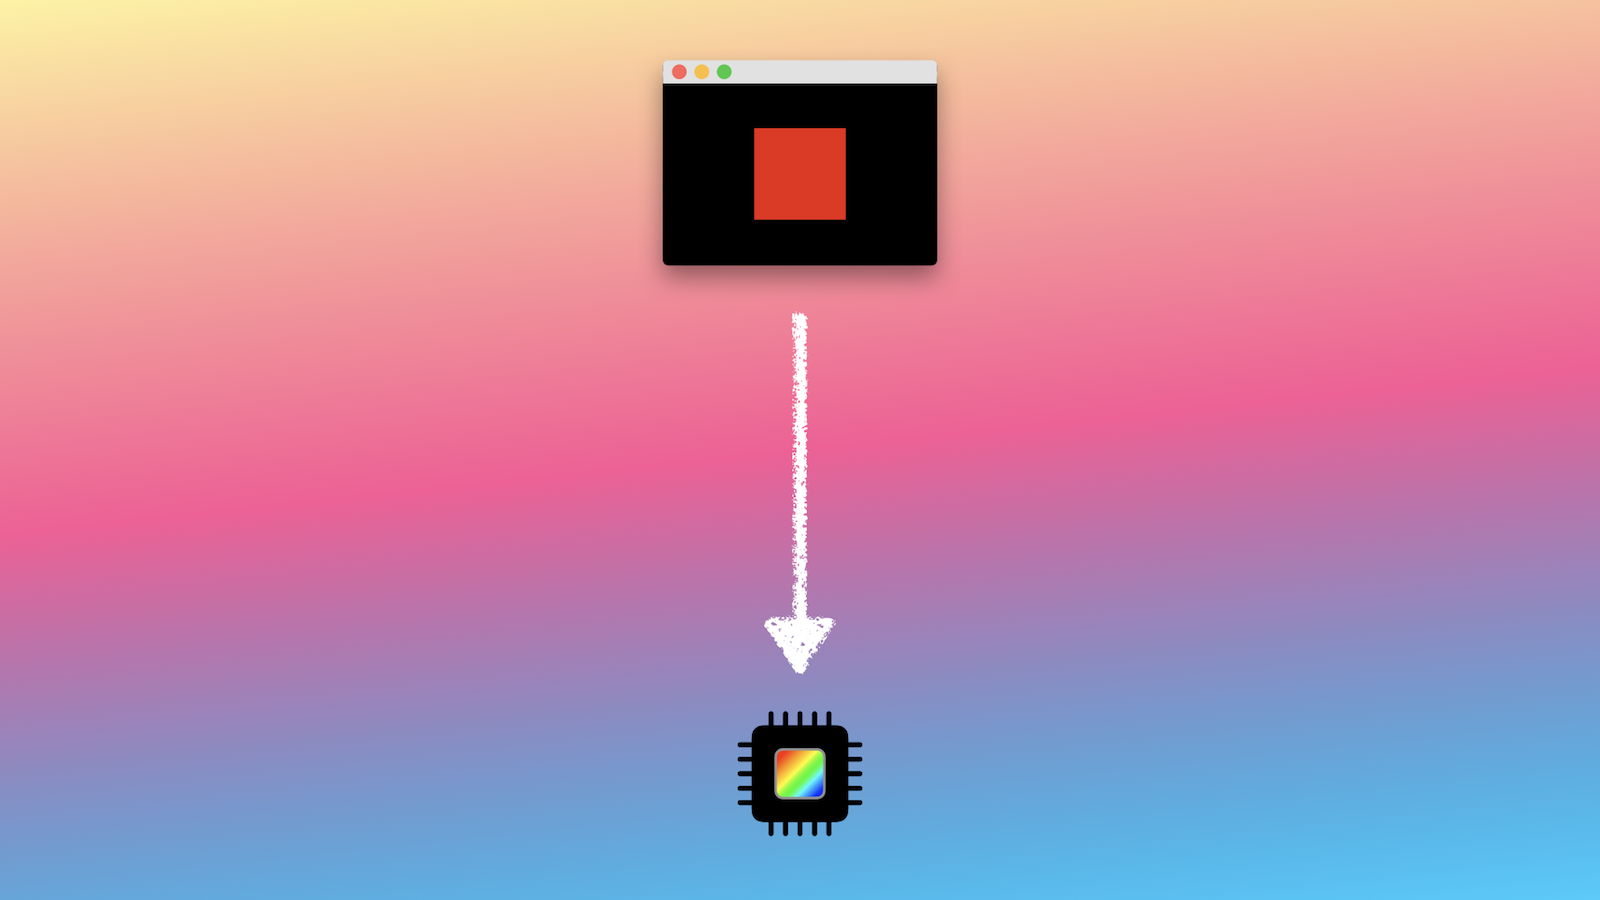
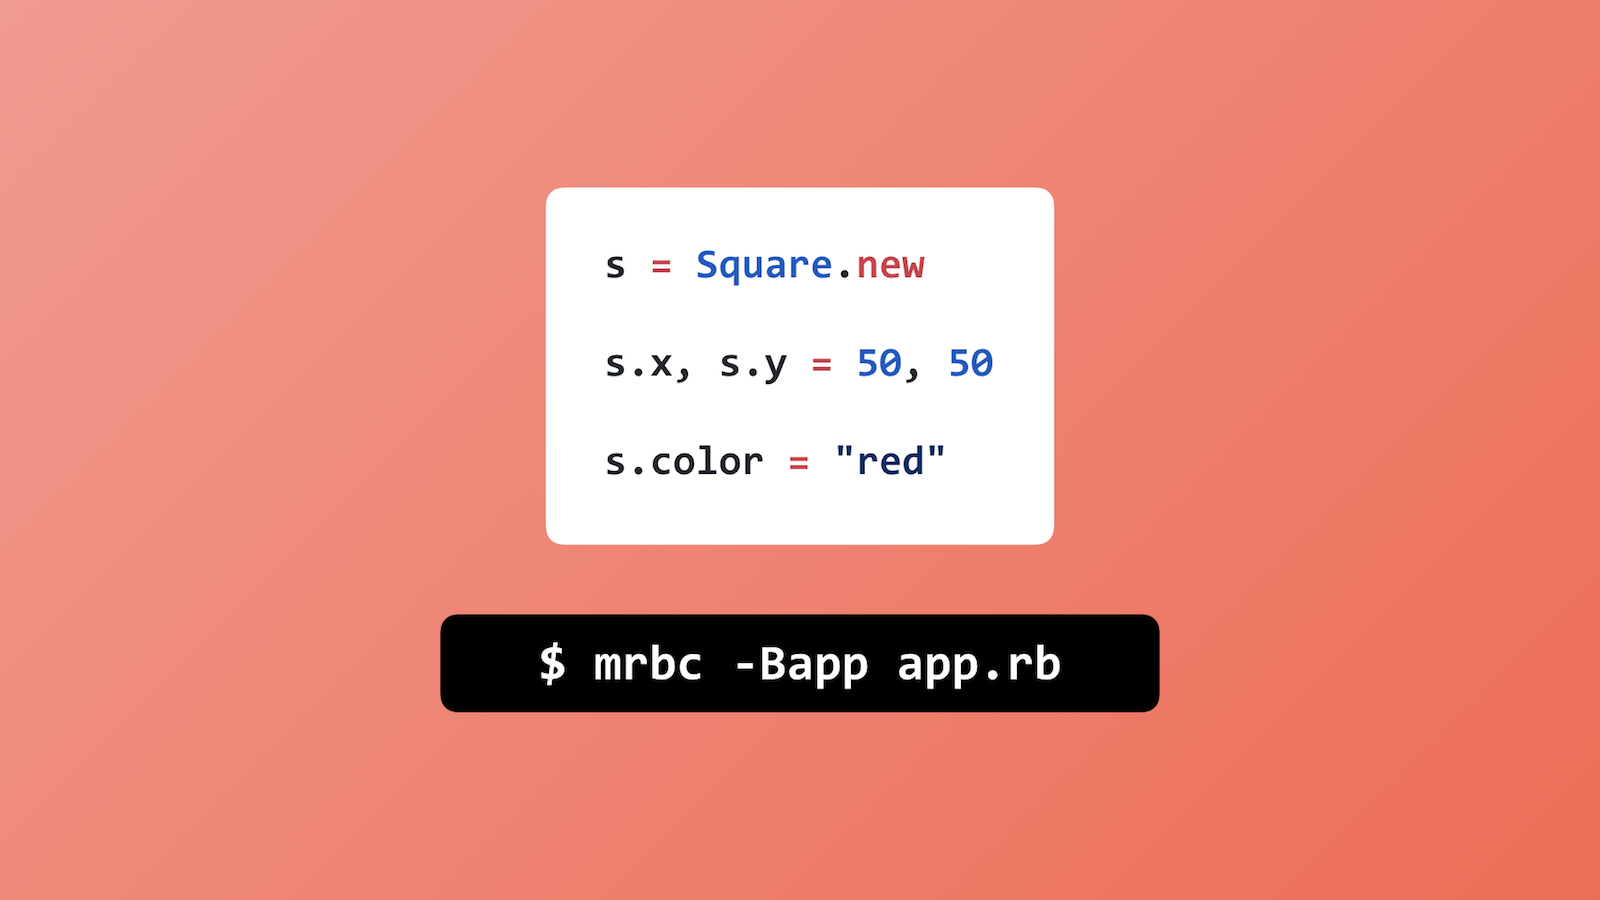
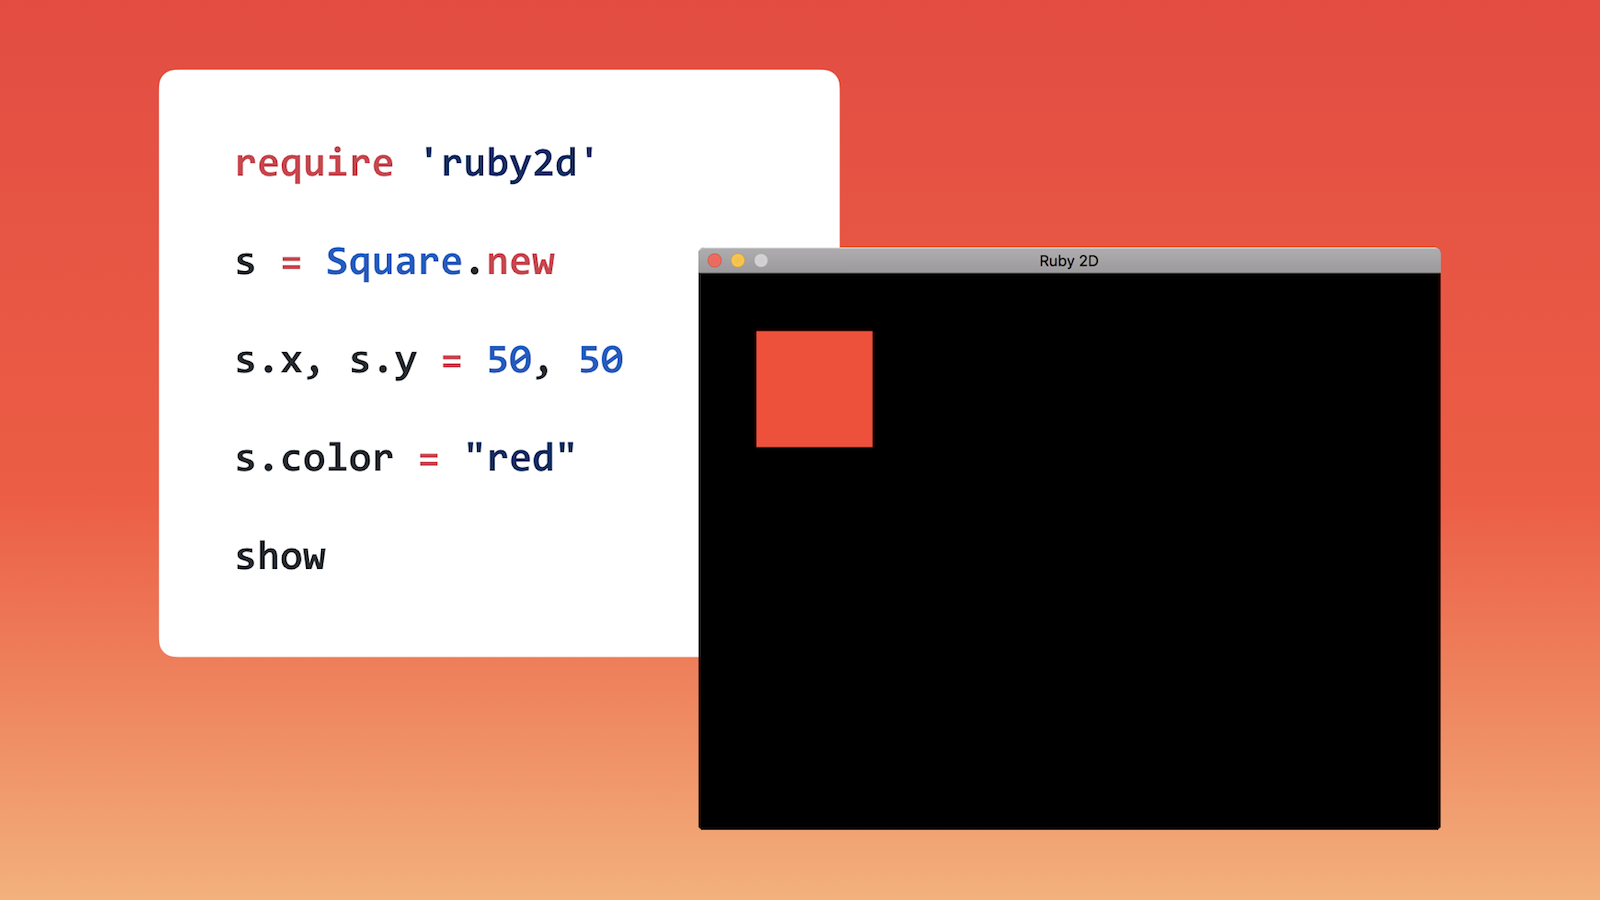
I like to begin with the end in mind, so I imagined a little Ruby script to create a window and draw a simple red square, like this. Now, how could we make this kind of experience possible? This would be our MVP, or ["minimum viable product"](https://en.wikipedia.org/wiki/Minimum_viable_product).

To create this "red square" application, I knew at the lowest level there would be some hardware that would help us render and draw to the screen, like the [graphics processing unit](https://en.wikipedia.org/wiki/Graphics_processing_unit). What else would need to go in between the hardware and our app?

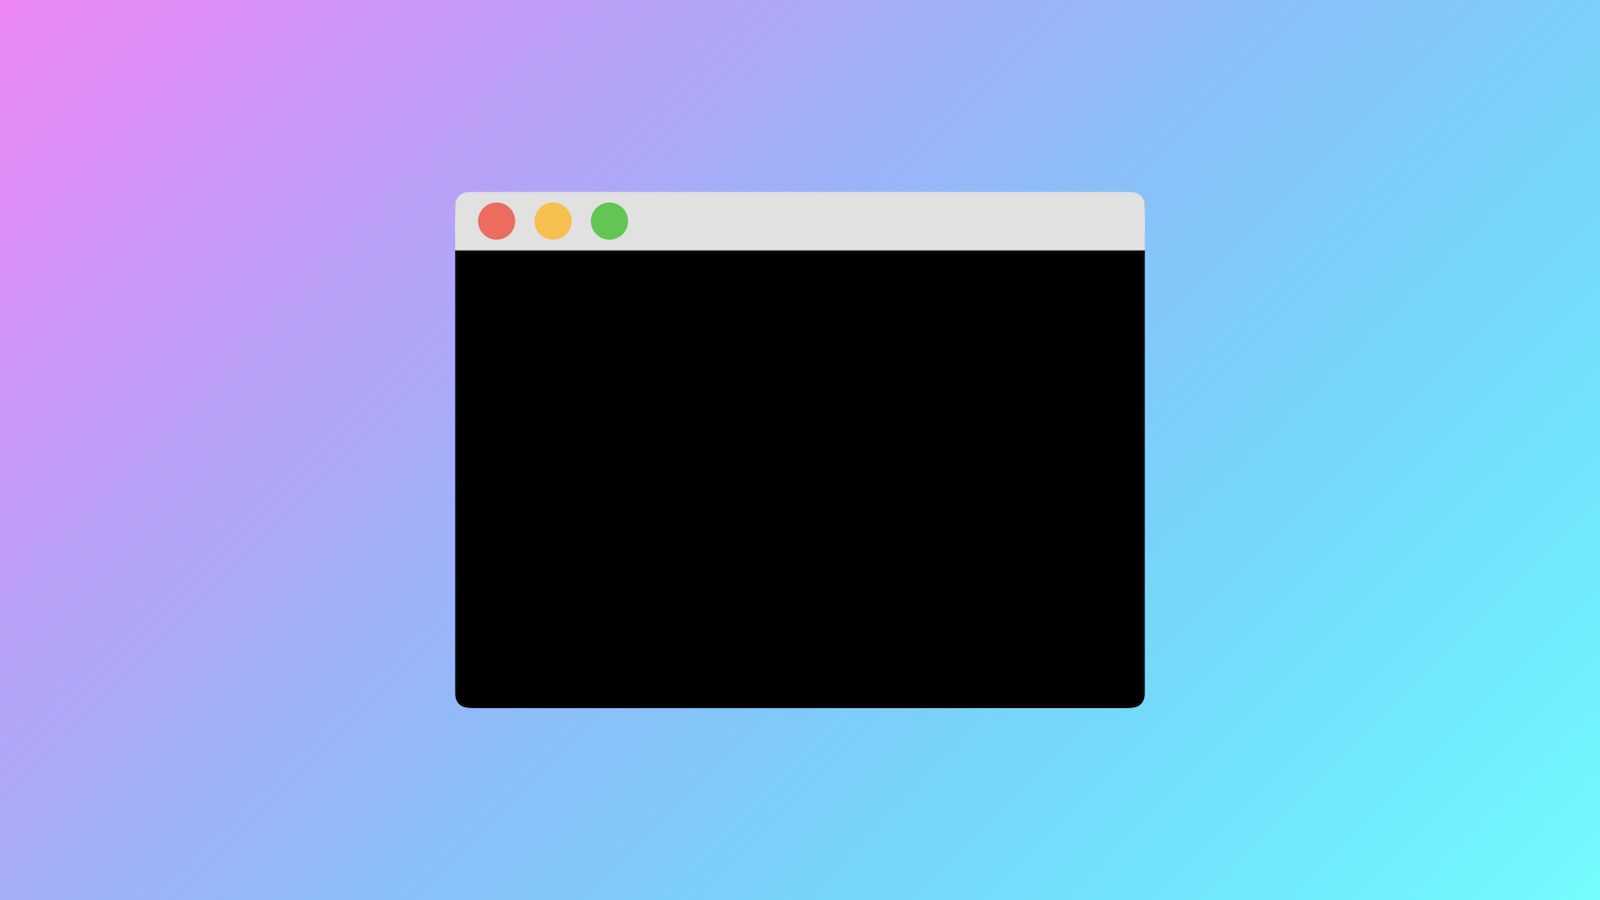
I broke down the problem even further. What's the most fundamental thing we would need? How about a window!

Turns out that all operating systems have native libraries and APIs for creating windows and accessing essentials things, like input devices, for example.

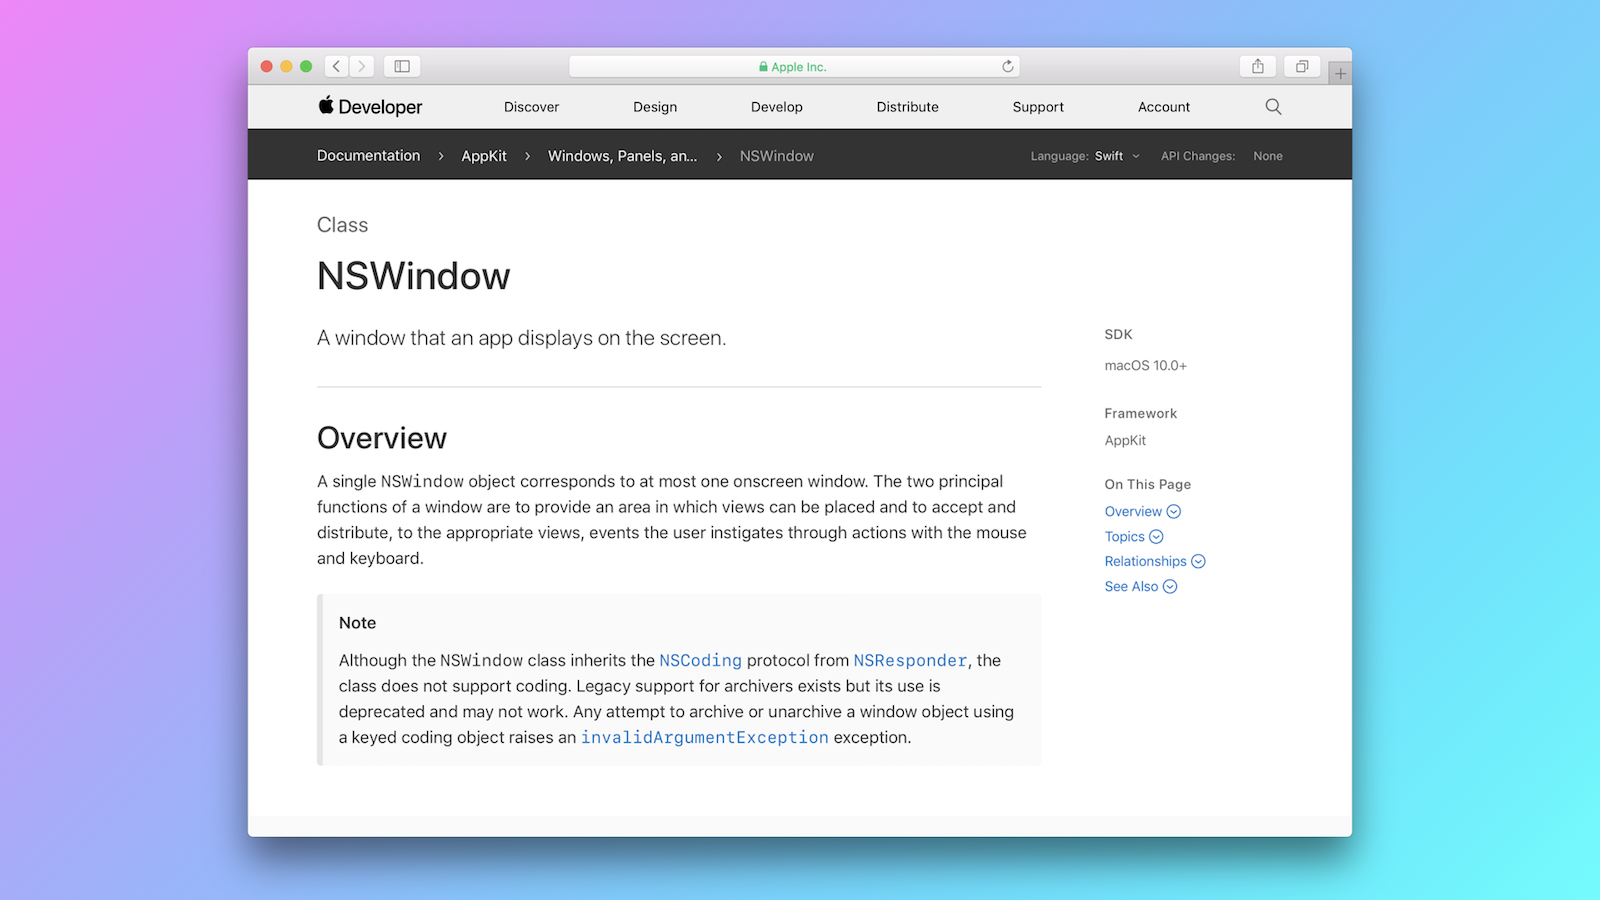
The operating system I use, macOS, provides a class called [`NSWindow`](https://developer.apple.com/documentation/appkit/nswindow). According it its documentation, it represents "a window that an app displays on the screen." Sounds good to me!

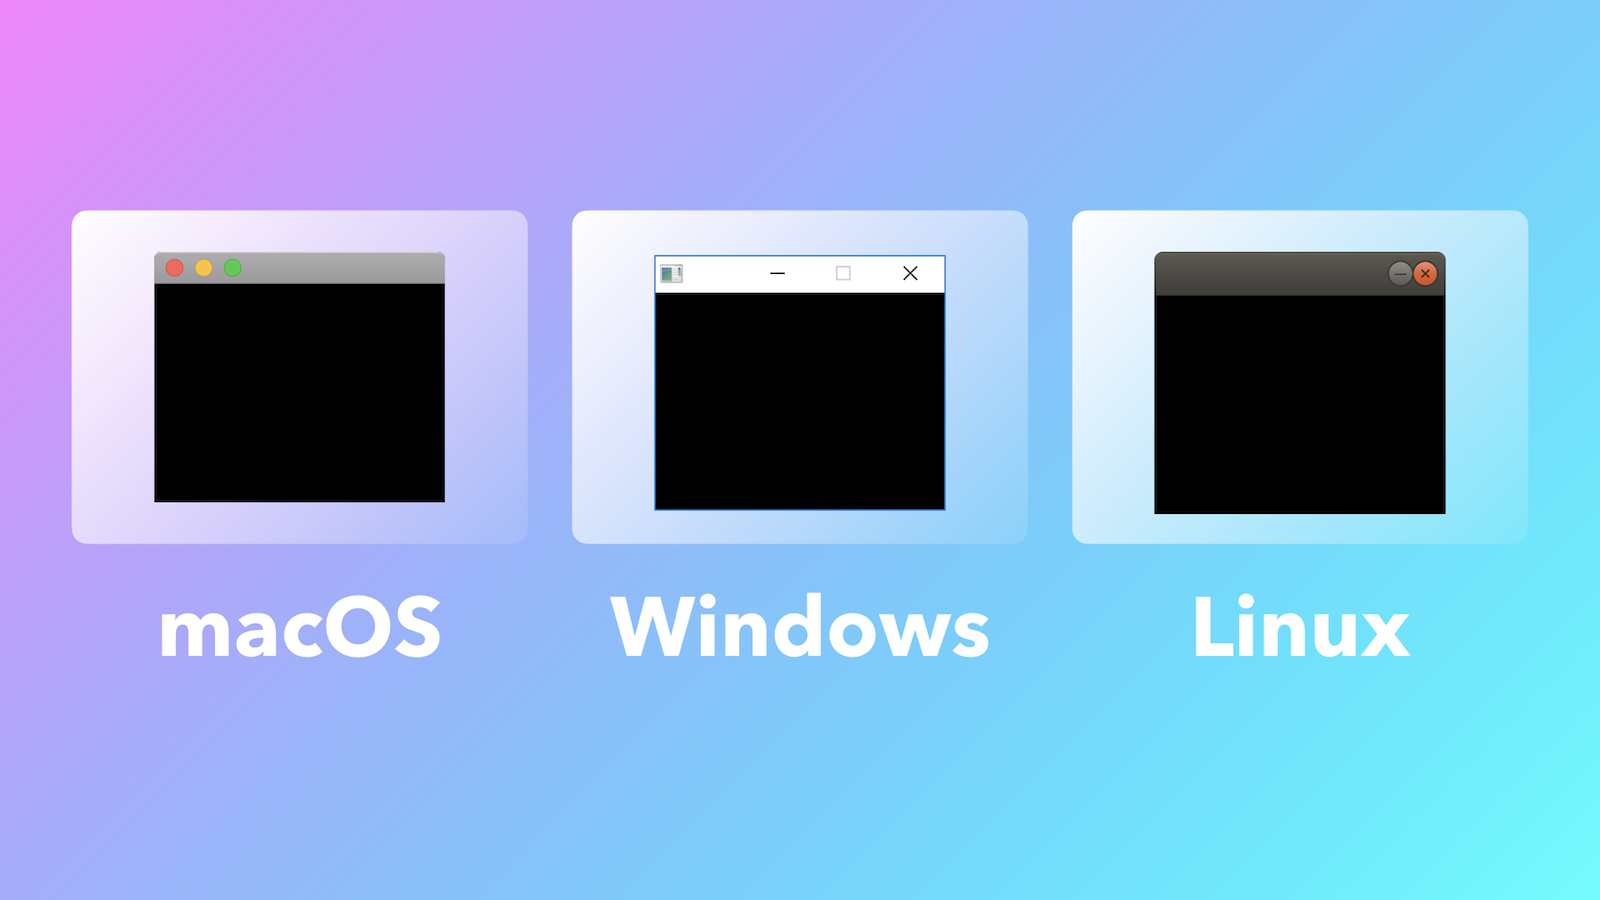
You'll find similar classes and libraries for other operating systems, like [Windows](https://msdn.microsoft.com/en-us/library/windows/desktop/ff381397(v=vs.85).aspx) and [Linux](https://en.wikibooks.org/wiki/X_Window_Programming/Xlib).

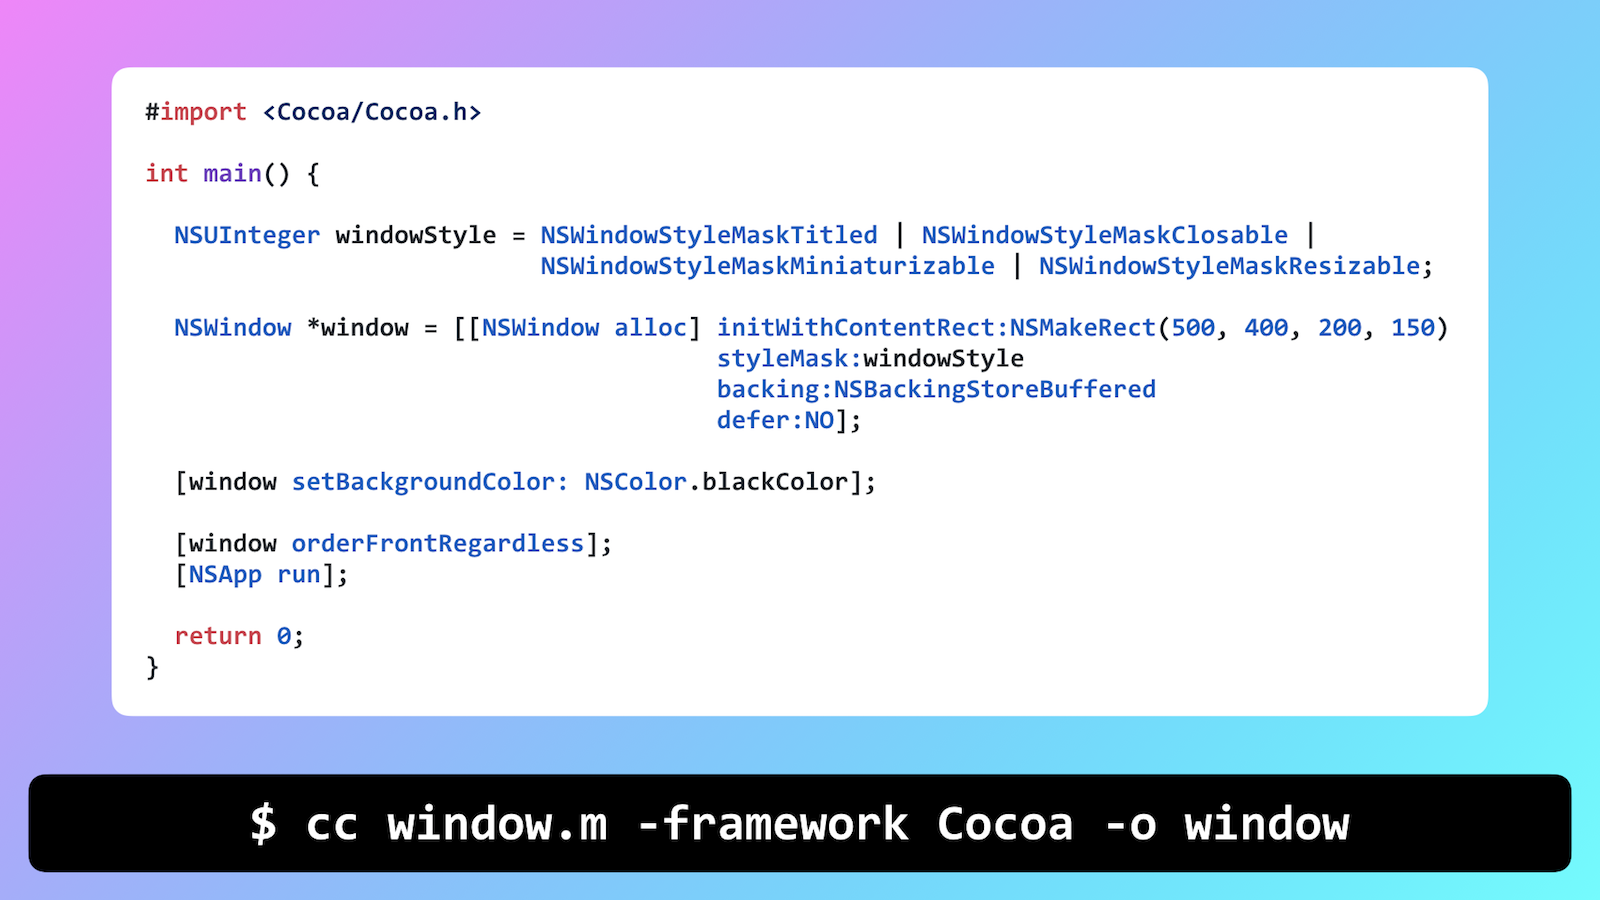
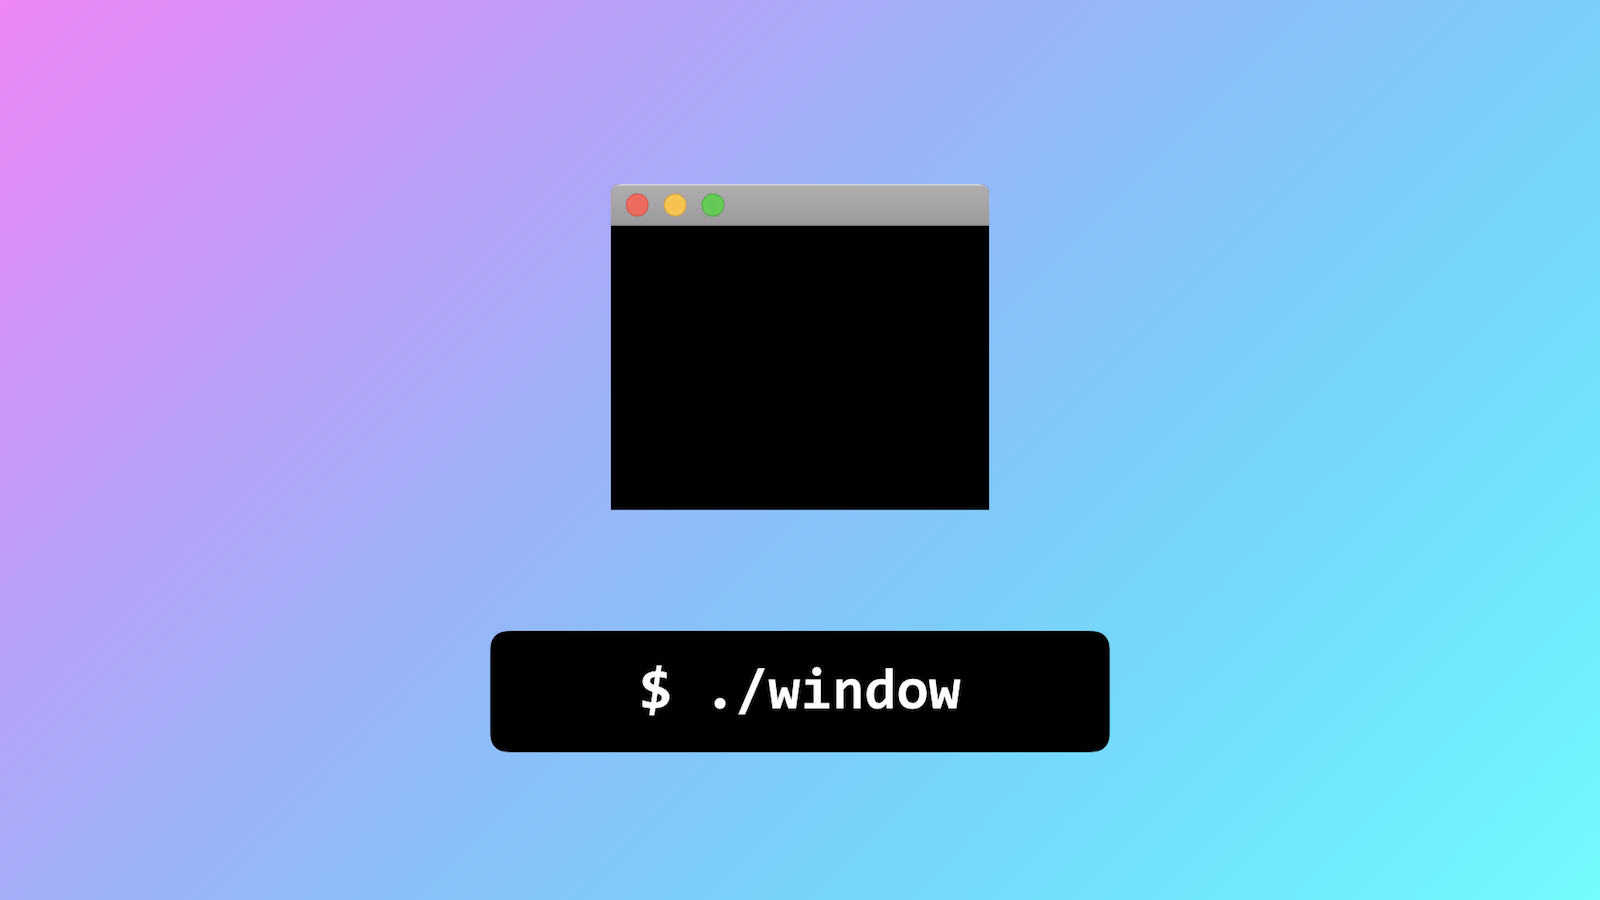
After studying the documentation, and a bit of trial and error, you'll figure out how to create a window! Here's a working program, written in [Objective-C](https://en.wikipedia.org/wiki/Objective-C), that will do just that ([view the code](#macos-nswindow)).

If you're looking for a challenge, see if you can write a program to create a simple window on Windows or Linux.

If we compile and run the program, we'll see our window pop up. Albeit, it's an empty one that doesn't really do anything, but a good start nevertheless.

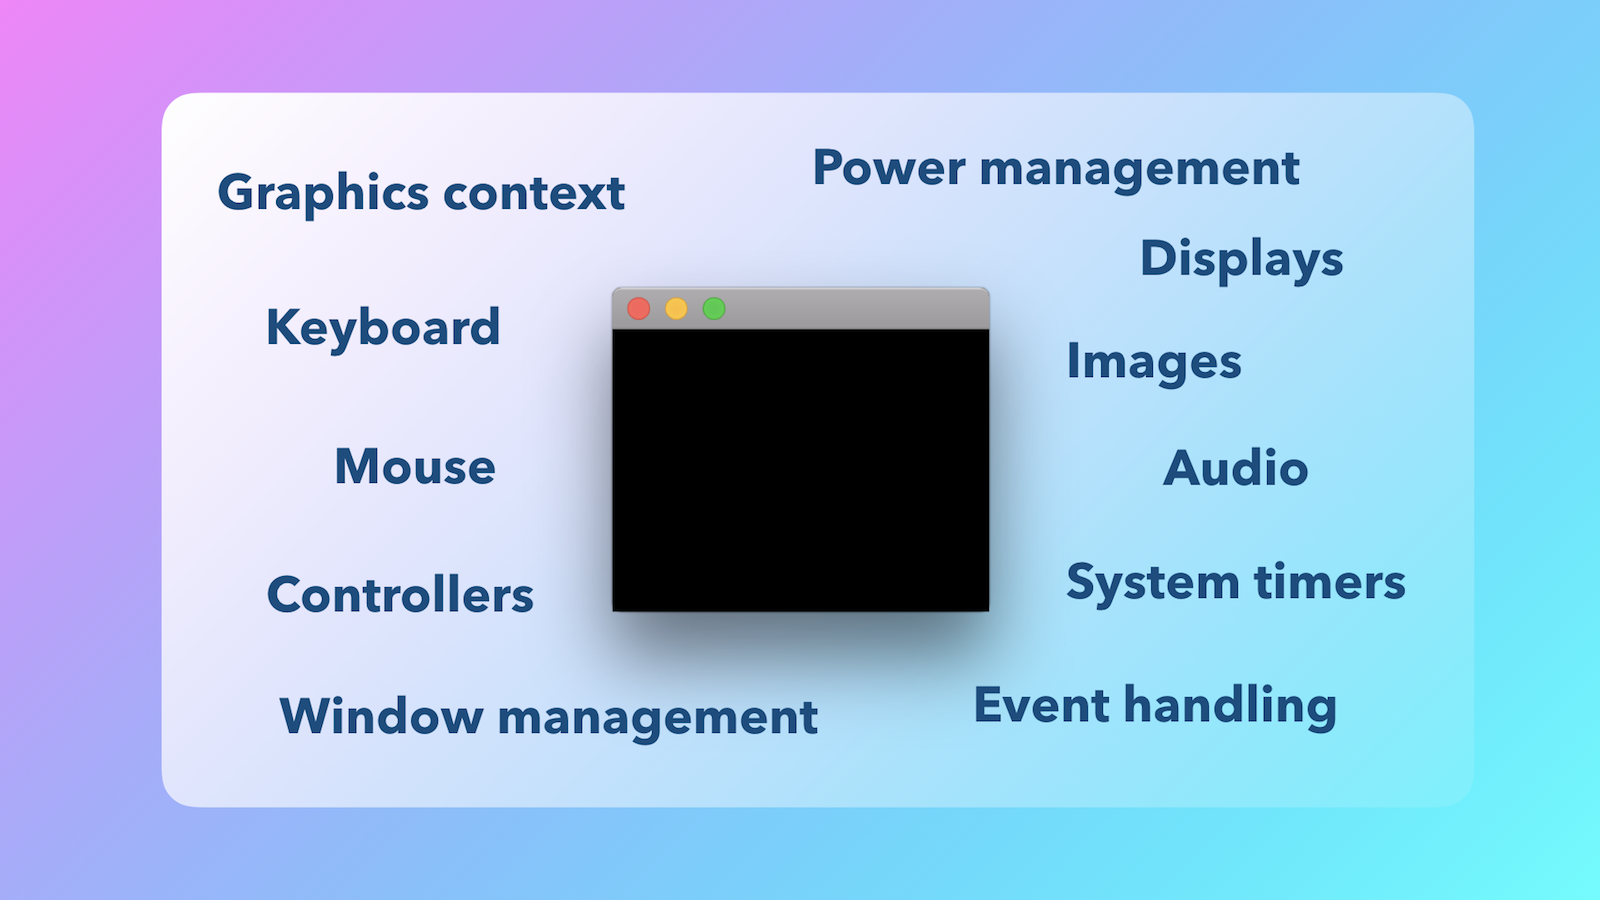
While we've made some good progress, if we want to achieve the full vision we laid out, there's going to be _a lot_ more work to do. We'll need a graphics context to draw things, we'll want the ability to play audio, read and display image files, get input from a wide variety of devices, and interact with a number of system events and functions. This _might_ be doable for a single operating system...

...but doing that for _each_ major OS...

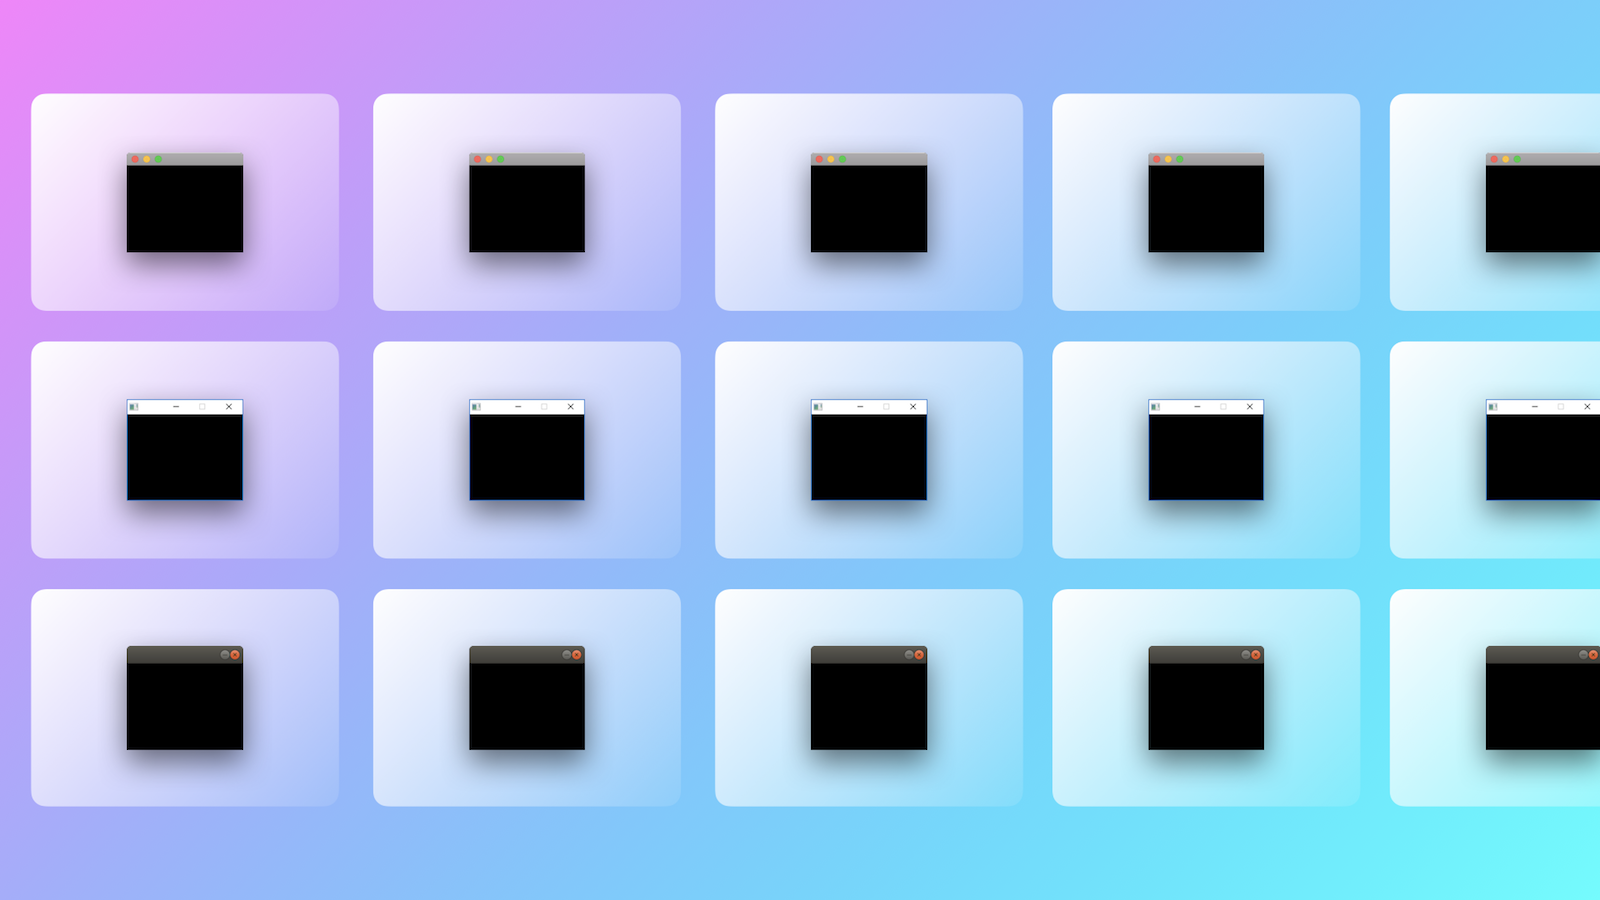
...and on top of that account for all the numerous inconsistencies, versions, configurations, and more...

...it quickly becomes overwhelming, and you might feel like this! Ahh!

So, are we stuck? Is this the end? 😧

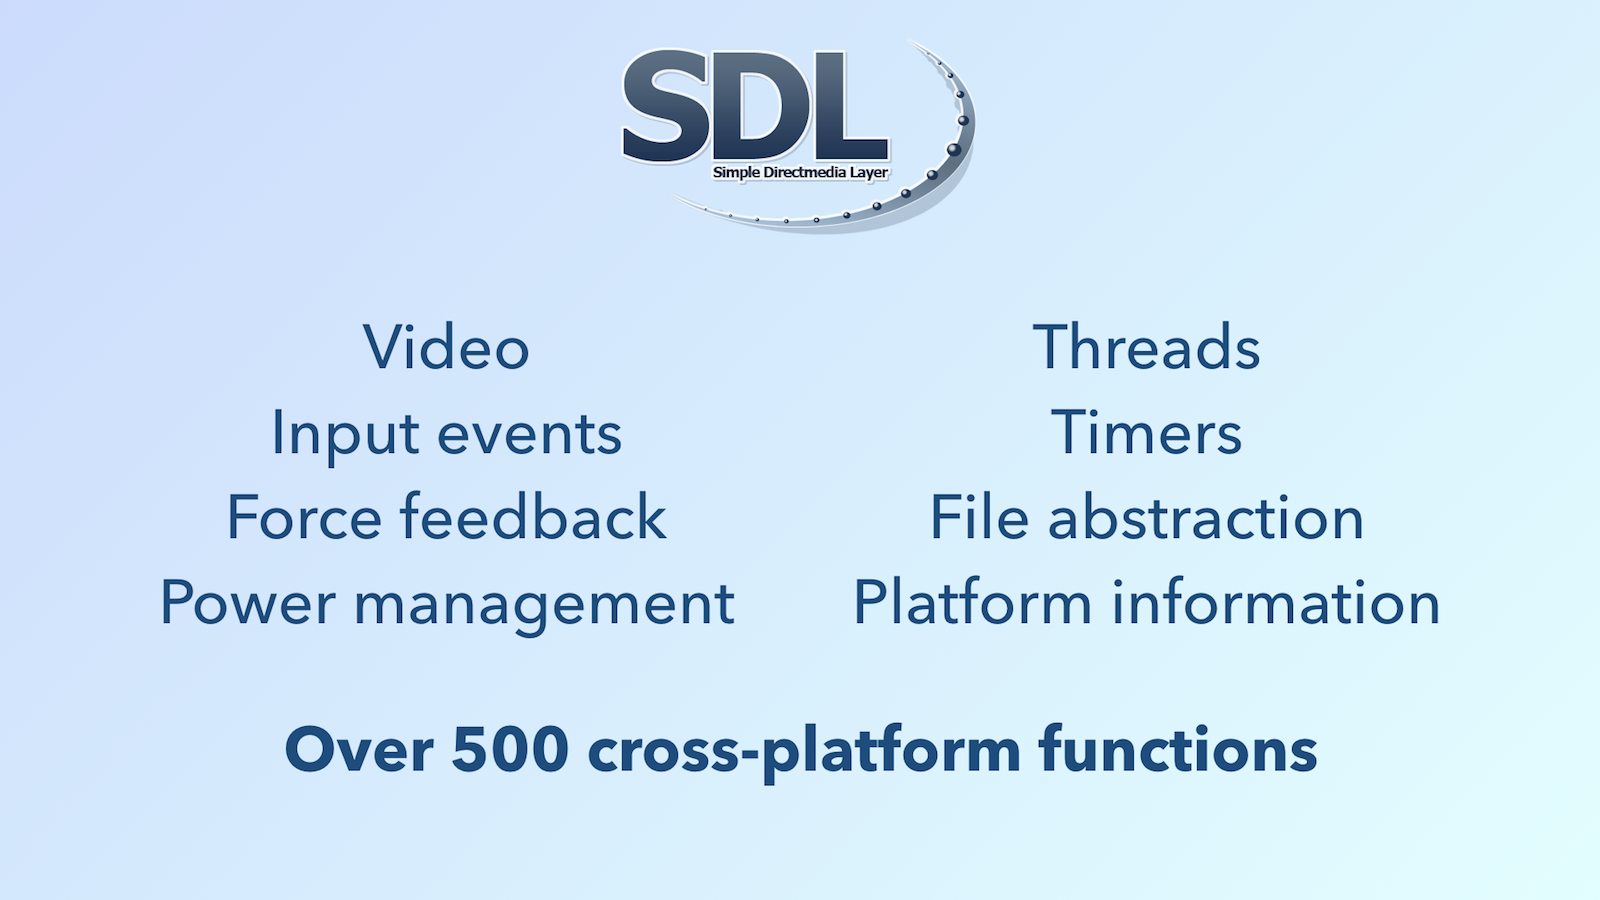
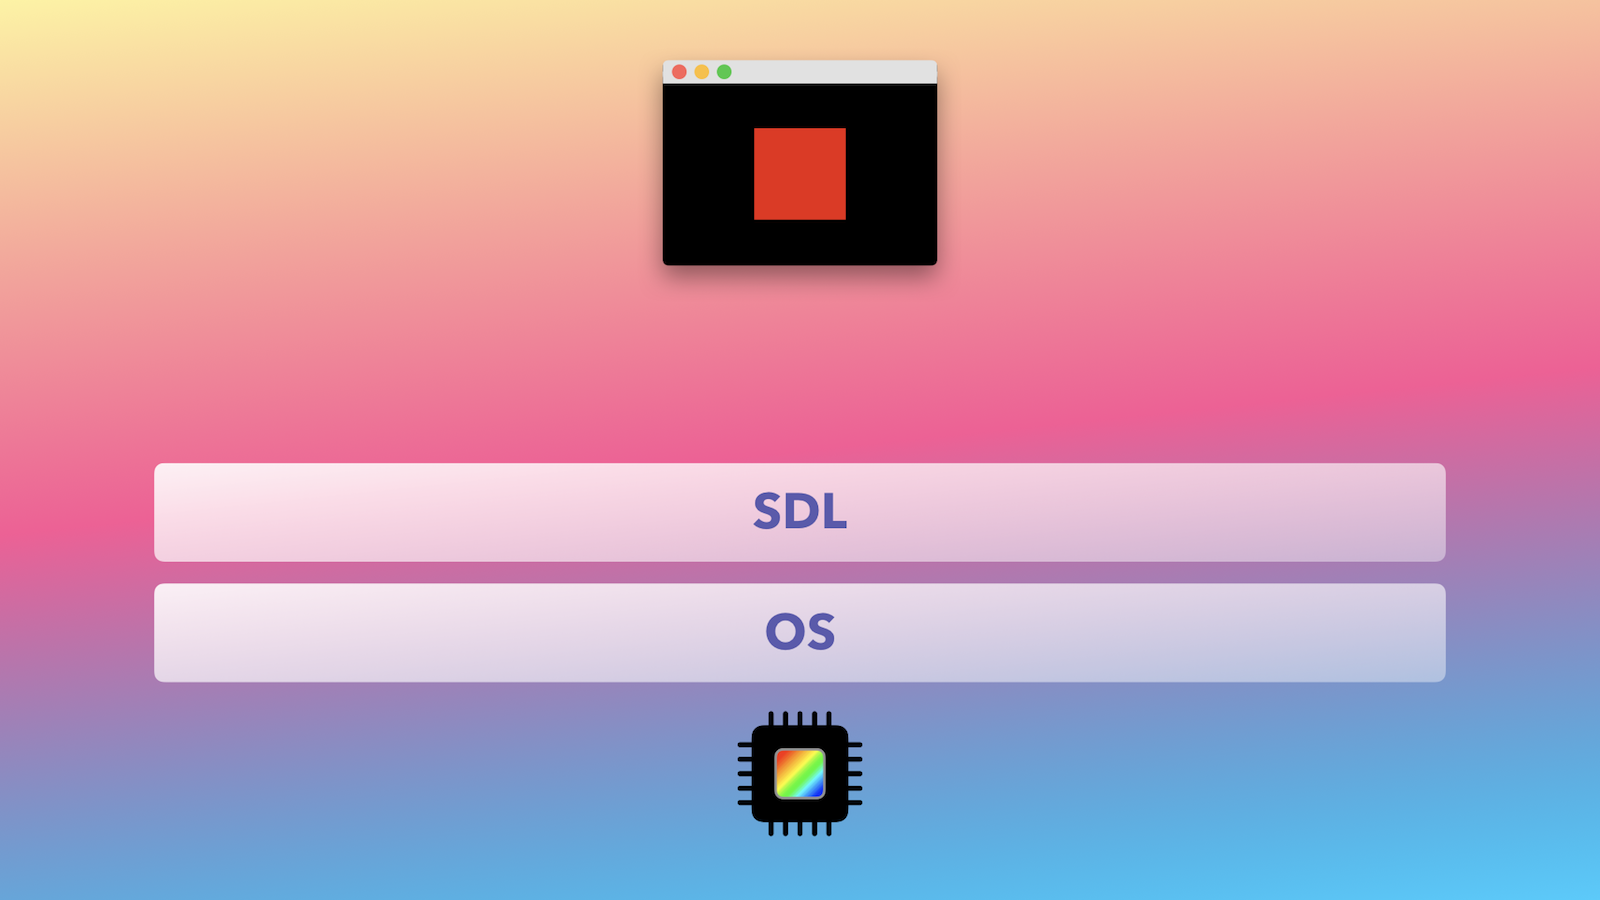
Fortunately not, because game developers have been working on this very problem for years. There are a number of libraries, sometimes called "media layers," that smooth out all the differences across operating systems and expose a nice API layer for everything you need to make games and interactive media applications.

A few popular ones are [SDL](https://www.libsdl.org), [GLFW](http://www.glfw.org), and [SFML](https://www.sfml-dev.org). Each of them have their own strengths and limitations, so picking one really depends on what you're trying to accomplish.

After giving them all a test drive, we found that SDL would be the most well-rounded for this project. It's open source, has almost 20 years of development into it (started in 1998), a vibrant and generous community, and most importantly for us, it has everything we need for our graphics and gaming ambitions.

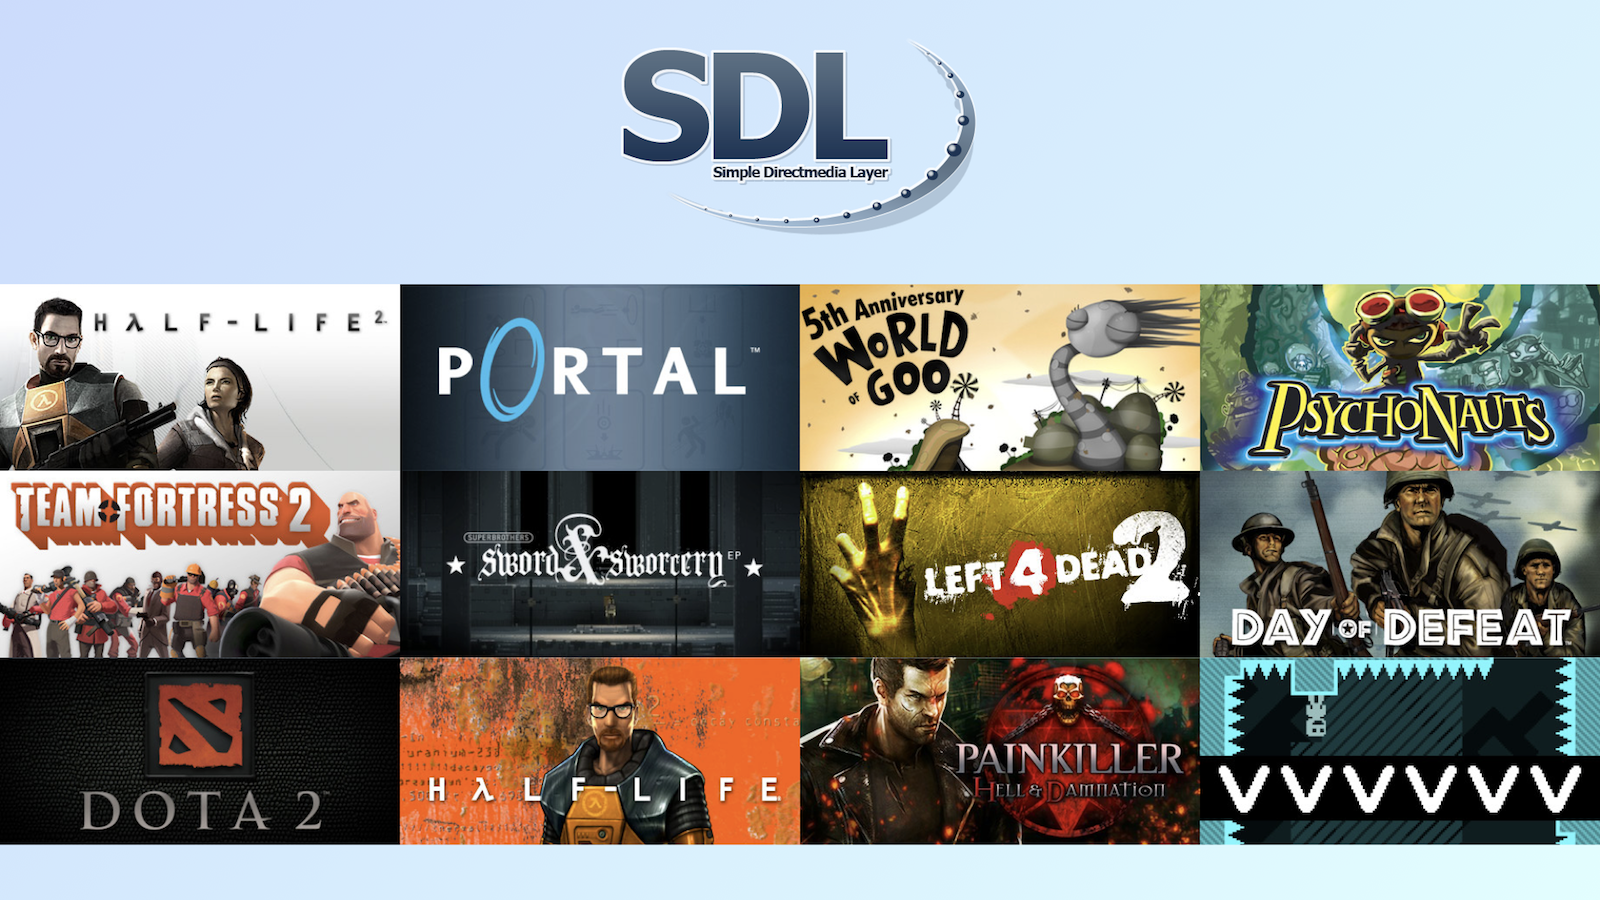
If you're still not convinced, it's also trusted by triple-A titles, like Half-Life and Portal 😍, and indie games alike.

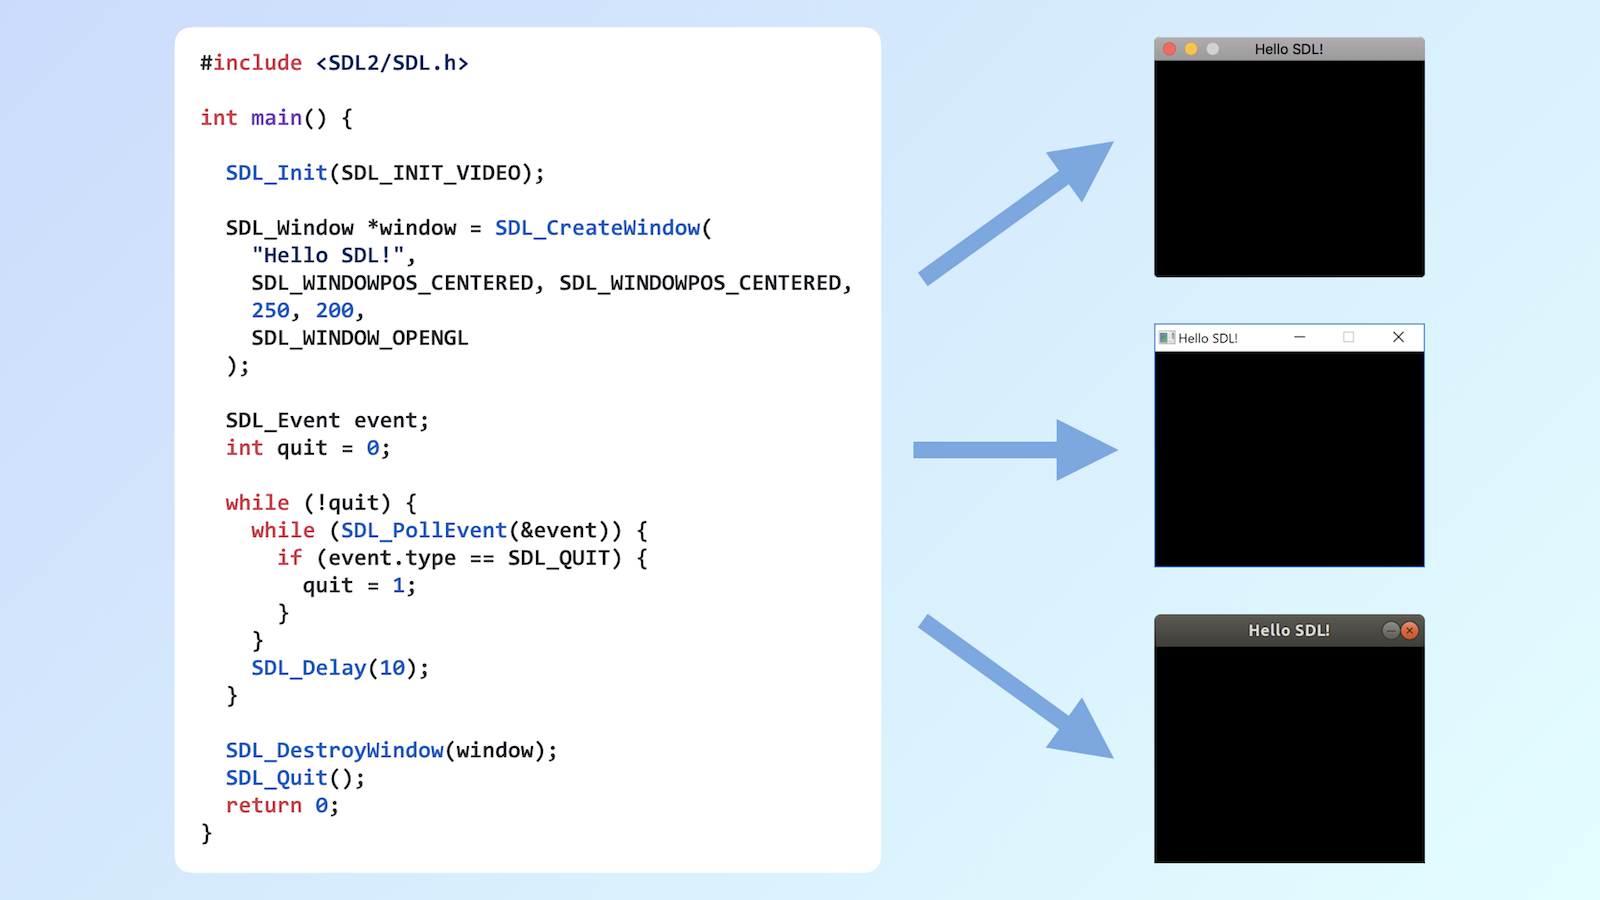
Here's what that same, basic window application looks like, but now written in C and using SDL to make it cross platform ([see the code](#create-a-window-with-sdl)).

If this sparks your interest and want to learn more, check out this great talk on [Game Development with SDL 2.0](https://www.youtube.com/watch?v=MeMPCSqQ-34&list=UUStZs-X5W6V3TFJLnwkzN5w).

Awesome, looks like we're back on track!

Now hold on a minute...what's with all this C? Isn't C some old, crufty language? And where does Ruby fit into the picture?

Yes, it's true, the [C programming language](https://en.wikipedia.org/wiki/C_(programming_language)) has been around quite a while (nearly 45 years!), but it's also a very contemporary language used for all kinds of things today. It's a beautifully simple, efficient, and precise language that is perfect for programming systems, exchanging data, and interoperating at low levels.

If you'd like to learn more about C, check out this free book from MagPi, ["Learn to Code with C."](https://www.raspberrypi.org/magpi/learn-code-c)

It also just so happens that **Ruby _loves_ C!** 😘 Its primary implementation [MRI](https://en.wikipedia.org/wiki/Ruby_MRI) (or CRuby) is written in C, as are others. This means that Ruby can seamlessly interact with the native world. Just because it's an interpreted language doesn't mean it's confined by that label.

So, let's return to our "red square" app. We know there's some hardware at the lowest levels.

We learned about how the operating system provides us with native libraries and classes to create windows and more.

We also learned about SDL, a library that will help us write cross-platform code effortlessly.

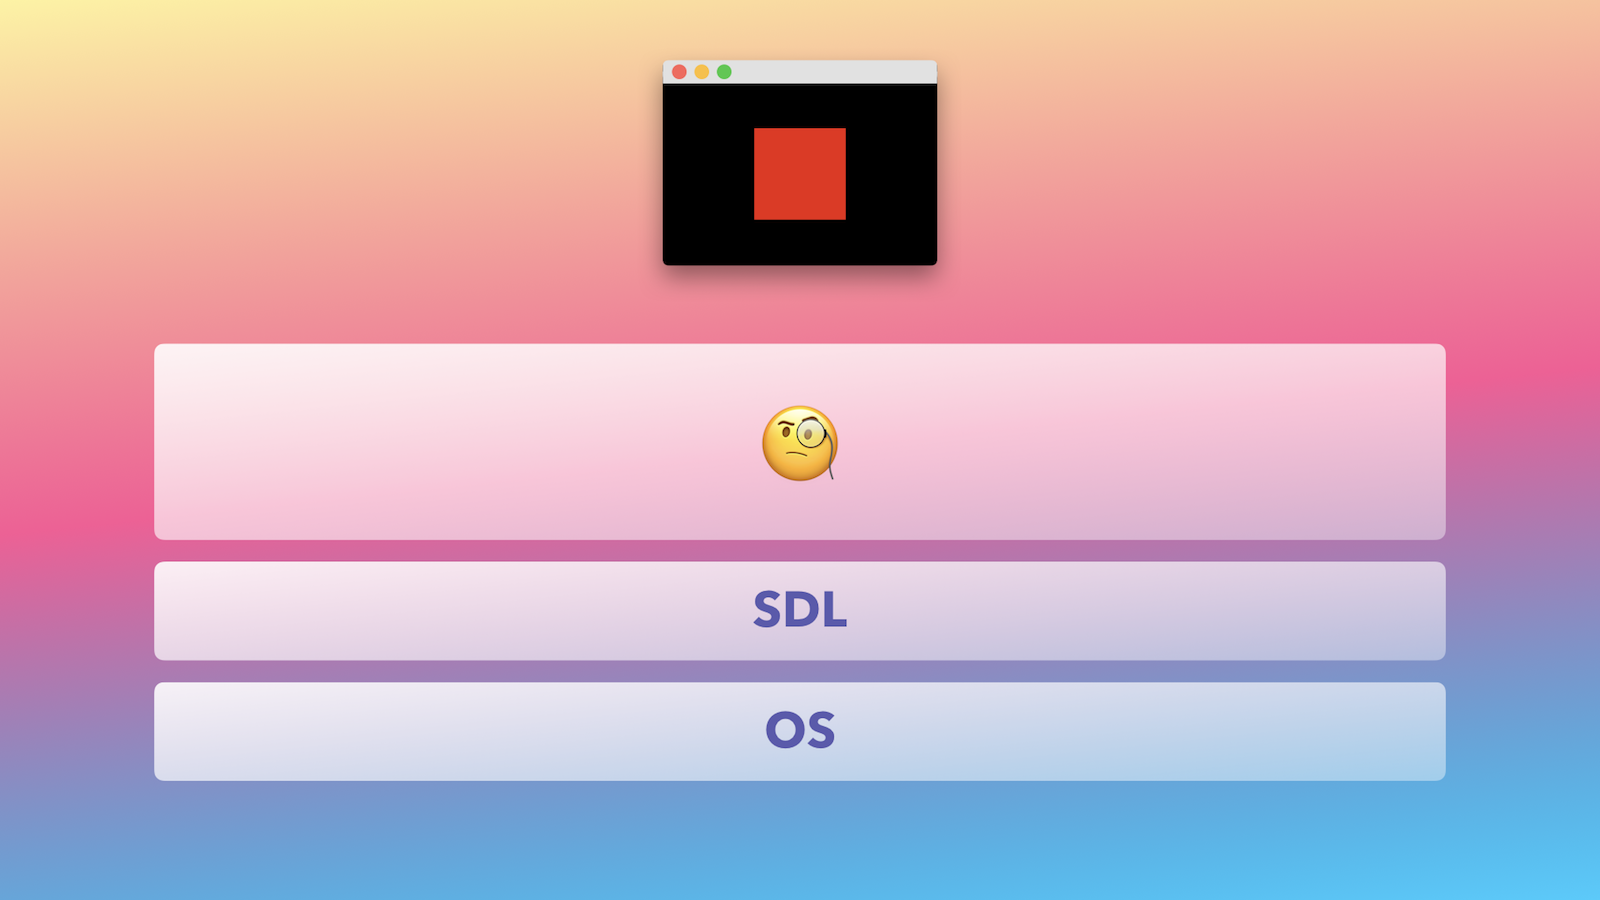
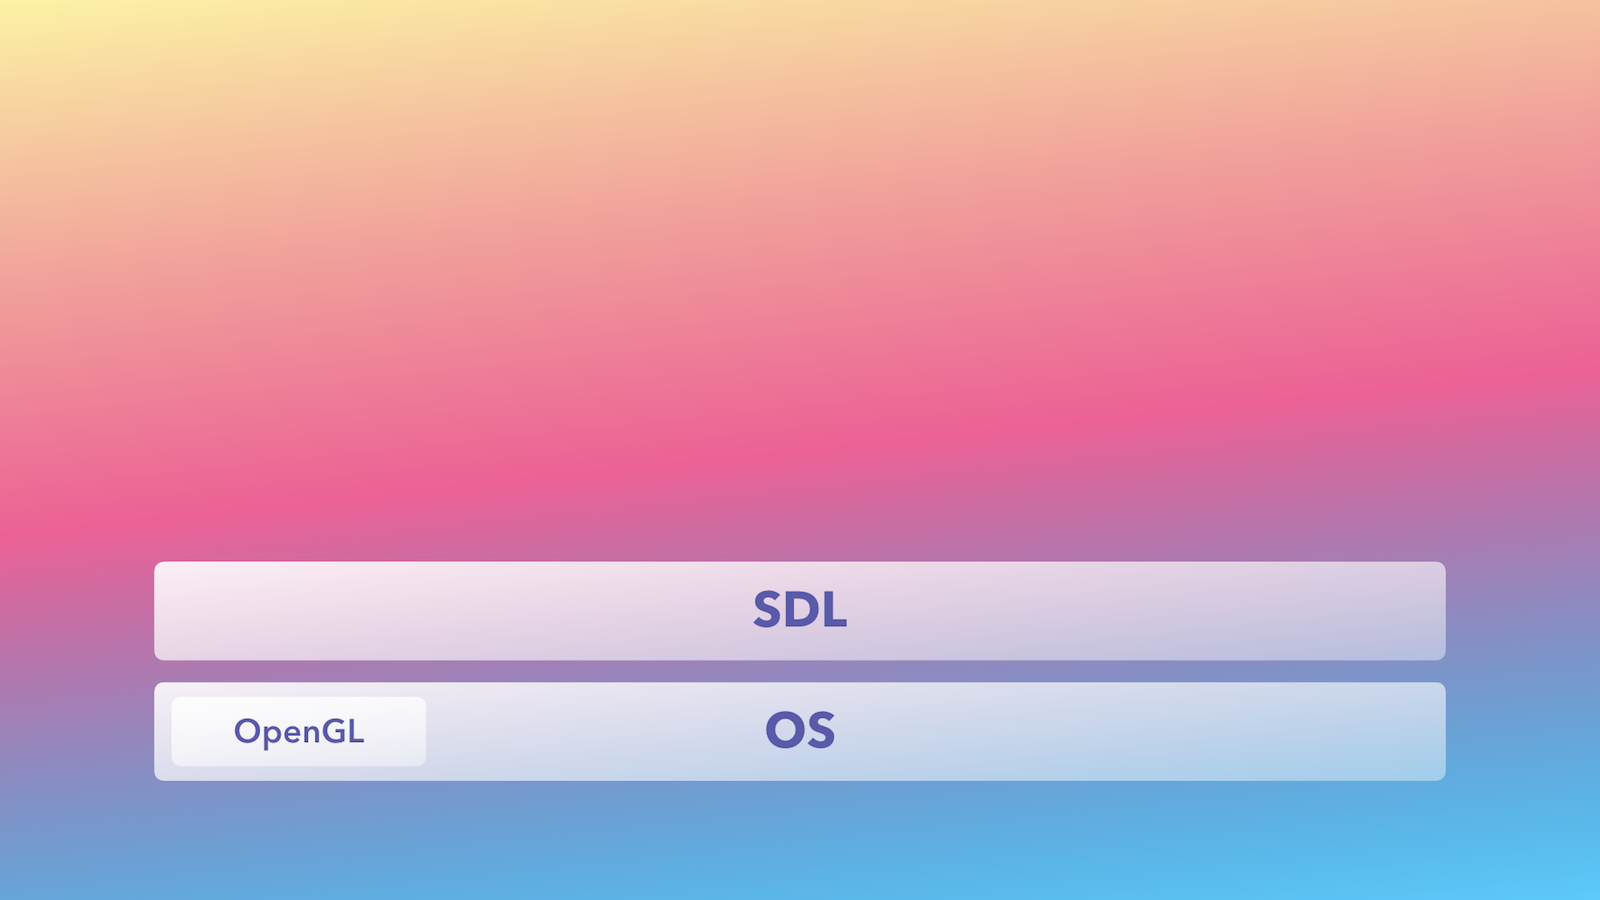
We'll move the hardware out of our stack here, since we won't be interacting with it directly anyways. We're not there yet — what else is needed so we can write our "red square" app?

Well, one thing we can't do yet is draw anything, which is obviously going to be pretty important. 😉 So...

Let's make some graphics! We'll need to figure out how to render shapes and textures.

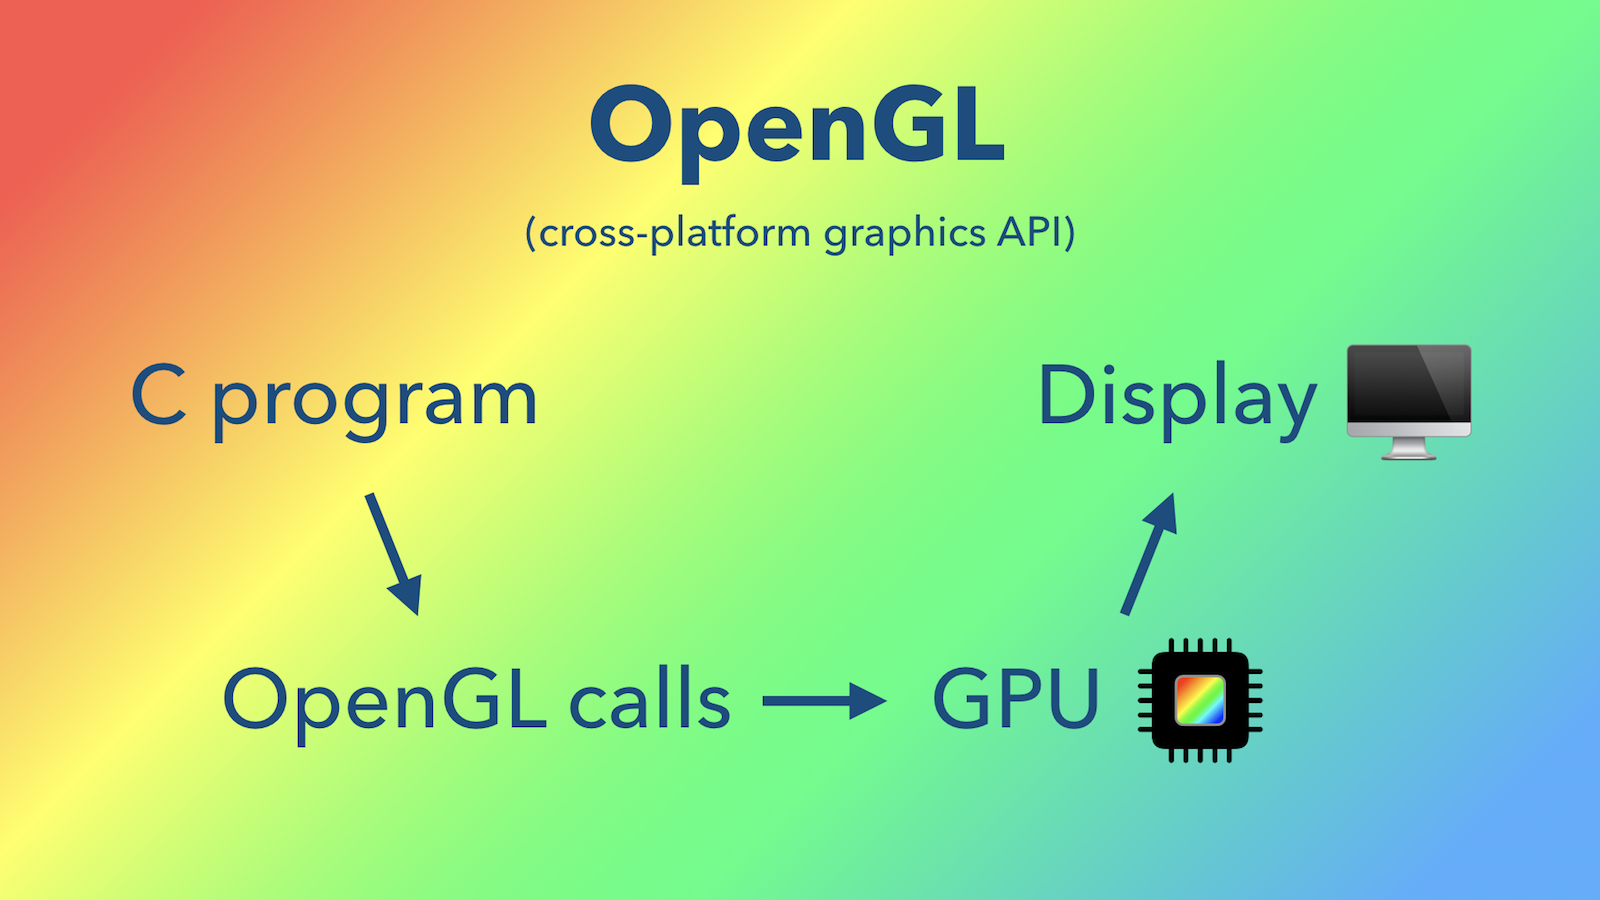
In modern graphics programming, we don't have to talk directly to the hardware here either. We'll use APIs provided by the OS to handle all that. For our purposes, we'll leverage [OpenGL](https://en.wikipedia.org/wiki/OpenGL), a cross-platform API for both 2D and 3D graphics. You may be familiar with it and other kinds of APIs, like [DirectX](https://msdn.microsoft.com/en-us/library/windows/desktop/ee663274(v=vs.85).aspx) for Windows and [Metal](https://developer.apple.com/metal/) for Apple platforms. For us, we'll want to stay away from the proprietary and platform-specific APIs so we can use the same code everywhere.

Here's what the programming experience will look like from our perspective: we'll write a C program that will make OpenGL API calls (which are prefixed with `gl`, for example `glDrawArrays(GL_TRIANGLES, 0, 3)`), those calls will be translated by the OS and graphics drivers to create hardware-specific commands, and finally the results will be rendered and displayed. There's obviously much more going on behind the scenes, but these convenient APIs abstract all of that for us, yay!

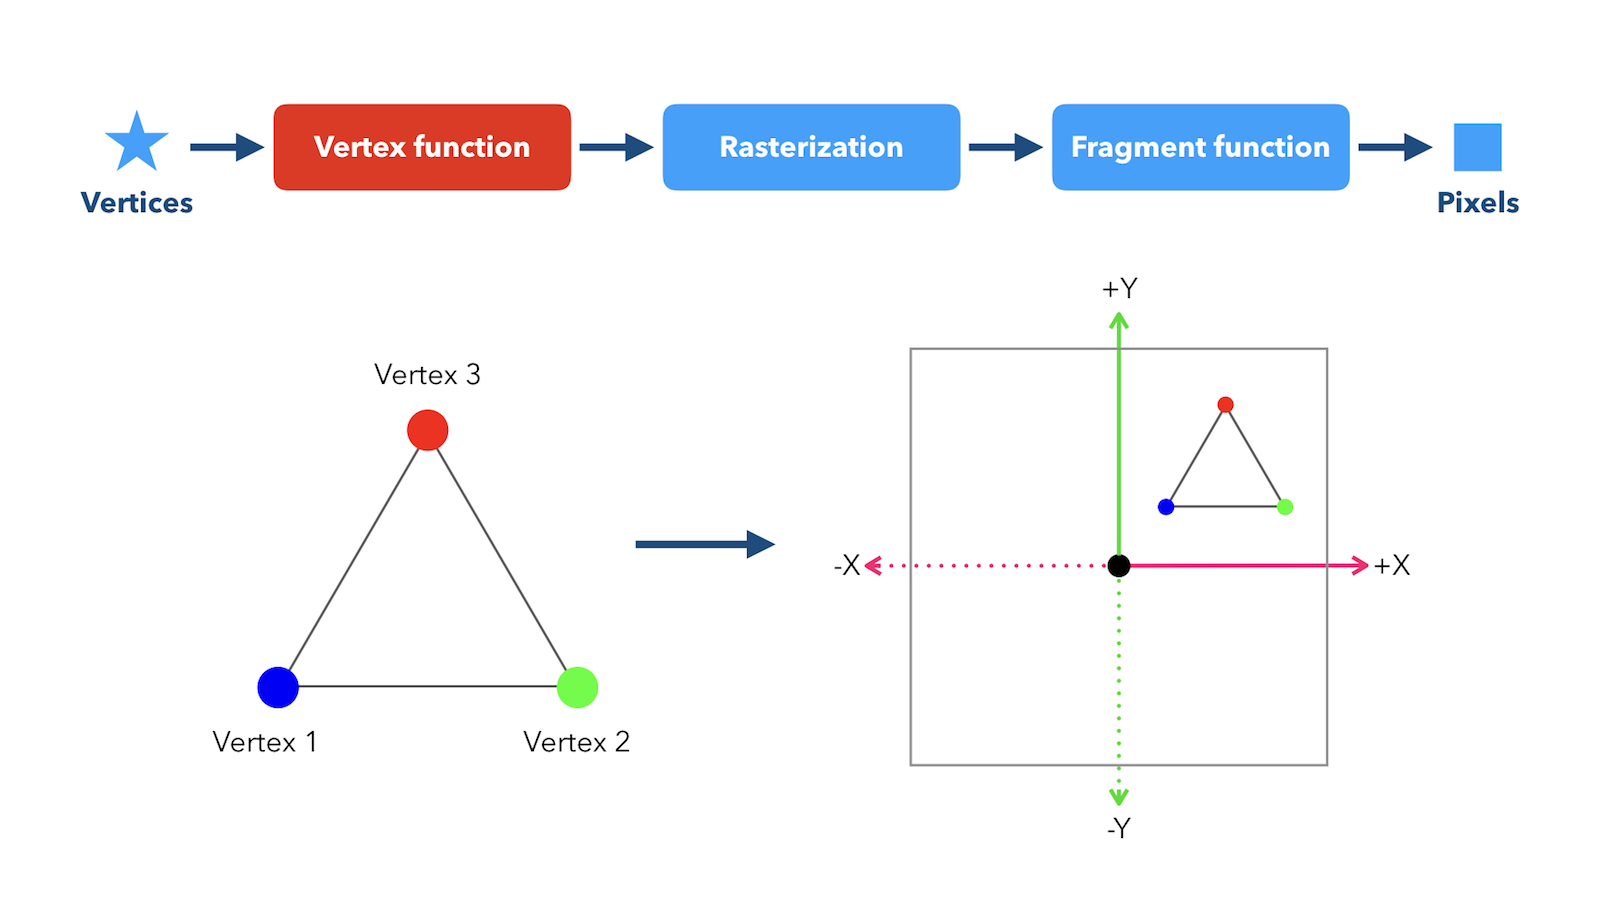
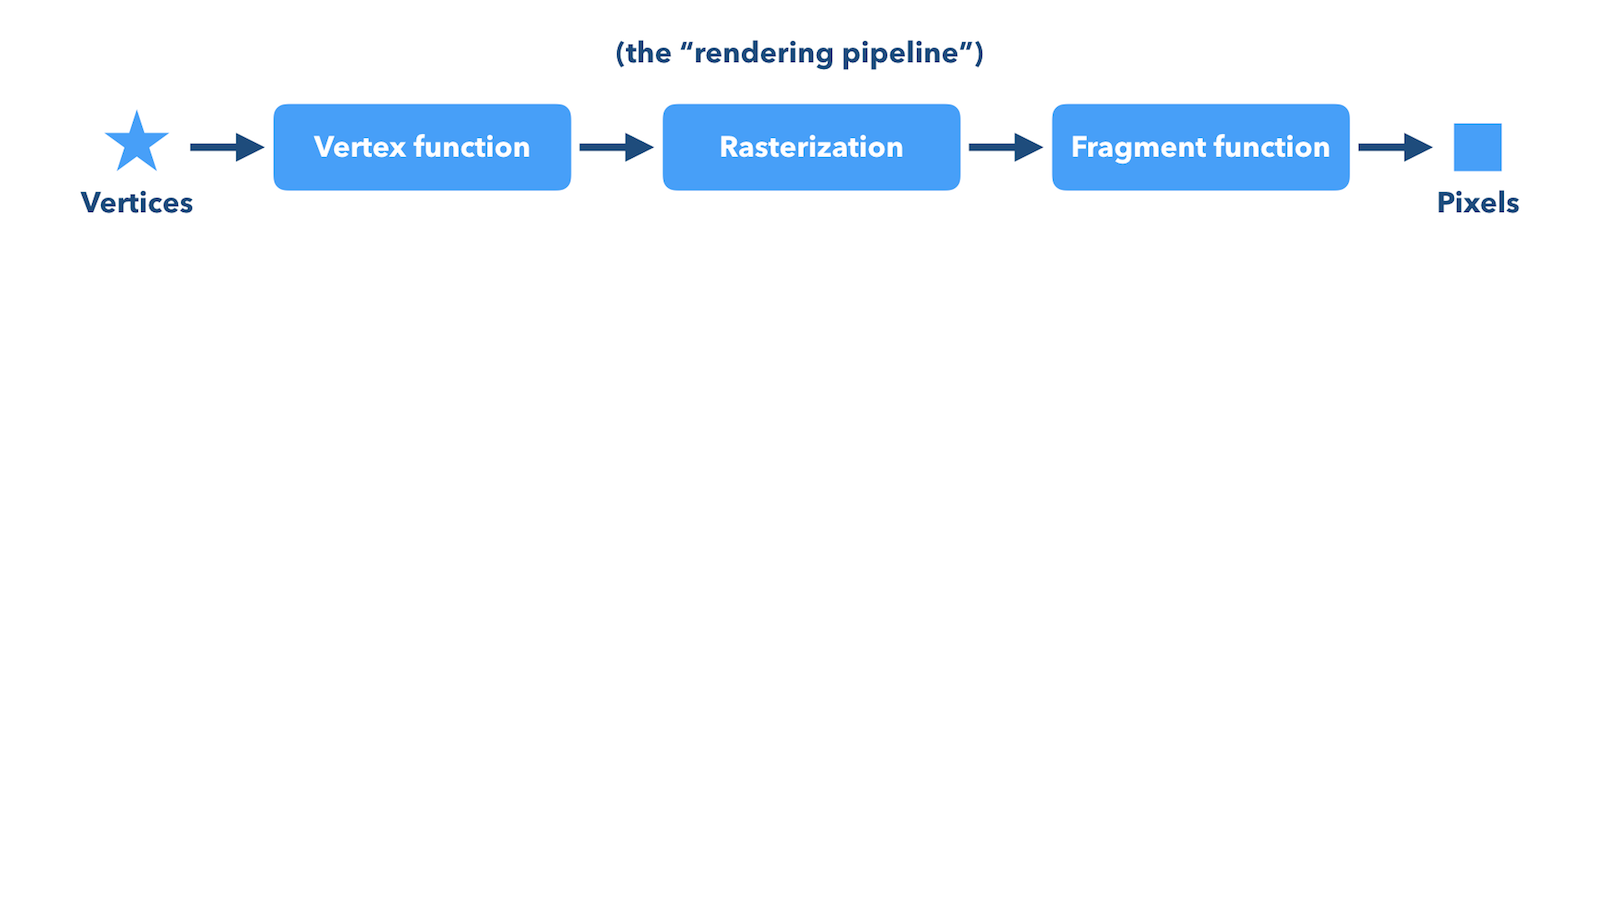
Let's dive deeper to understand the process of how graphics get rendered, since we'll actually need to do some programming here to get the results we want. All the action will take place in the "rendering pipeline," or the sequence of steps that will take place to render objects. This will just be a high-level overview of the important stages, but you're free to explore the full [OpenGL pipeline](https://www.khronos.org/opengl/wiki/Rendering_Pipeline_Overview) in more detail.

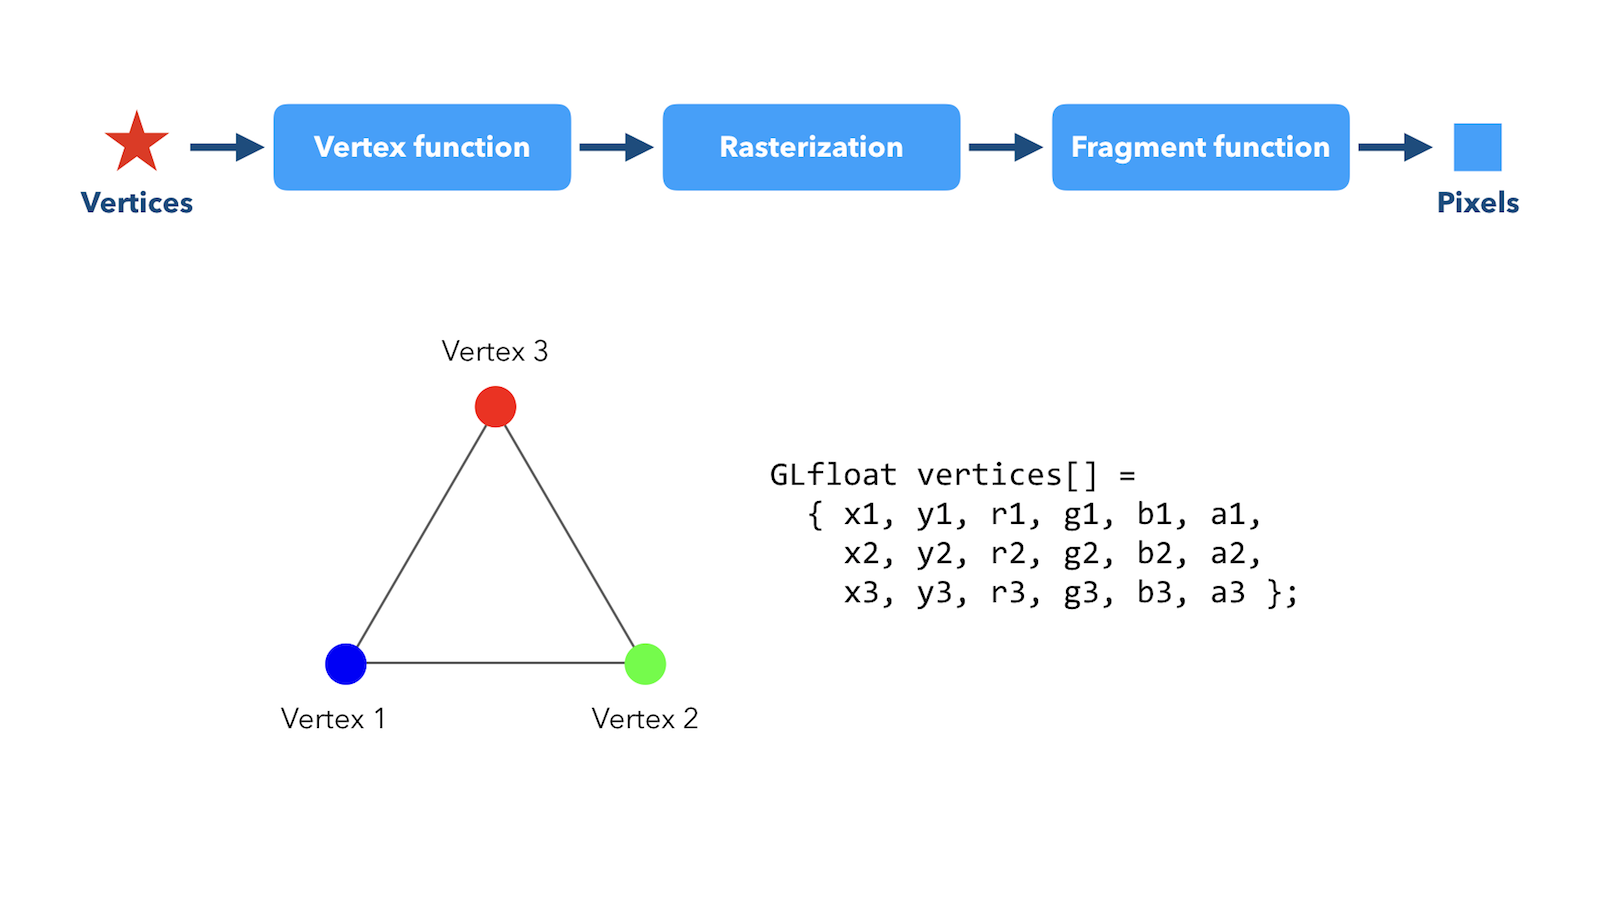
It all starts with points in space where our shapes will meet, known as [vertices](https://en.wikipedia.org/wiki/Vertex_(geometry)). Each vertex will be represented by floating-point values describing its `x` and `y` coordinates, and four color values: red, green, blue, and alpha (for transparency).

Here, we have the simplest geometric shape we can draw: a triangle. It consists of three vertices stored in a C array of `GLfloat`, which is a special platform-independent floating point type provided by OpenGL (notice the `GL` prefix).

Next, we'll pass the vertices to a vertex function, which we're responsible for writing. These are functions written in the [OpenGL Shading Language](https://en.wikipedia.org/wiki/OpenGL_Shading_Language), also known as GLSL, a language based on C with some added graphics-specific data types and capabilities, and a few restrictions.

The vertex function in where we'll map the points in space to a [coordinate system](https://en.wikipedia.org/wiki/Coordinate_system) as seen here.

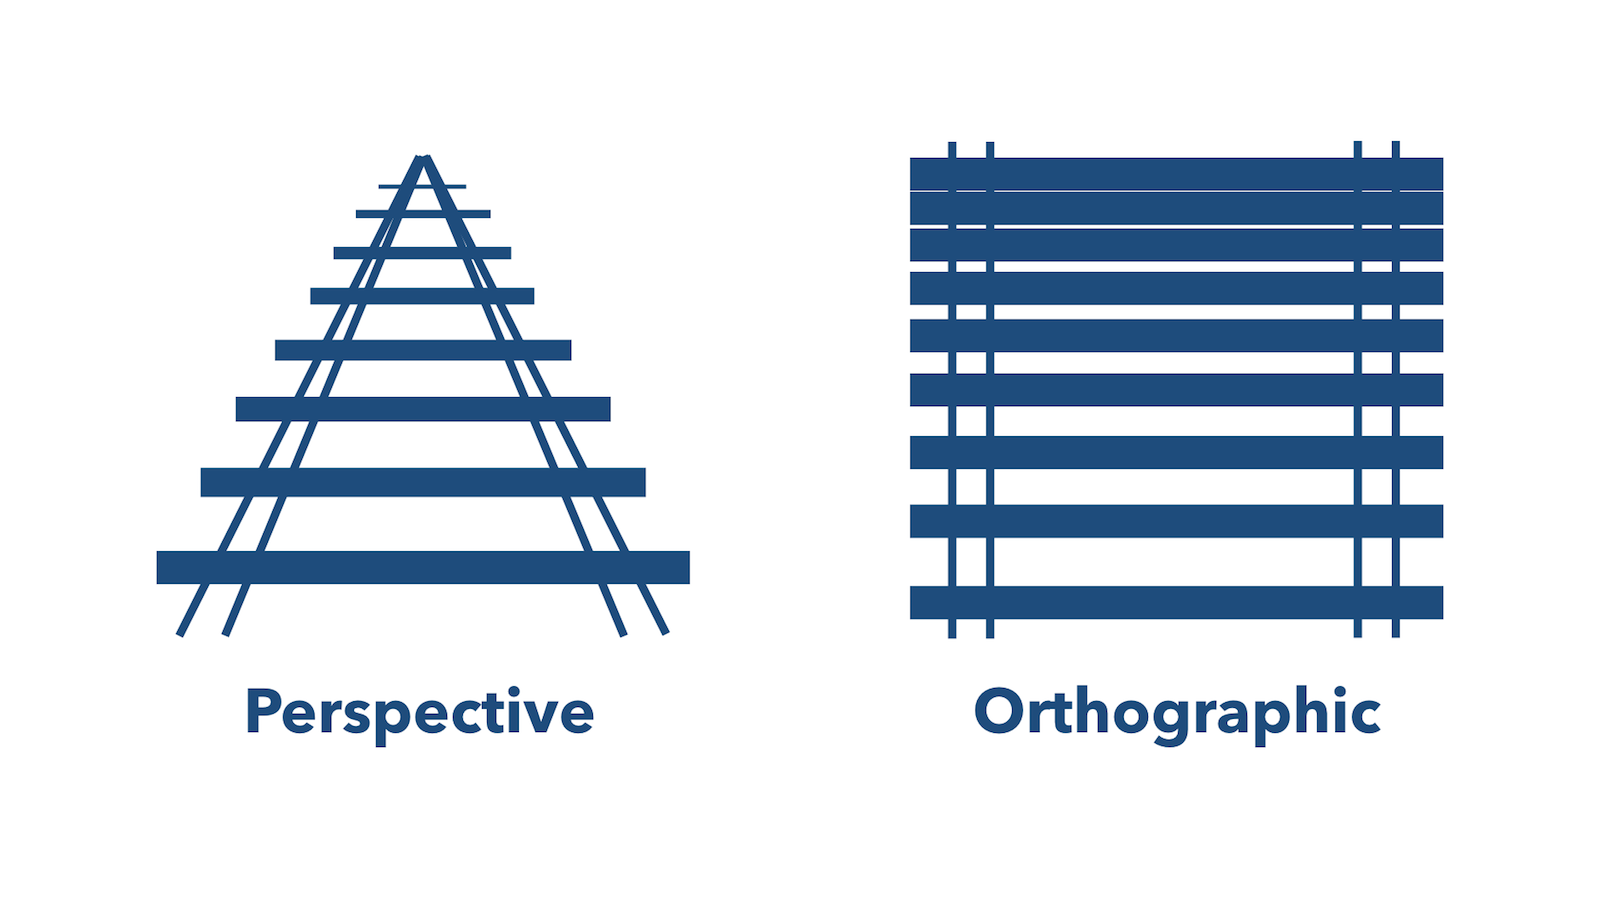
We'll also need to choose a [graphical projection](https://en.wikipedia.org/wiki/Graphical_projection). We see the world with [perspective](https://en.wikipedia.org/wiki/Perspective_(graphical)) and depth, as illustrated by the train tracks on the left here — everything seems to to converge towards [vanishing point](https://en.wikipedia.org/wiki/Vanishing_point) in the distance. Perspective is important when rendering [three-dimensional space](https://en.wikipedia.org/wiki/3D_computer_graphics), but in the 2D world we're creating, we don't need it!

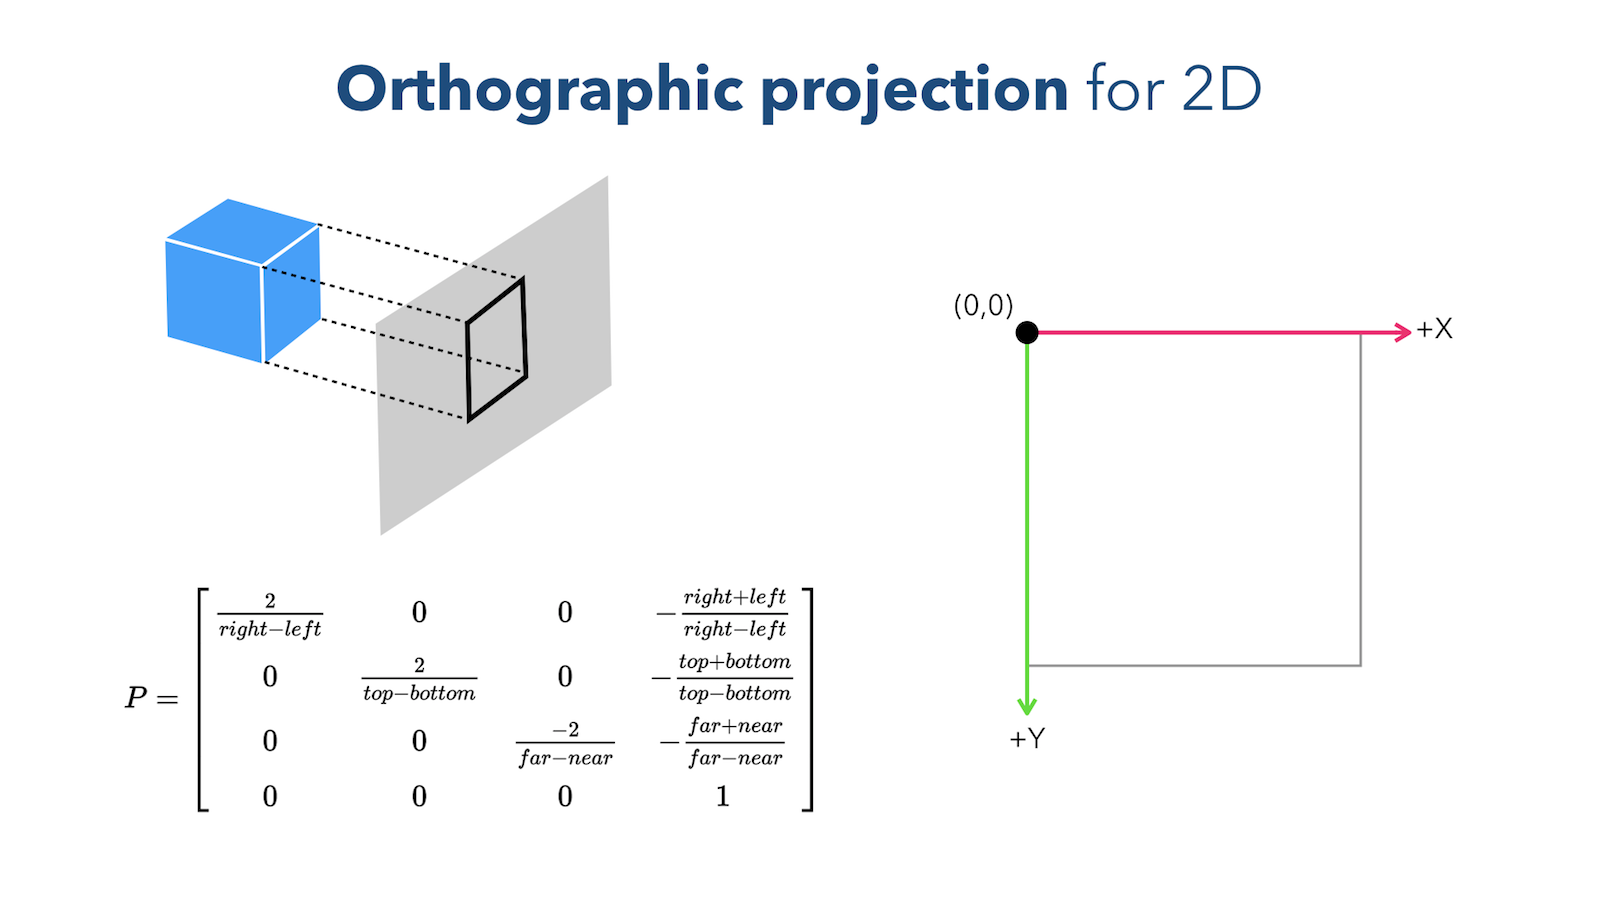
For our [two-dimensional space](https://en.wikipedia.org/wiki/Two-dimensional_space), we'll choose an [orthographic projection](https://en.wikipedia.org/wiki/Orthographic_projection), which means all the projection lines are orthogonal to the projection plane. That's a fancy way of saying the world is essentially flat, as far as we see it at least.

Applying an orthographic projection means we have to first define a matrix that represents it, shown here, then apply it to every coordinate. In this vertex stage, we can also do things like manipulate the coordinate system itself so that the origin is in the upper-left corner and y-axis is flipped, a convention in graphics programming to make things easier (notice how content is added or removed from the lower-right corner as you resize an application window on your desktop 🤔).

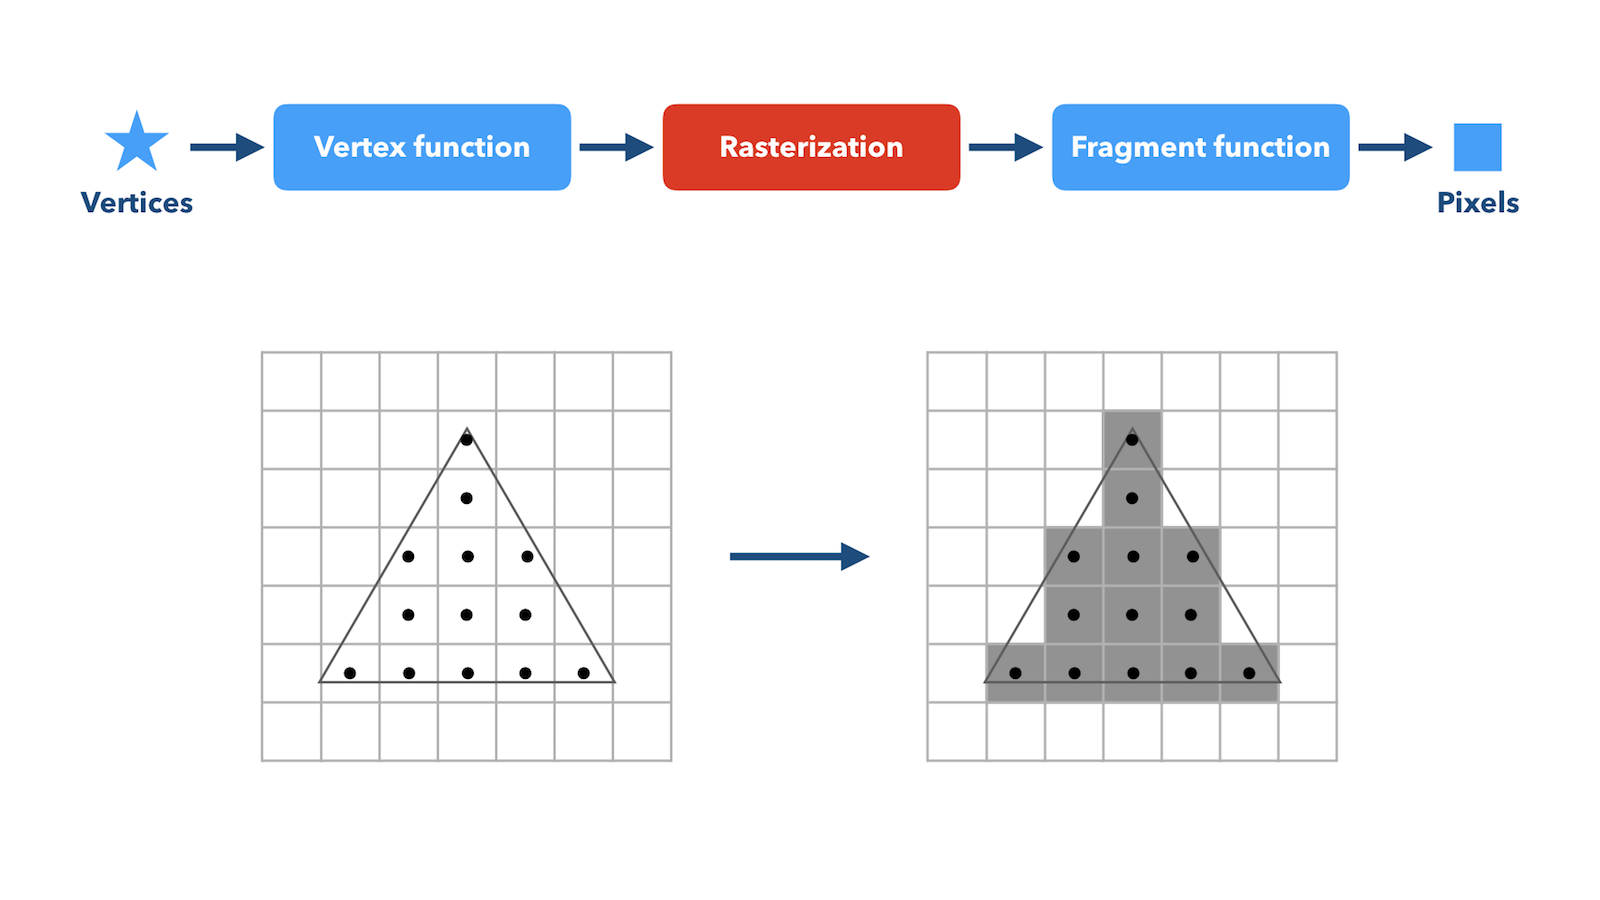
Once we have the vertices where we want them in our coordinate system, the next step is to determine what pixels will be in the bounds of the shape we've made. That process is called ["rasterization,"](https://www.scratchapixel.com/lessons/3d-basic-rendering/rasterization-practical-implementation/rasterization-stage) and is largely handled for us, thankfully.

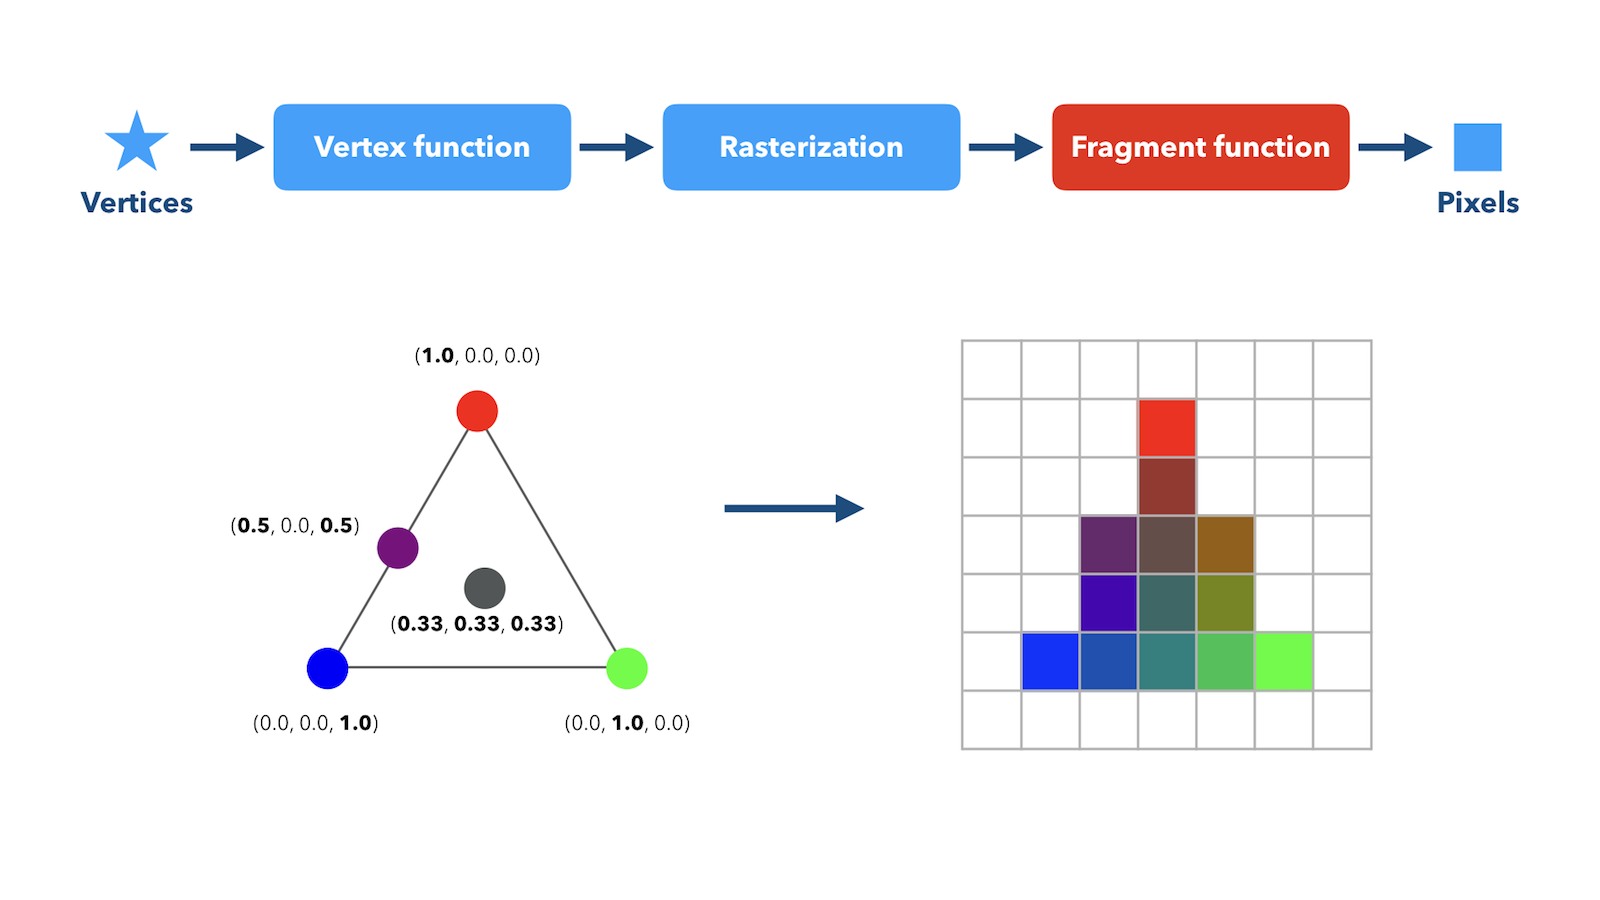
Now that we have our pixels identified, it's time to color them in. Remember, we only defined three colors for our triangle, one at each vertex. Our shape will be composed of more than just three pixels, so what colors will the other pixels be? We define this behavior in our fragment function. We could really have [a ton of fun](https://www.shadertoy.com/view/XsXXDn) here, manipulating colors to create awesome effects, but for this simple triangle we'll just choose the intermediate values, or colors, between each vertex.

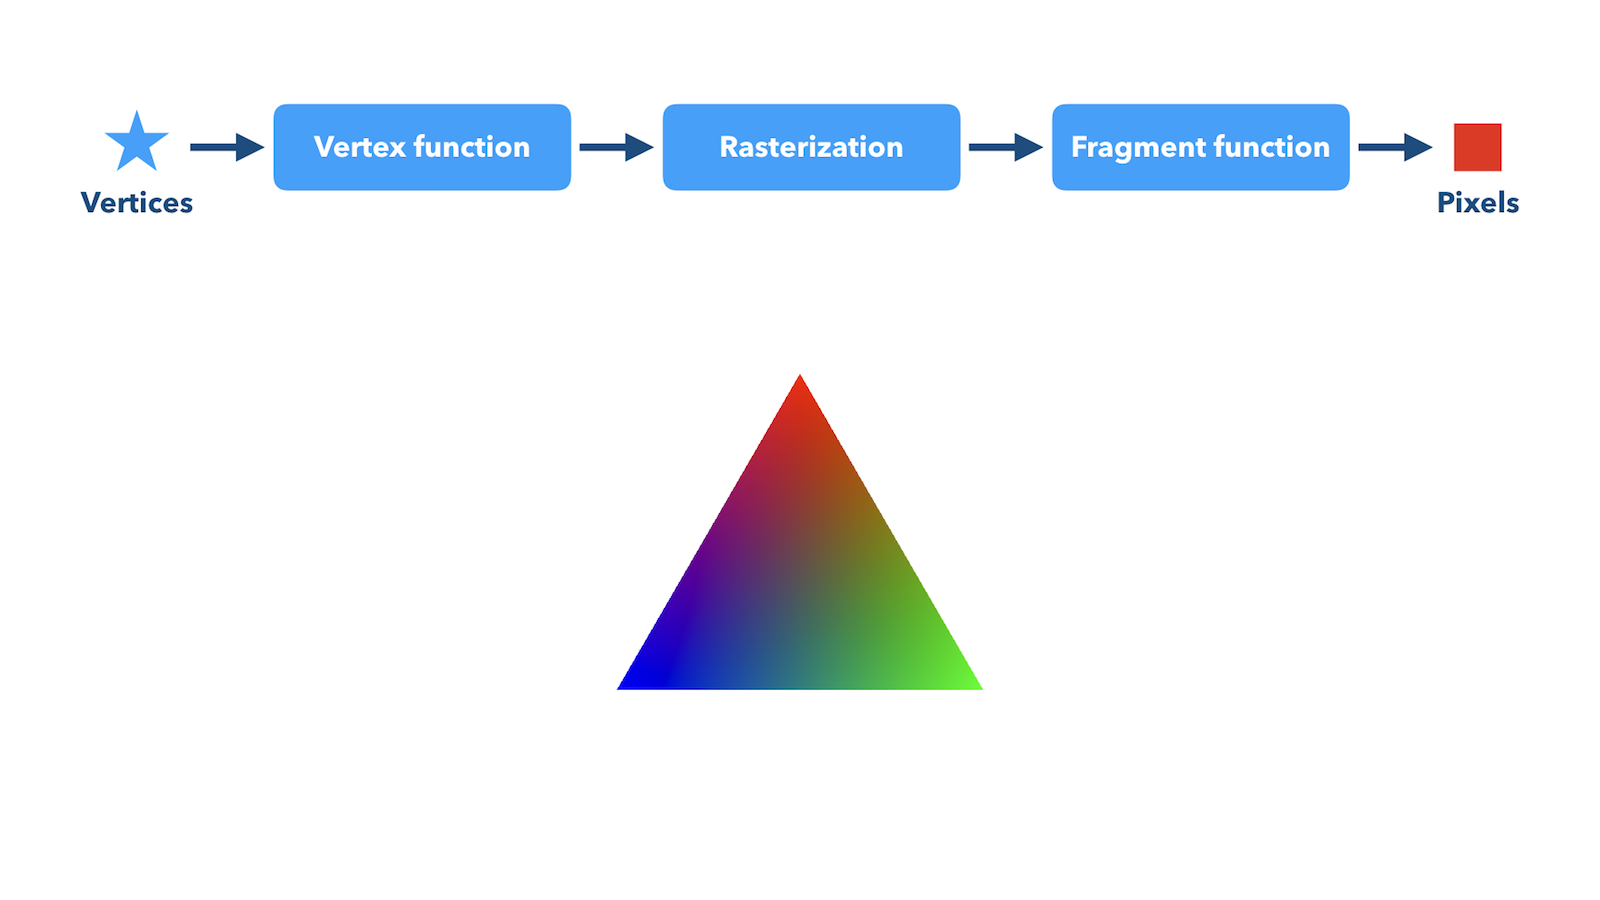
Finally, we have our triangle all colored in. With enough pixels, we'll hopefully have a nice, smooth shape like this one here.

These pixels will then get written to a frame buffer, which is a chunk of memory in your graphics card (or shared with RAM) that contains a per-pixel representation of your screen. In a common dual-buffer system, the pixels will get written to the "back buffer," while the computer is displaying the contents of the "front buffer." Then at your command, you'll "swap buffers," so that the back is moved to the front, and the front to the back for you to draw the next set of pixels on.

This might see pretty straight forward, yes? Well, the graphics programming experience is a bit...wild. If you try it yourself, you might go through all these emotions, as I did.

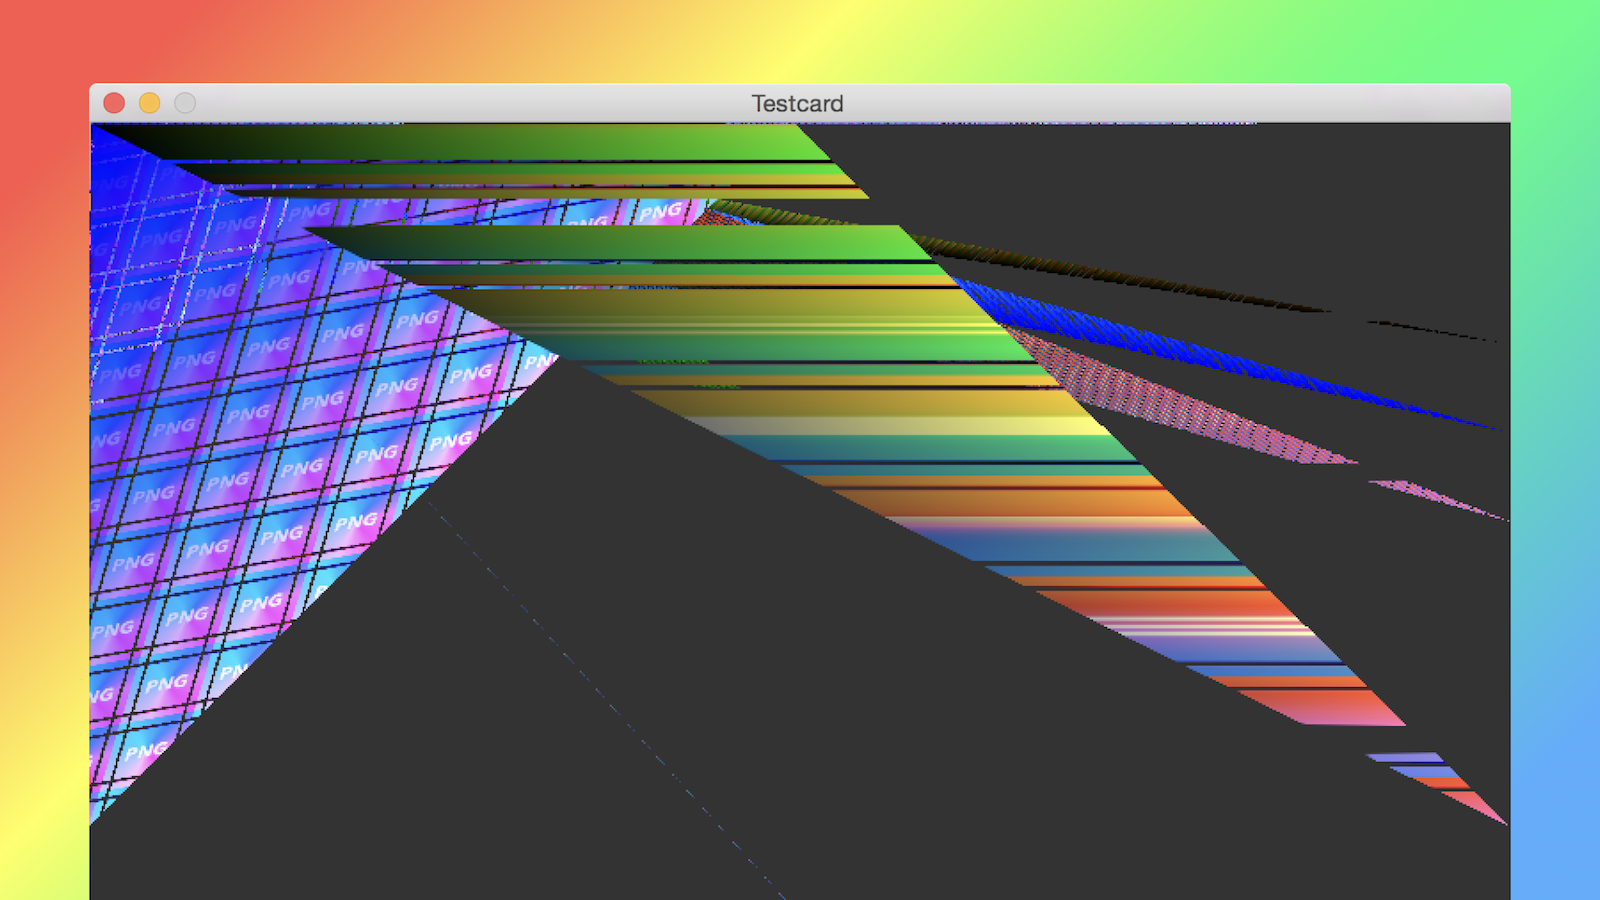
And sometimes, things go really wrong, yikes!

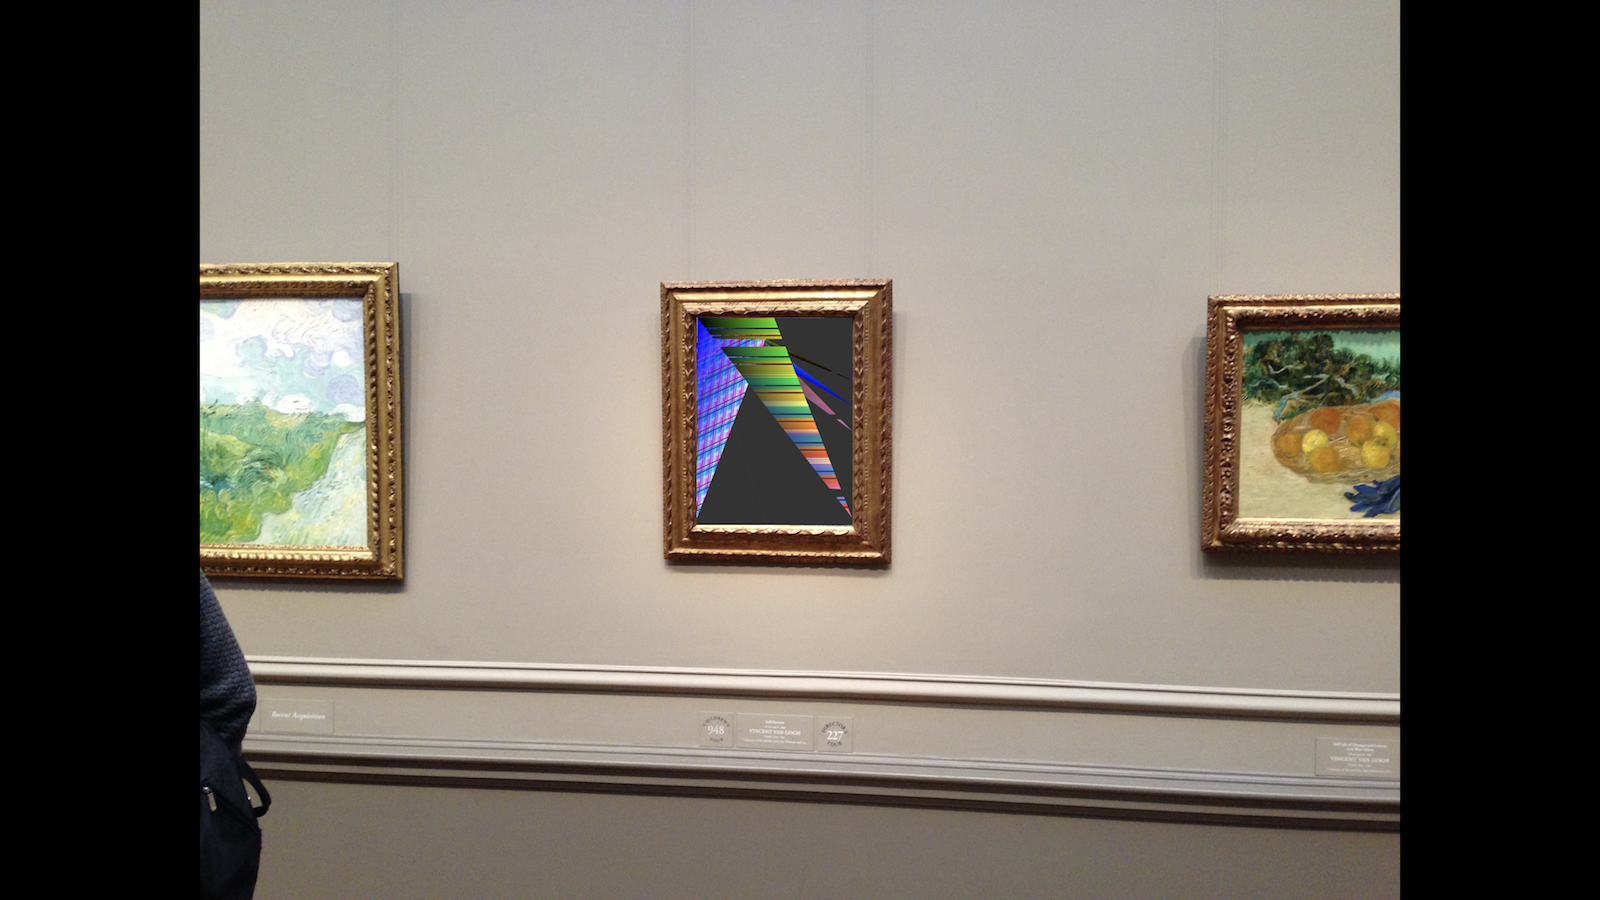
The neat thing about graphics programming is, even when you mess up, the result is often pretty cool.

Some might call it art!

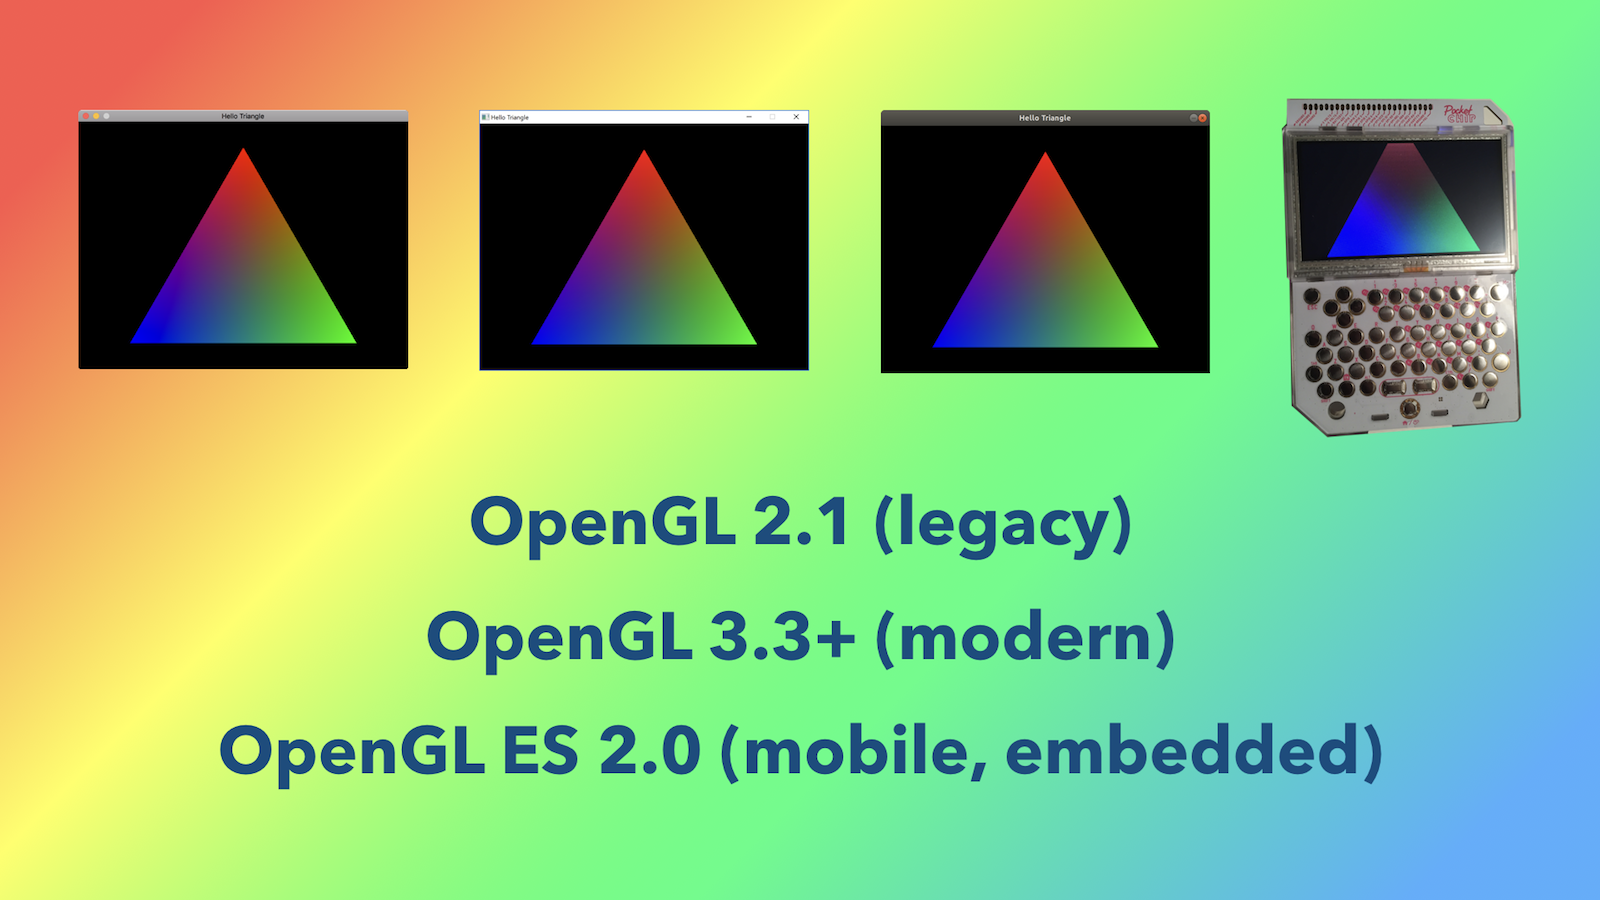
OpenGL is awesome, particularly because we can target every platform out there, maybe not always with the exact same code, but pretty close. To support older hardware and operating systems, and platforms with limitations like virtual machines, we can use [legacy OpenGL](https://www.khronos.org/opengl/wiki/Legacy_OpenGL) in version 2, with its fixed-function pipeline. The modern "programmable pipleline" we just explored is supported in OpenGL 3 and higher. OpenGL was designed to target high-performance desktops and laptops, but there's also a version made for low power, mobile, and embedded devices, known as [OpenGL ES](https://www.khronos.org/opengles). This means we can also bring our graphics to iPhones, iPads, Android devices, TVs, the [Raspberry Pi](https://www.raspberrypi.org) and [CHIP](https://getchip.com).

I don't know about you, but [I feel like this!](https://twitter.com/floatvoid/status/863605150799118336) 🤣

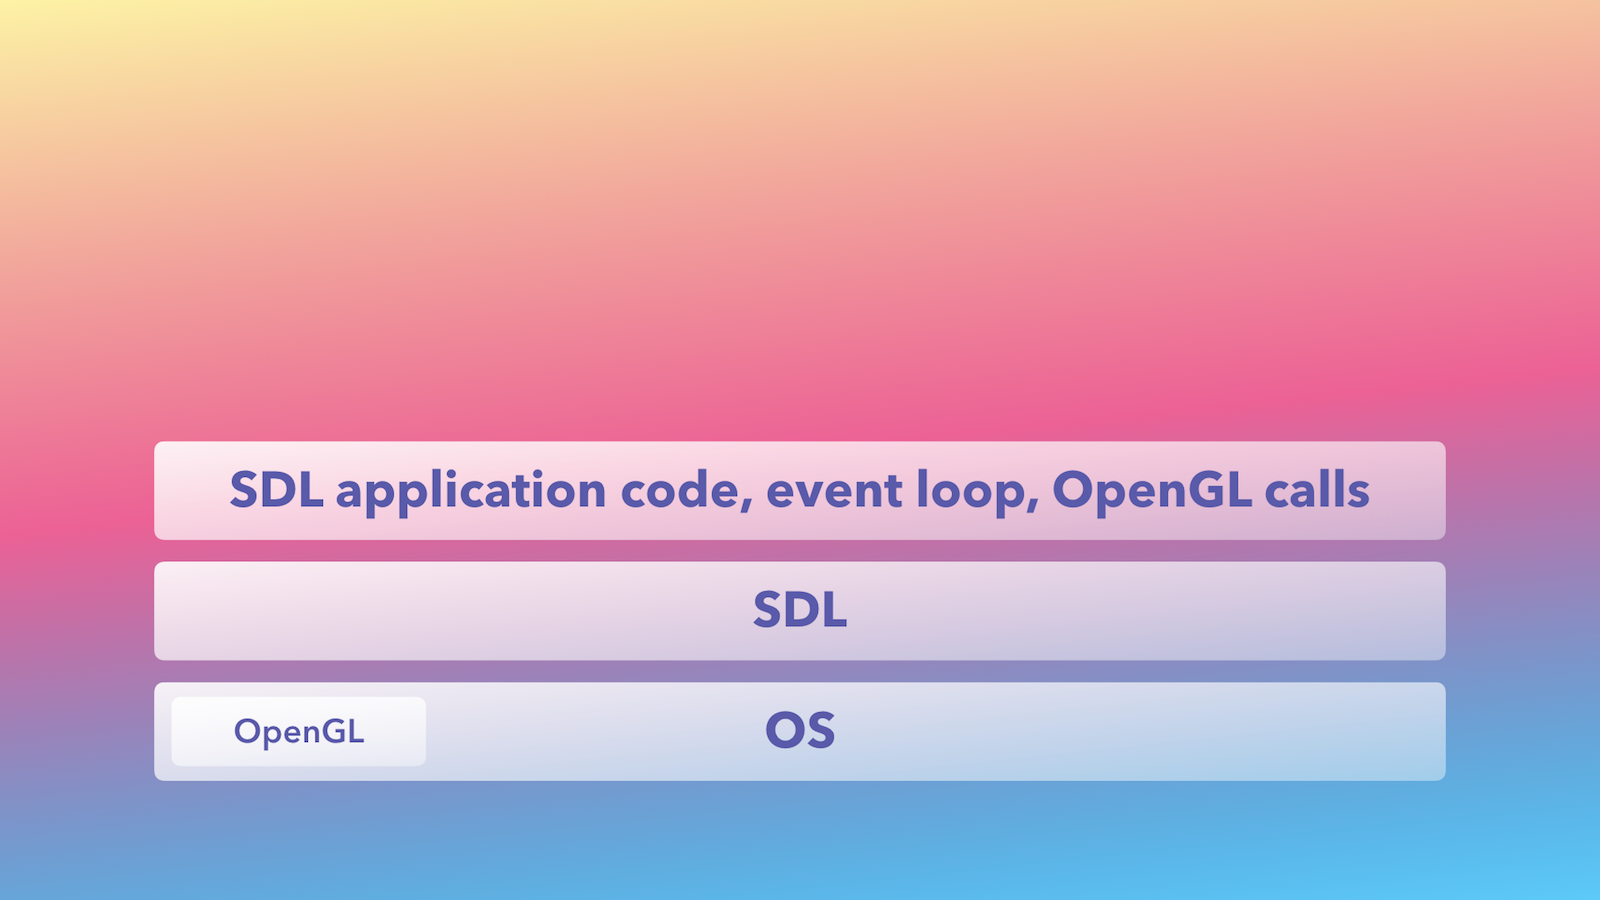
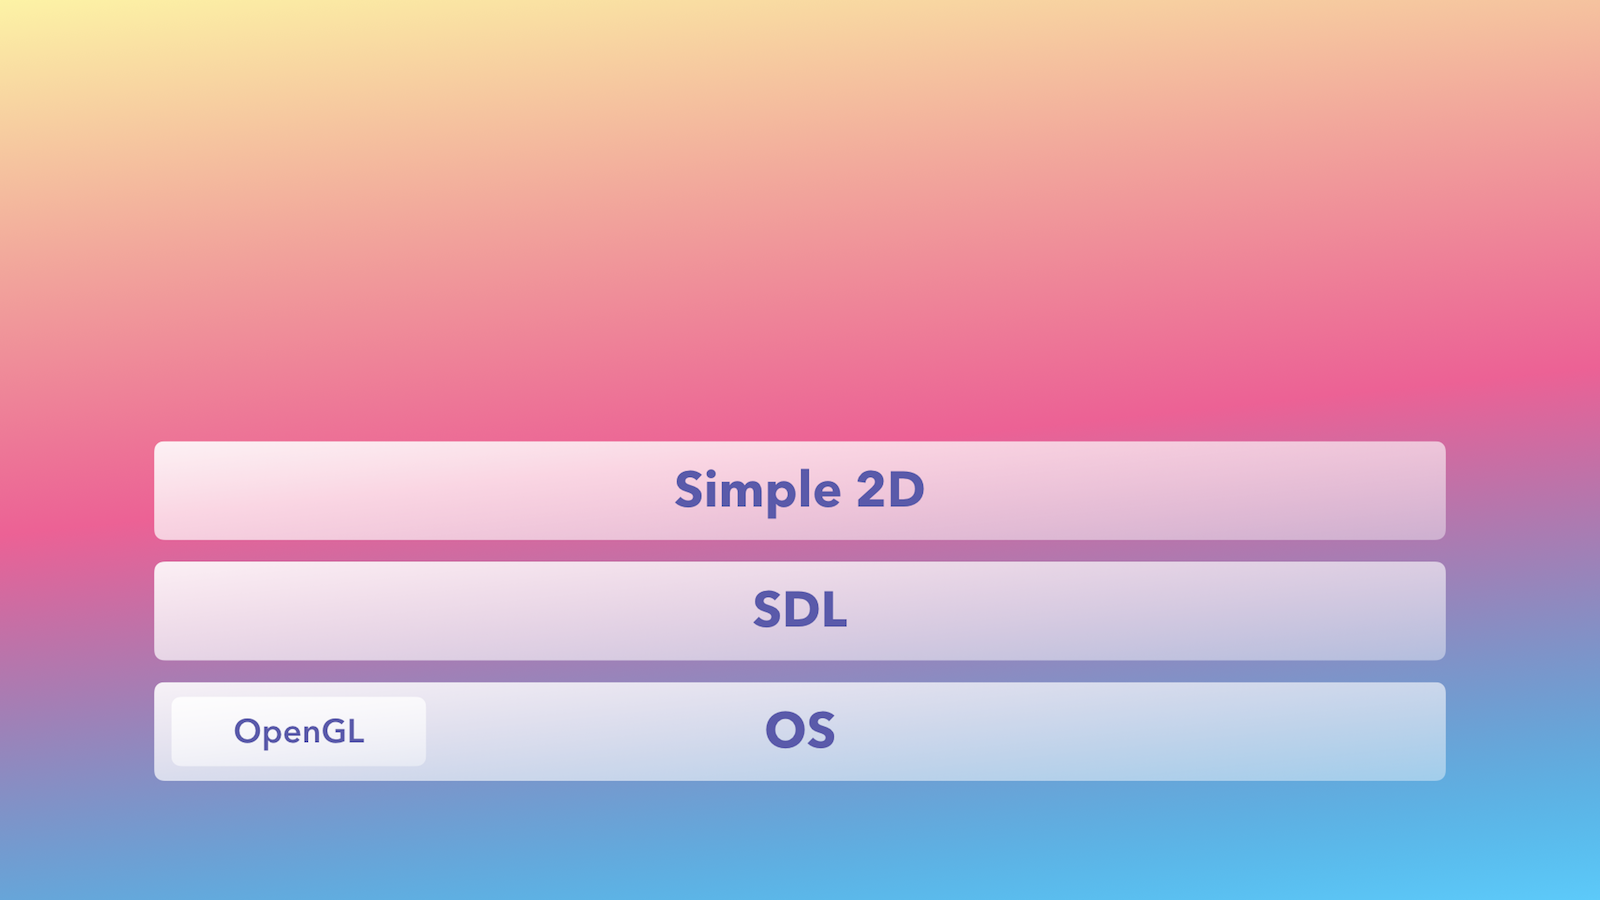
Alright, let's get back to our stack. We just learned OpenGL will help us render graphics, and that it's provided by our operating system (generally speaking). Most of the time we'll talk directly to the OpenGL API, but SDL also provides some convenience functions for us as well.

At this point, we'll need to write a fair amount of SDL application code, implement an event loop, talk to OpenGL, and more. It's going to get a bit messy, so it sure would be nice to organize all this into something useful and easy to use, maybe an API of its own. 🤔

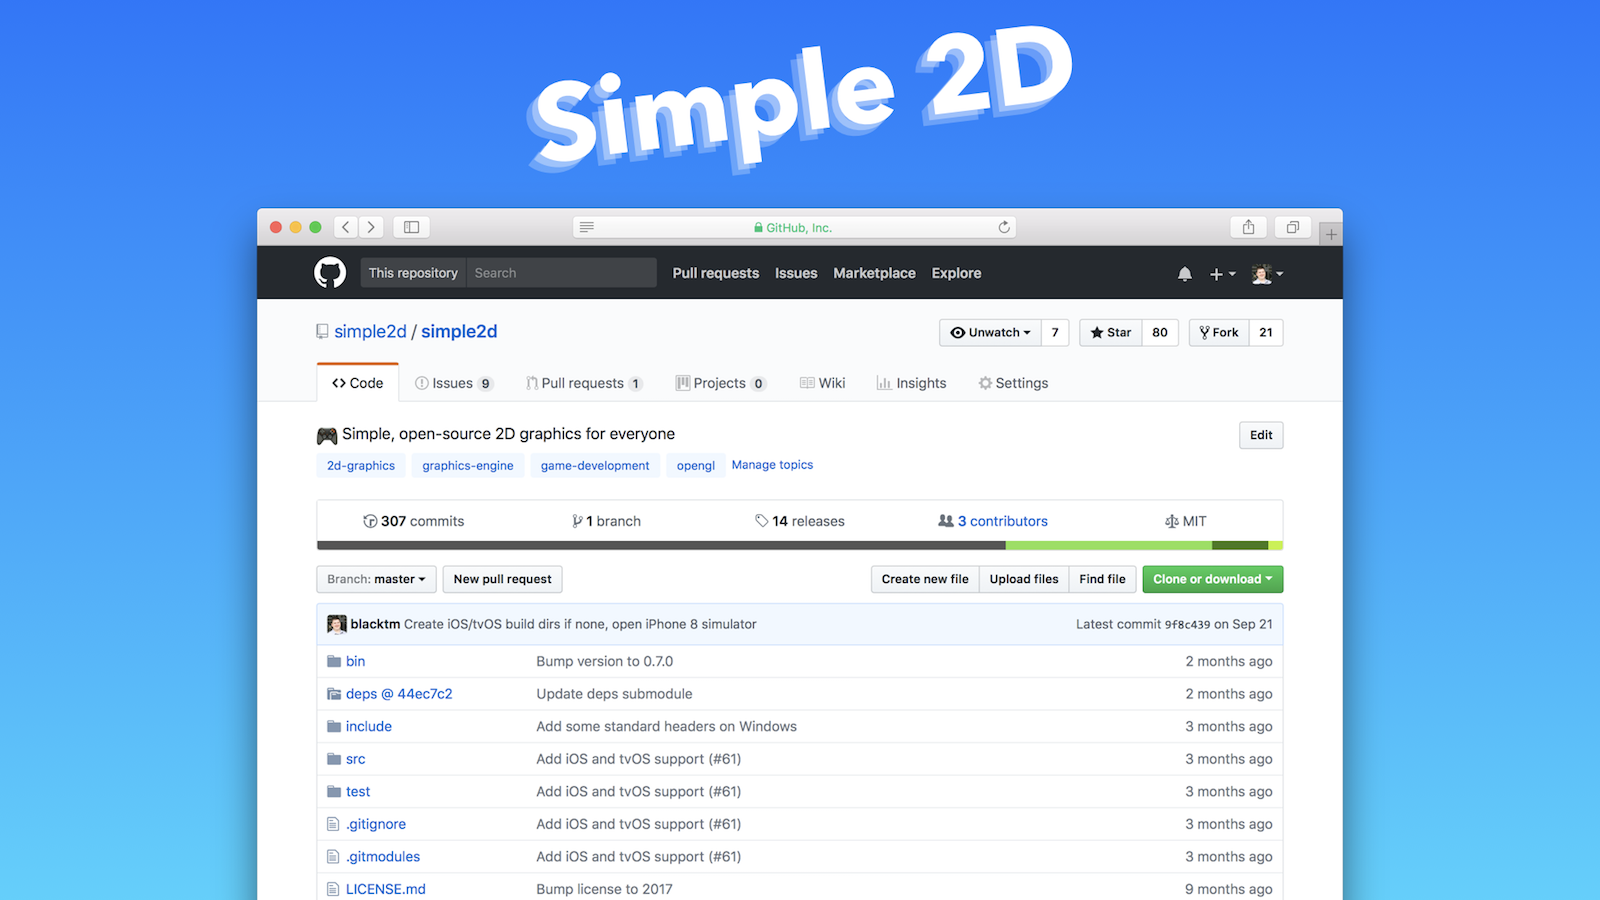
Well, that's what we did! As a byproduct of this effort, we create a little native library, written in C, to render common shapes and textures, handle input, audio, images, and other media, aptly named [Simple 2D](https://github.com/simple2d/simple2d).

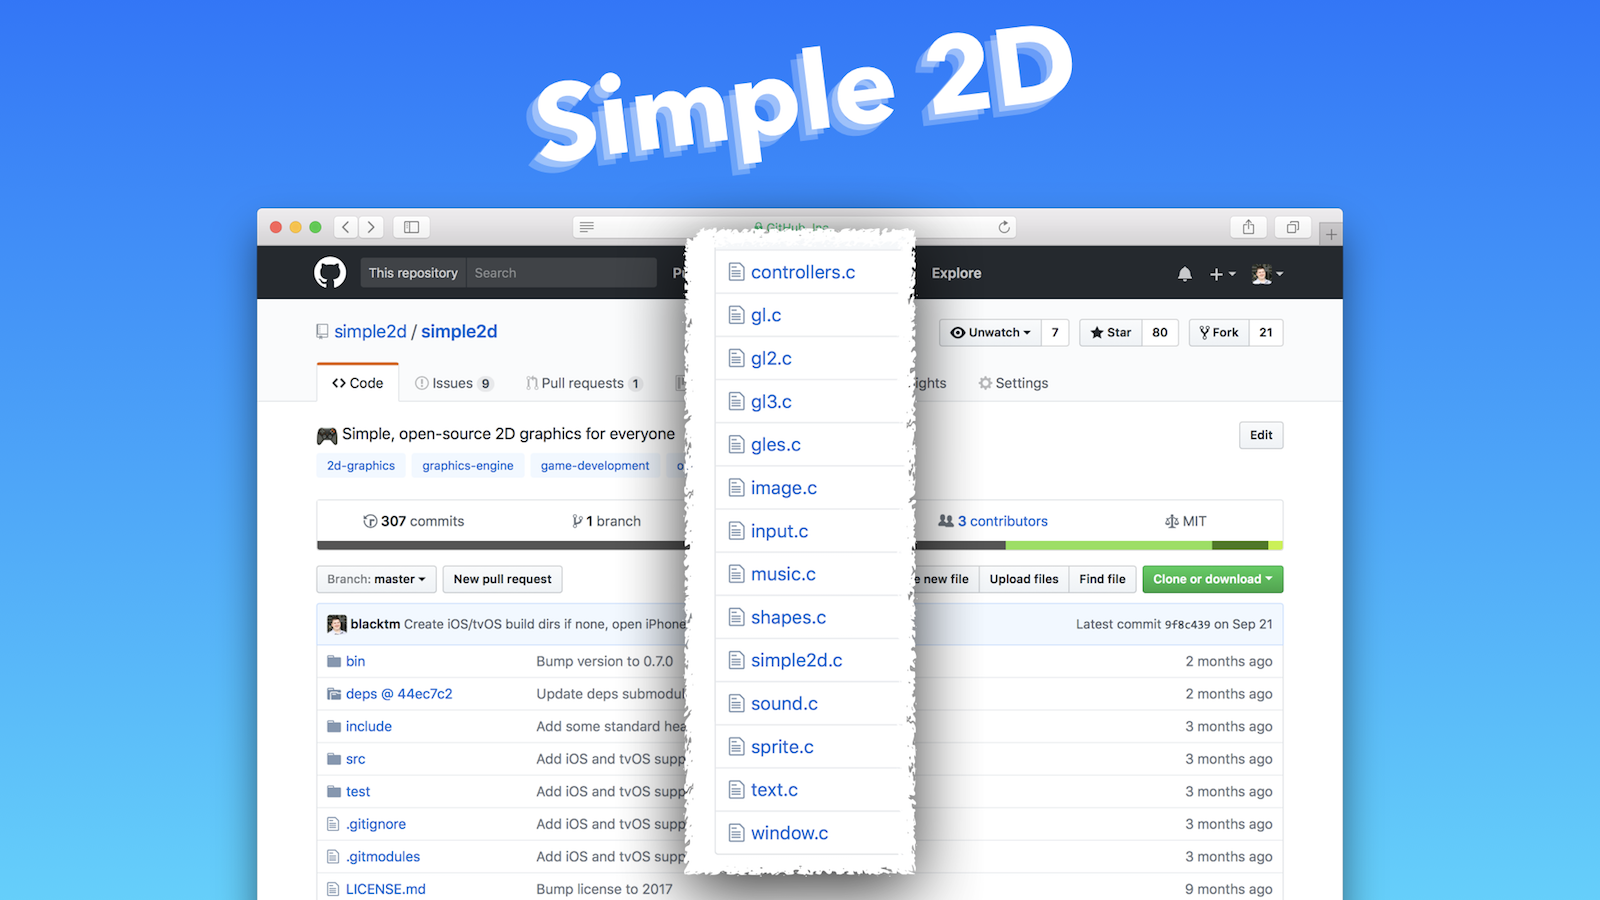
If you peer into the source code, the [`src/` directory](https://github.com/simple2d/simple2d/tree/master/src) particularly, you'll see files clearly named with the subject matter they deal with, like windows and images. See the "gl*.c" files? That's where we implemented the OpenGL rendering pathways we just talked about.

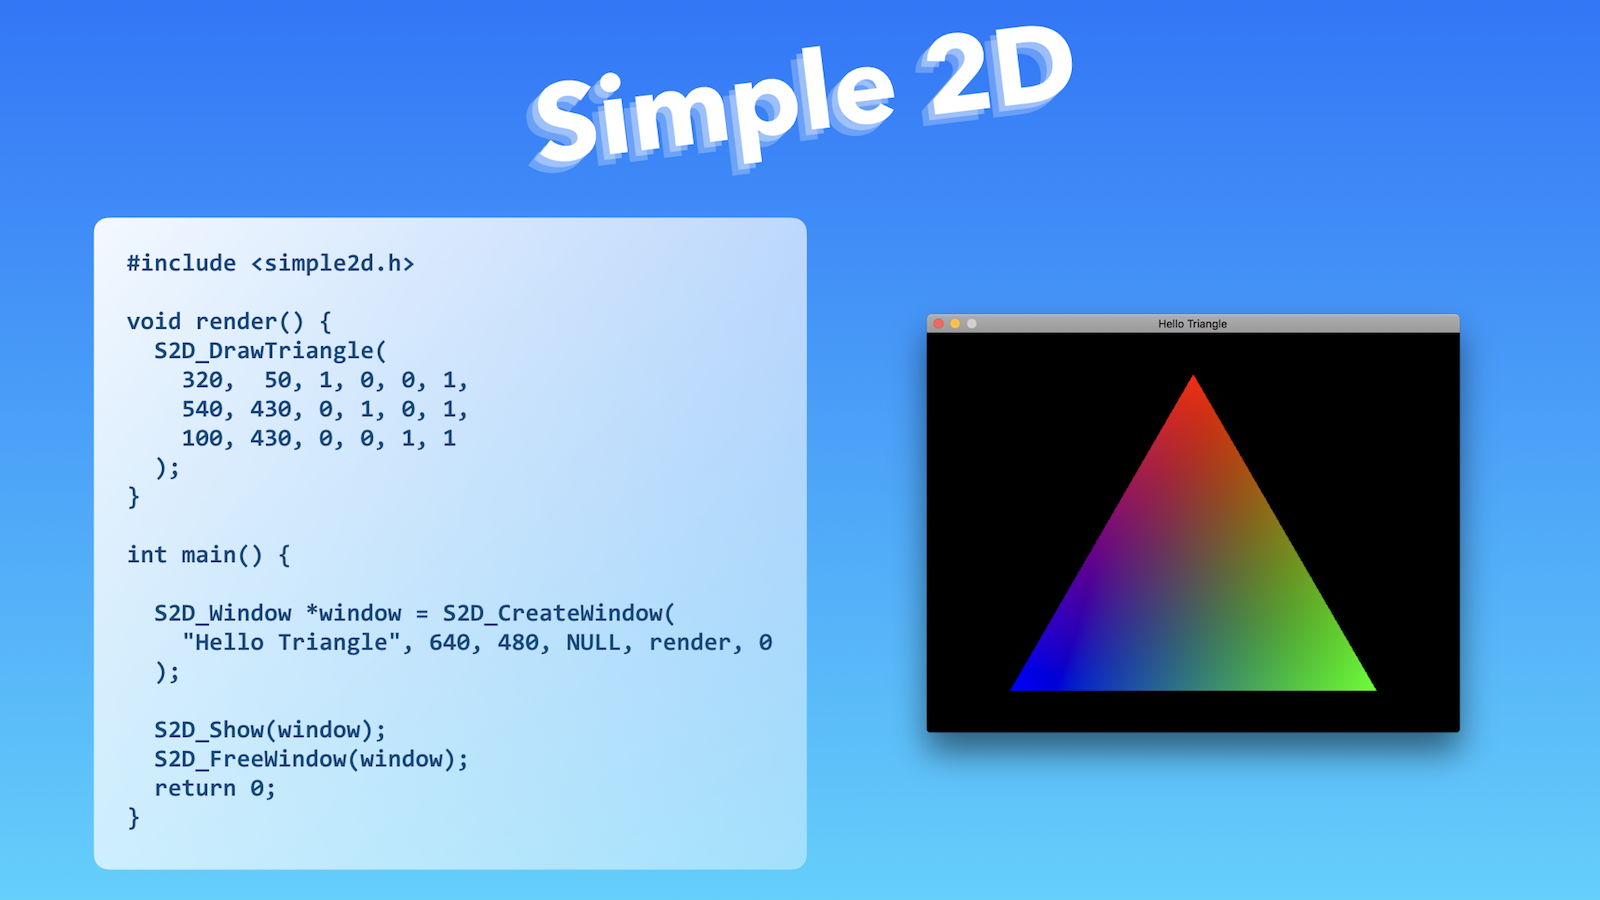
Just to demonstrate how simple this really is, here's a cross-platform "hello triangle" application. All it takes is three Simple 2D funtion calls — `S2D_CreateWindow`, `S2D_DrawTriangle`, `S2D_Show` — to render this stunning triangle everywhere. 😲

Find this example and others in the [README](https://github.com/simple2d/simple2d#creating-apps-with-simple-2d).

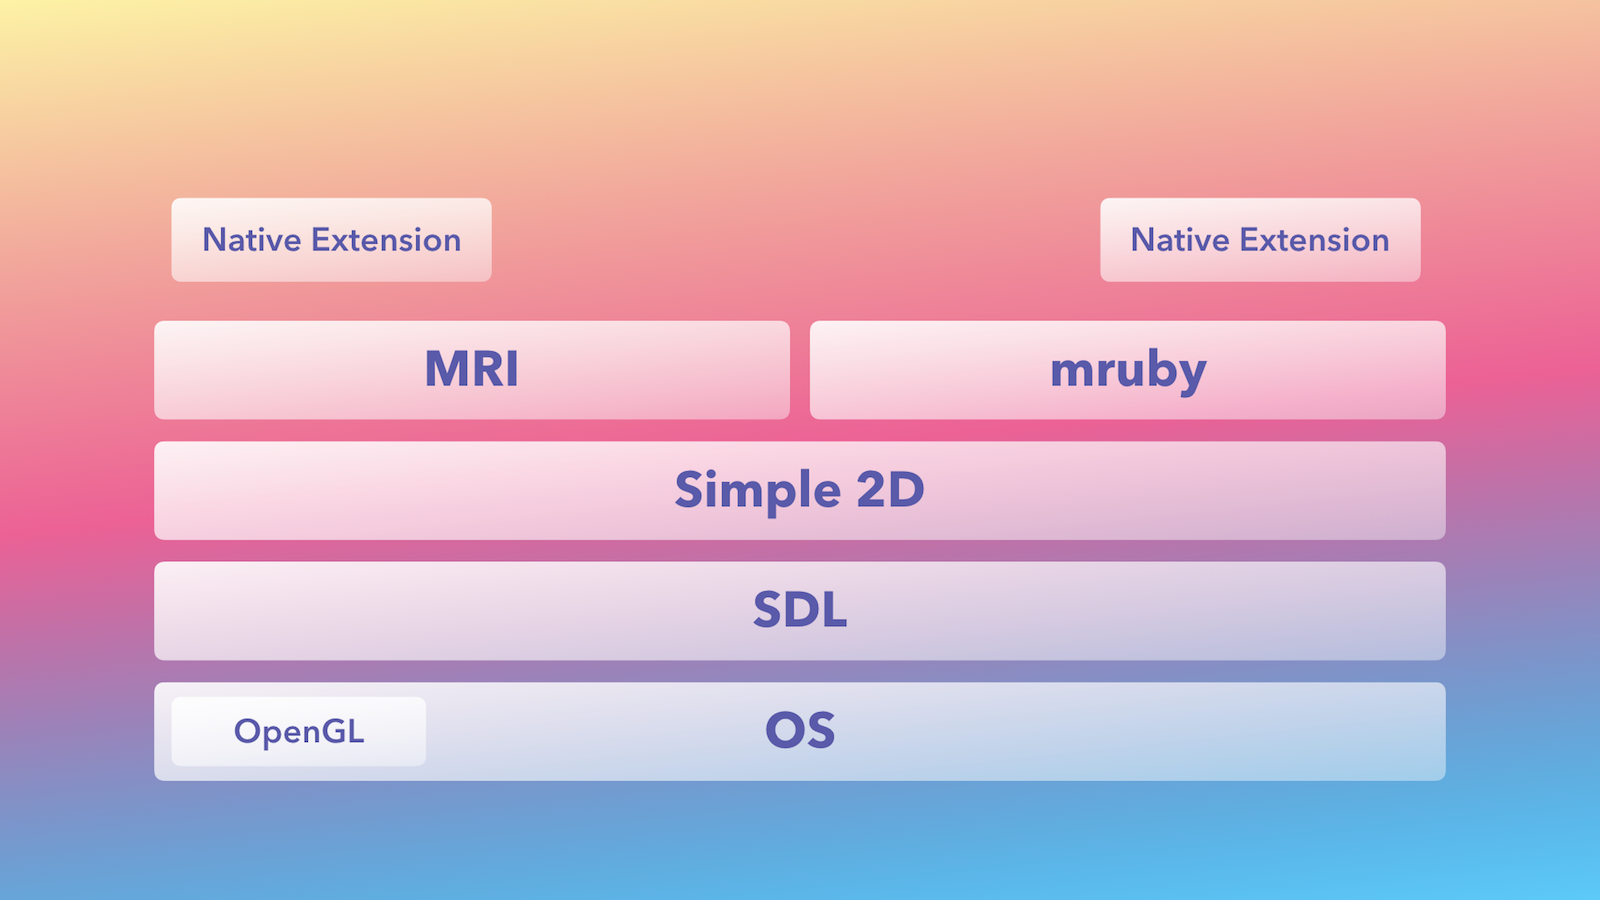
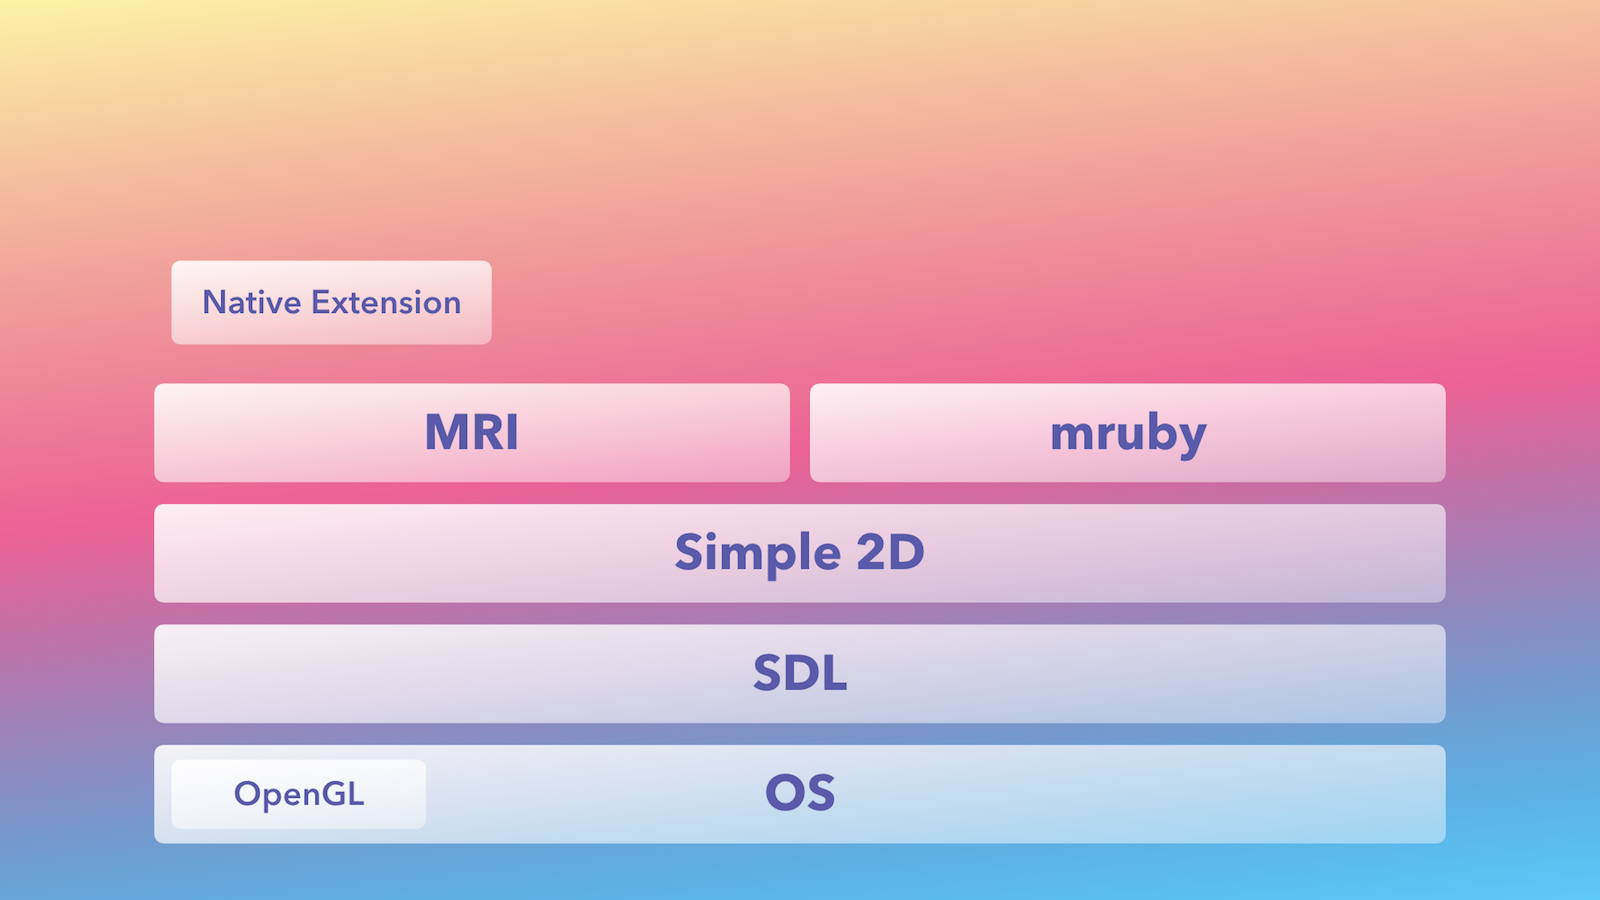
Returning to our stack once again, we'll add Simple 2D on top to make it really easy to talk to the lower-level native bits.

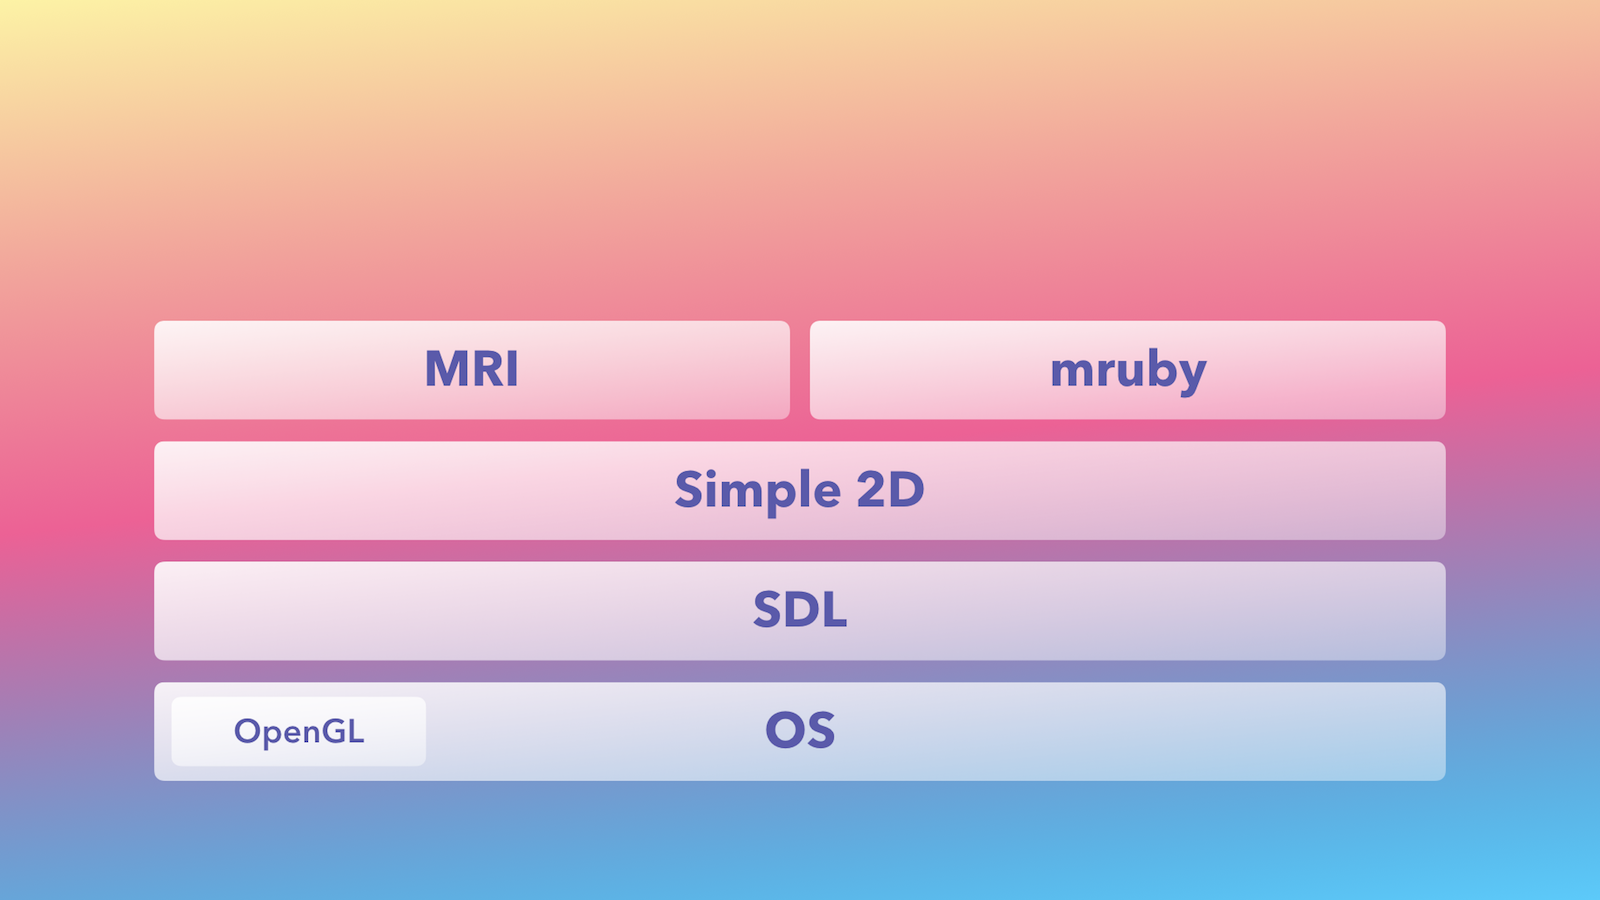
And now, we can finally add Ruby! We can use [MRI](https://en.wikipedia.org/wiki/Ruby_MRI), also known as CRuby, the language's primary implementation. You're probably familiar with MRI as a Rubyist, but what about mruby? If not, you should be!

[mruby](http://mruby.org) is a small, lightweight implementation of Ruby. It's designed for embedded uses where system resources, like memory and storage, are limited. It also opens up some new possibilities, like compiling your Ruby application to native code. Let's look at an example.

There are several ways we can [compile Ruby](http://mruby.org/docs/articles/executing-ruby-code-with-mruby.html), but for our needs, we're going to generate [bytecode](https://en.wikipedia.org/wiki/Bytecode) we can embed in a C source file.

First, we'll take our "red square" Ruby application and run it through the mruby compiler, `mrbc`, like this.

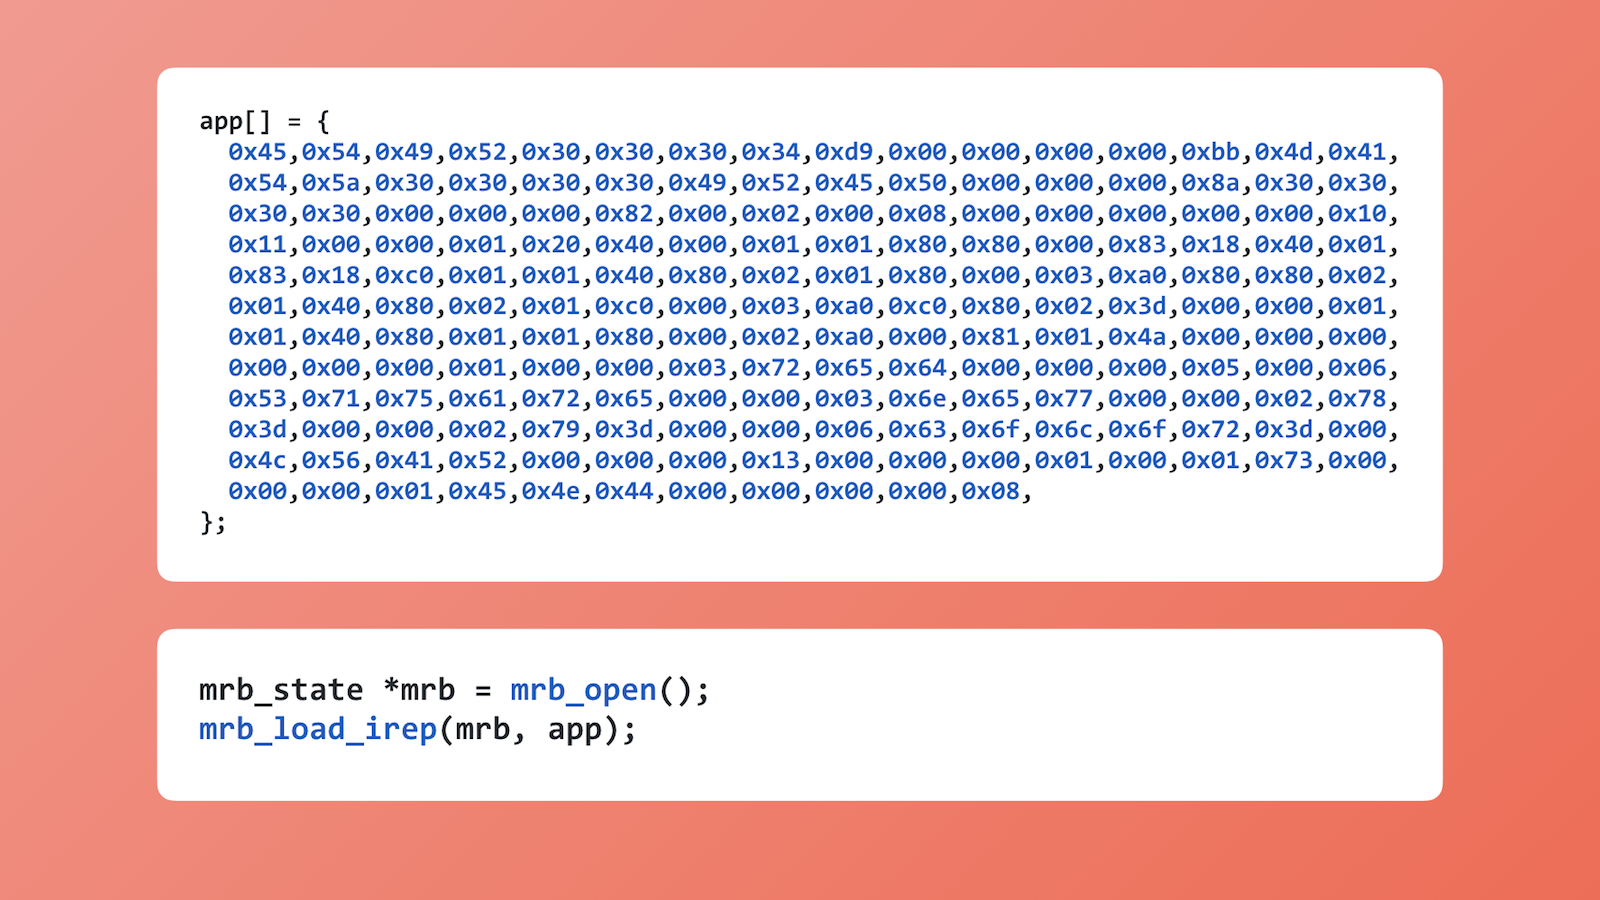
It will produce a C array containing bytecode, represented as hexidecimal symbols, which we can then run using the `mrb_load_irep` function. This might not seem too exciting (yet), but it'll allow us to write our apps in Ruby and compile them to machine-code binaries, which is ideal for distribution on mobile devices and other embedded systems.

In order to interact with the native layers below through Ruby's implementations, we'll need to write native extensions. You've probably use a gem with a native extension, and maybe you've even [written one](http://guides.rubygems.org/gems-with-extensions/).

Since MRI and mruby's native APIs are a bit different, we'll have to figure out how to talk to each of them.

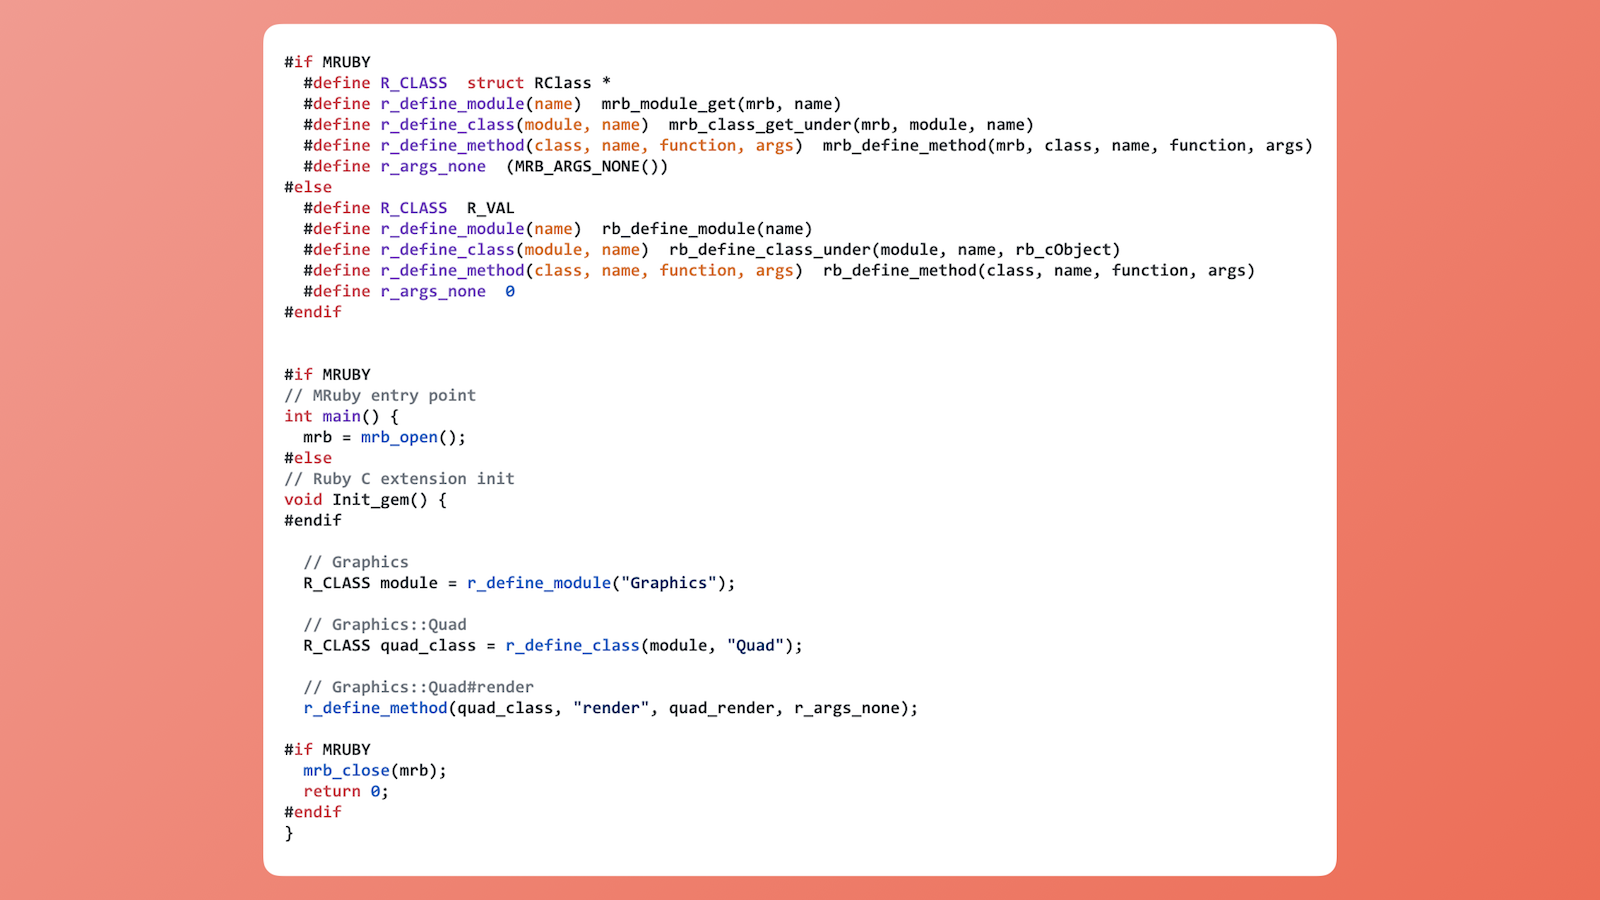
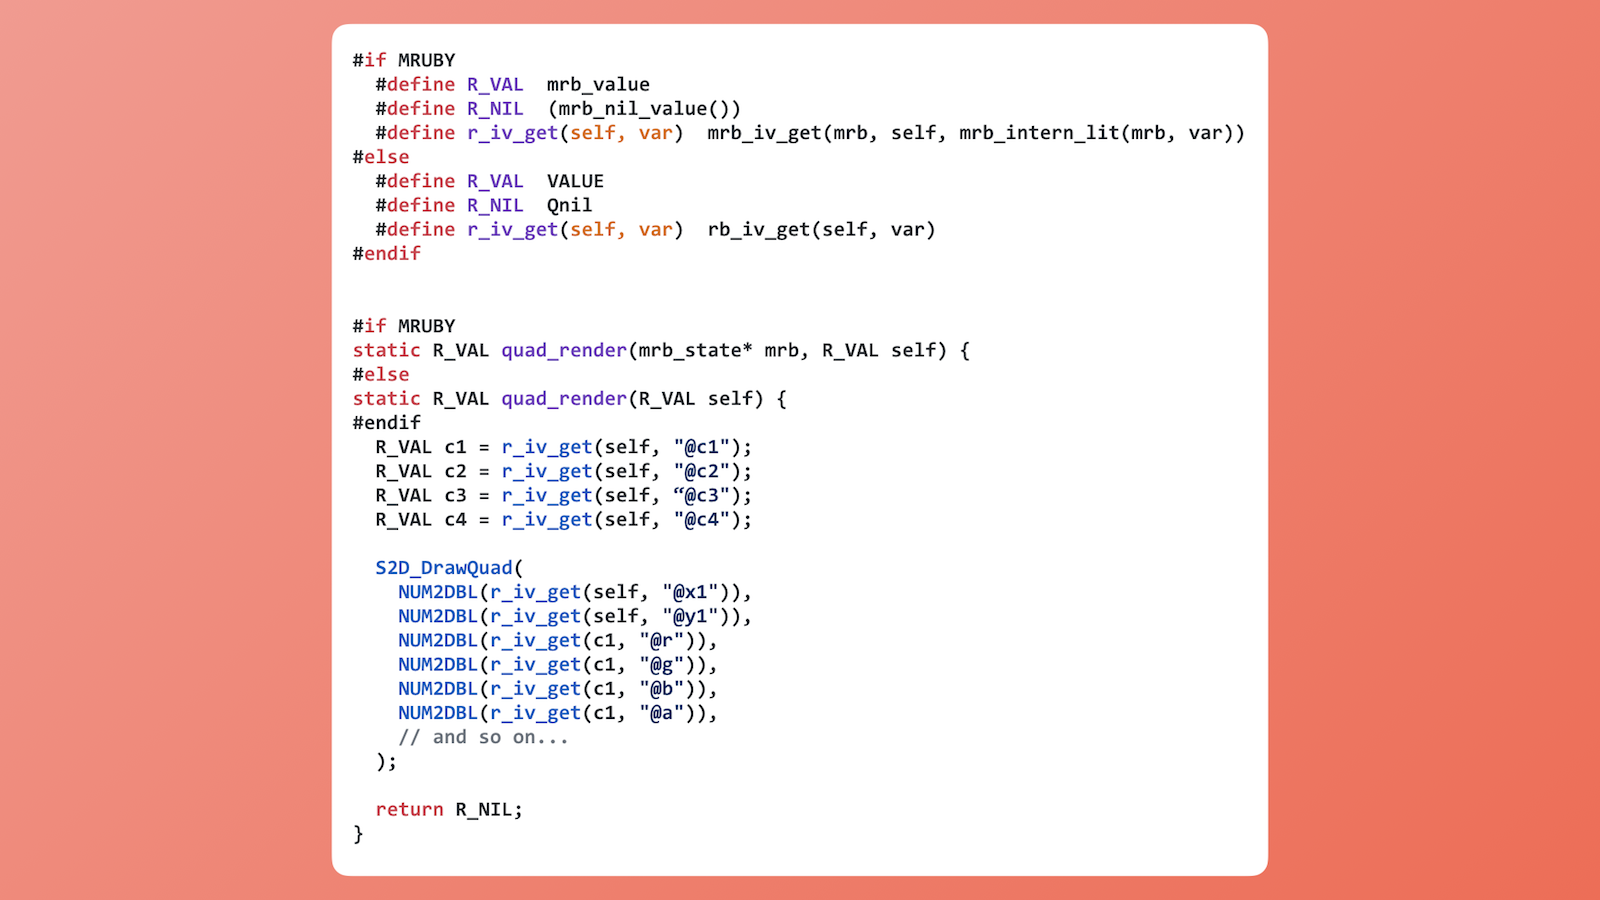
Here's what the native extension will look like. If we do some research, we can learn about how the [MRI C API](http://silverhammermba.github.io/emberb/c/) works. Similarly, the mruby API is well documented in the [`mruby.h` header file](http://mruby.org/docs/api/headers/mruby.h.html).

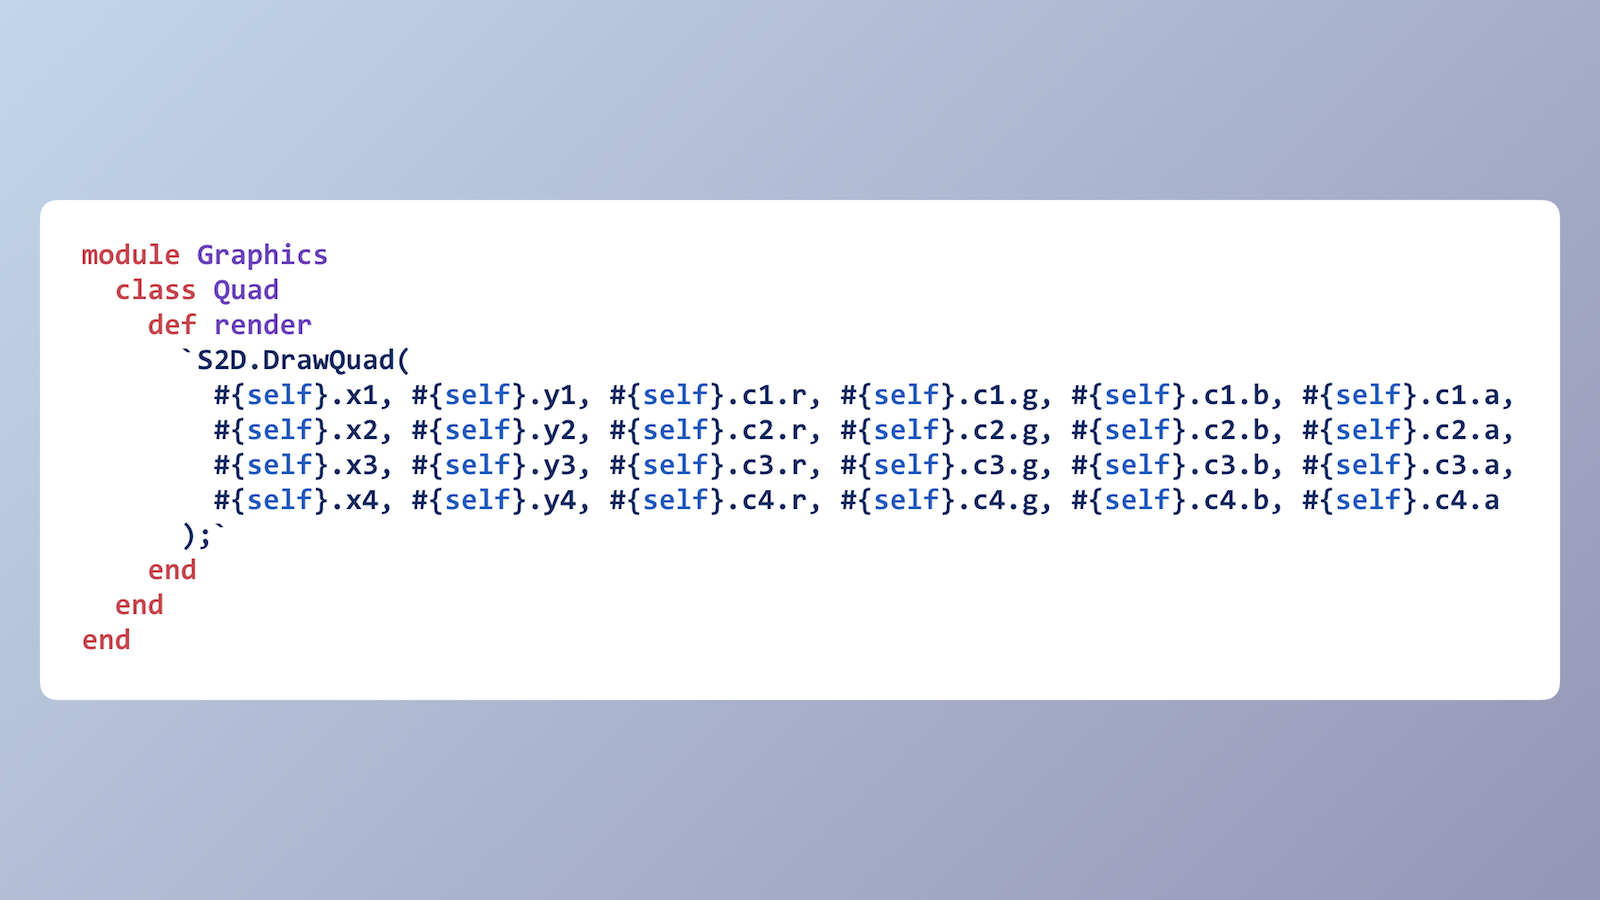
We can get really clever here and use C's `#define` directive, which is part of the [preprocessor](https://en.wikipedia.org/wiki/C_preprocessor). We'll be using it to define common data types and functions that work in both MRI _and_ mruby. You can [check out the code](#native-extension-for-mri-and-mruby) for this snippet and the one on the next slide, along with a deeper explanation of what's going on. In short, we're defining a Ruby module, class, and method in C.

Here, we're defining a C function, which is going to get executed when we call the Ruby method. This is where the Simple 2D function calls take place.

Since we were able to use `#define` to create a common API across MRI and mruby, we can put this all together into a single native extension.

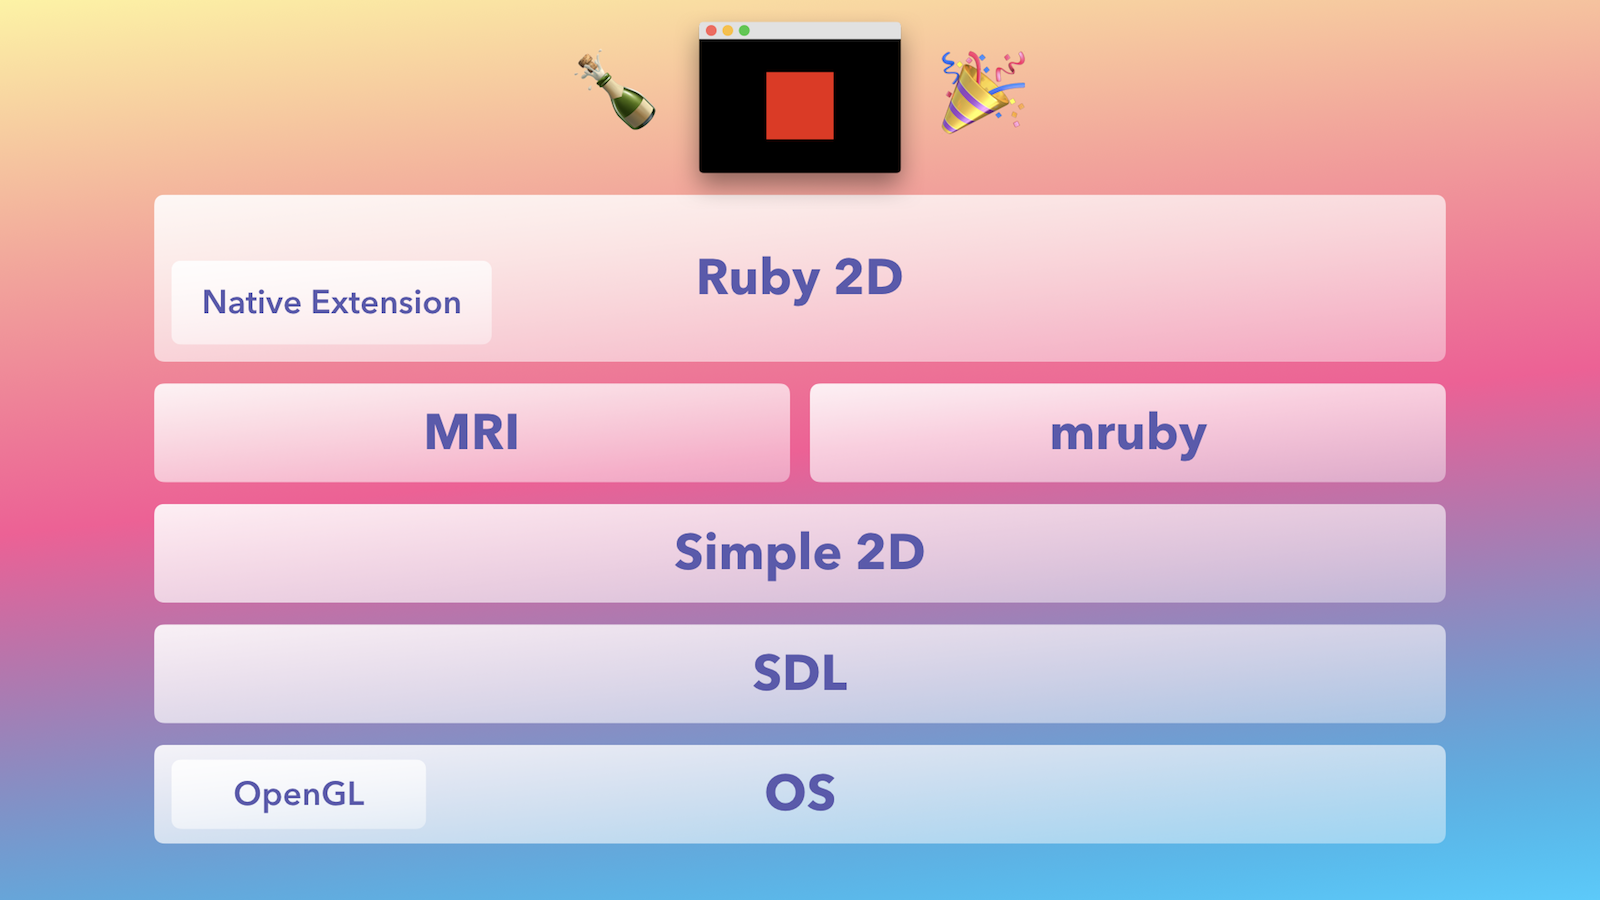
This native extension will live happily inside a gem we'll call "Ruby 2D" (more on that later). Let's celebrate because we have everything to make our "red square" Ruby application, hurray! 🙌

But wait a second...

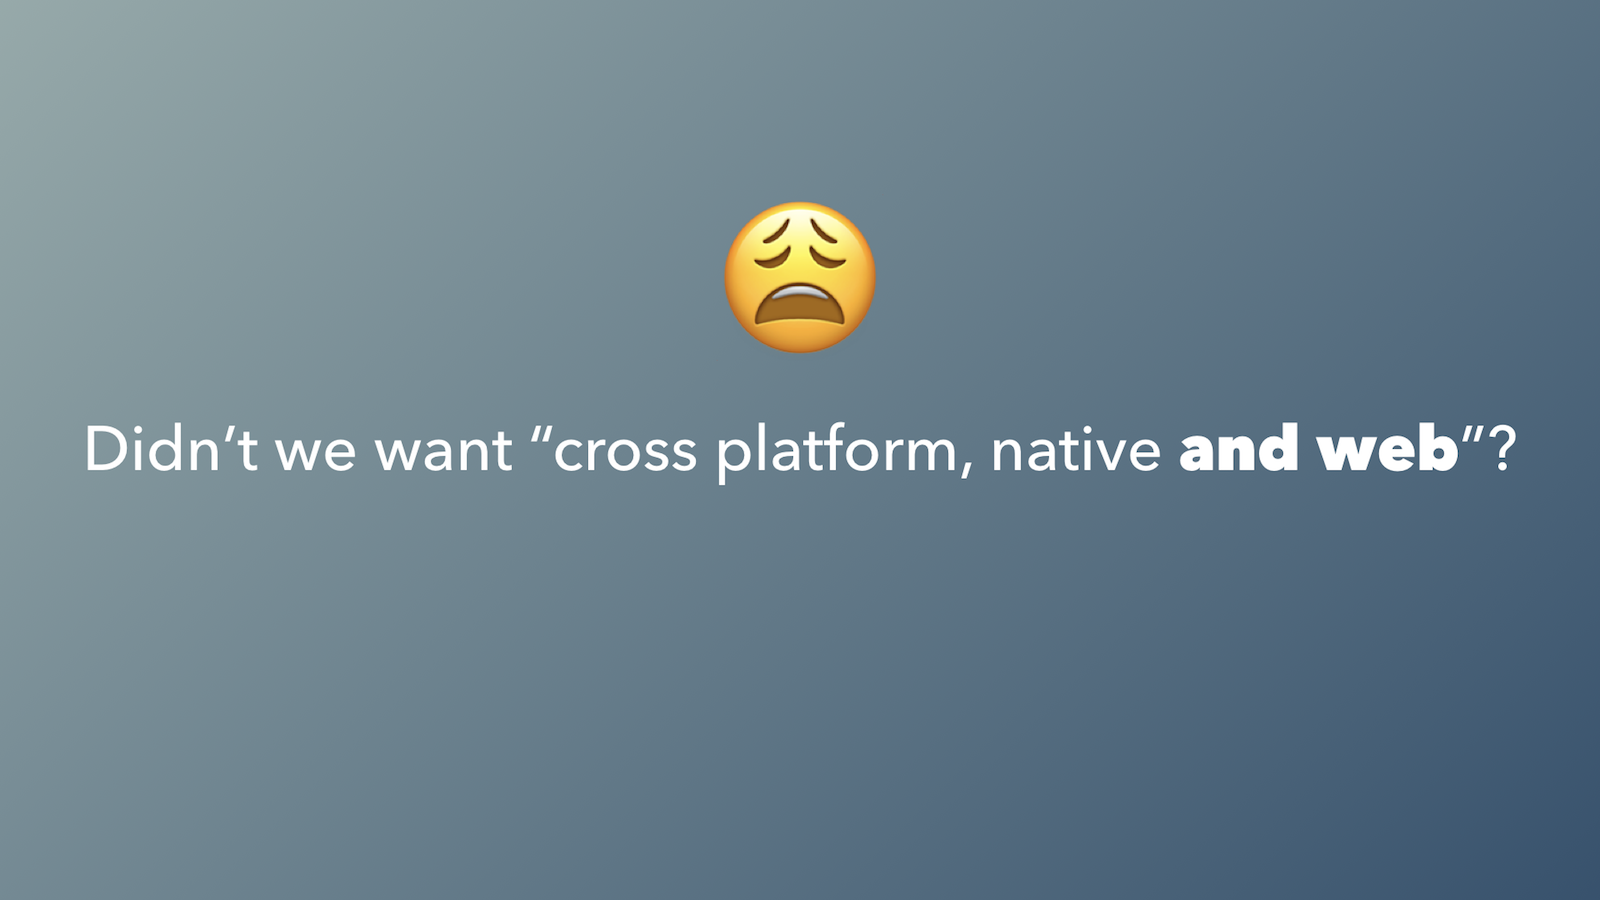
Wasn't one of our goals for this to also work _on the web_? Yes, it was. Let's not give up yet — we're so close!

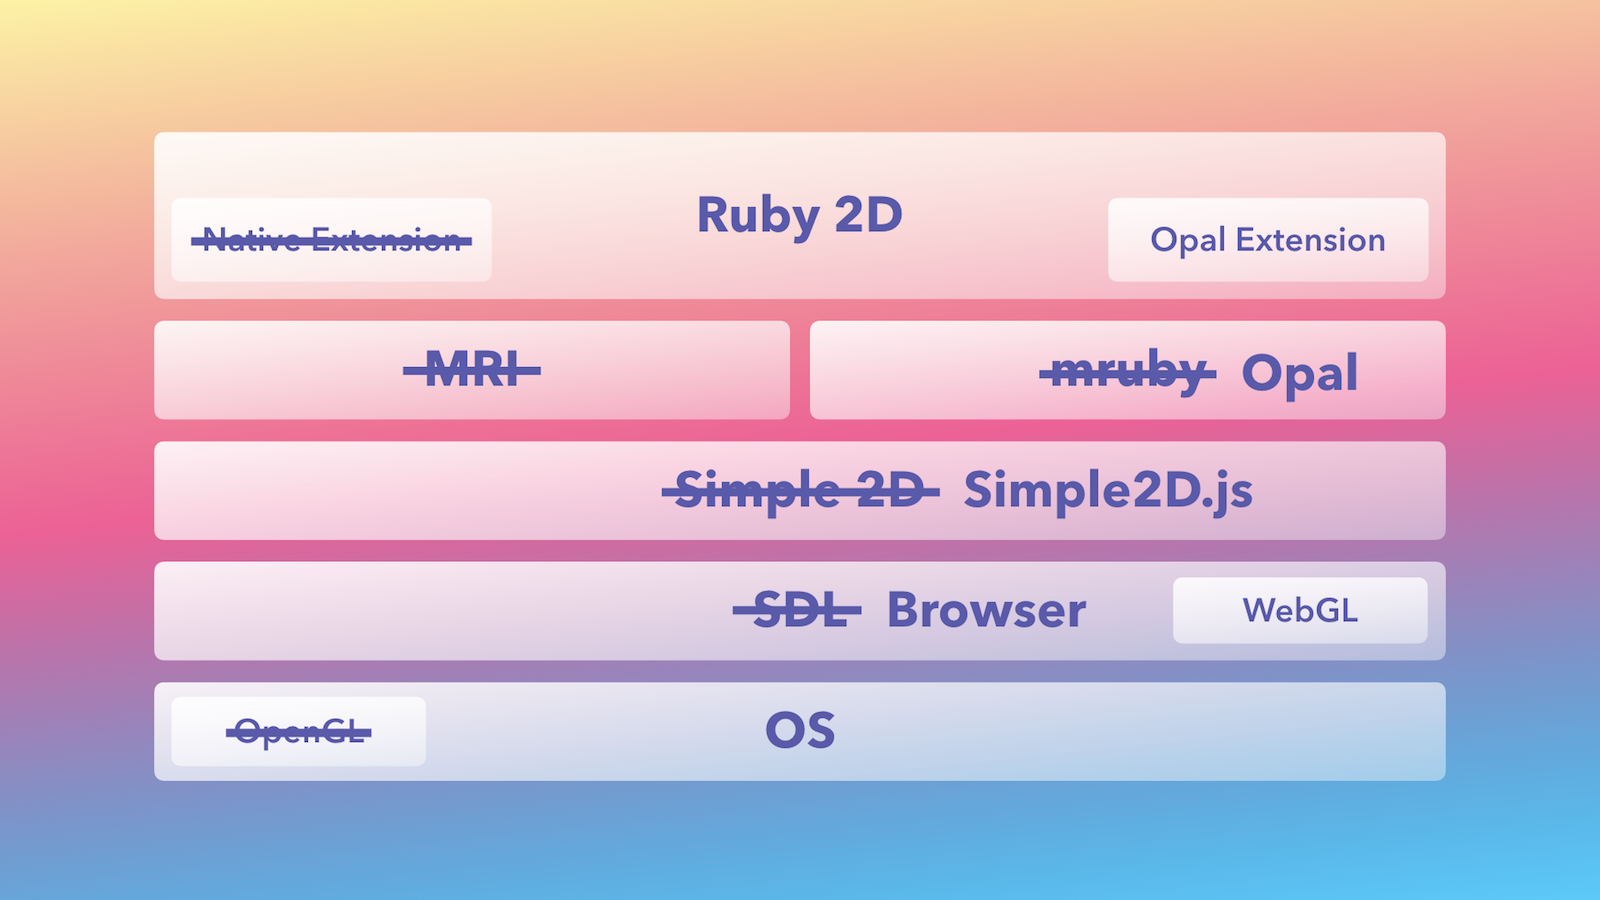
If we go back to our stack, what would we change to support the web? Let's start at the bottom...

➖ We don't need **OpenGl**, since that's for native desktop graphics.
➖ We can get rid of **SDL**, because...
➕ ...the **browser** provides us with the same cross-platform access to everything we need.
➕ The browser also gives us [**WebGL**](https://en.wikipedia.org/wiki/WebGL), which is OpenGL designed for web browsers.
➖ We won't use **Simple 2D**, since again, that's only for native apps, but...
➕ ...we can port it to JavaScript, and call it [**Simple2D.js**](https://github.com/simple2d/simple2d.js), so we have a similar, clean API for the web.
➖ We can't use either **MRI** or **mruby**, but...
➕ ...we _can_ use an implementation of Ruby made for the web, called **Opal**.
➖ The **native extension** won't be of much use to us here. Instead...
➕ ...we'll write an **Opal extension**

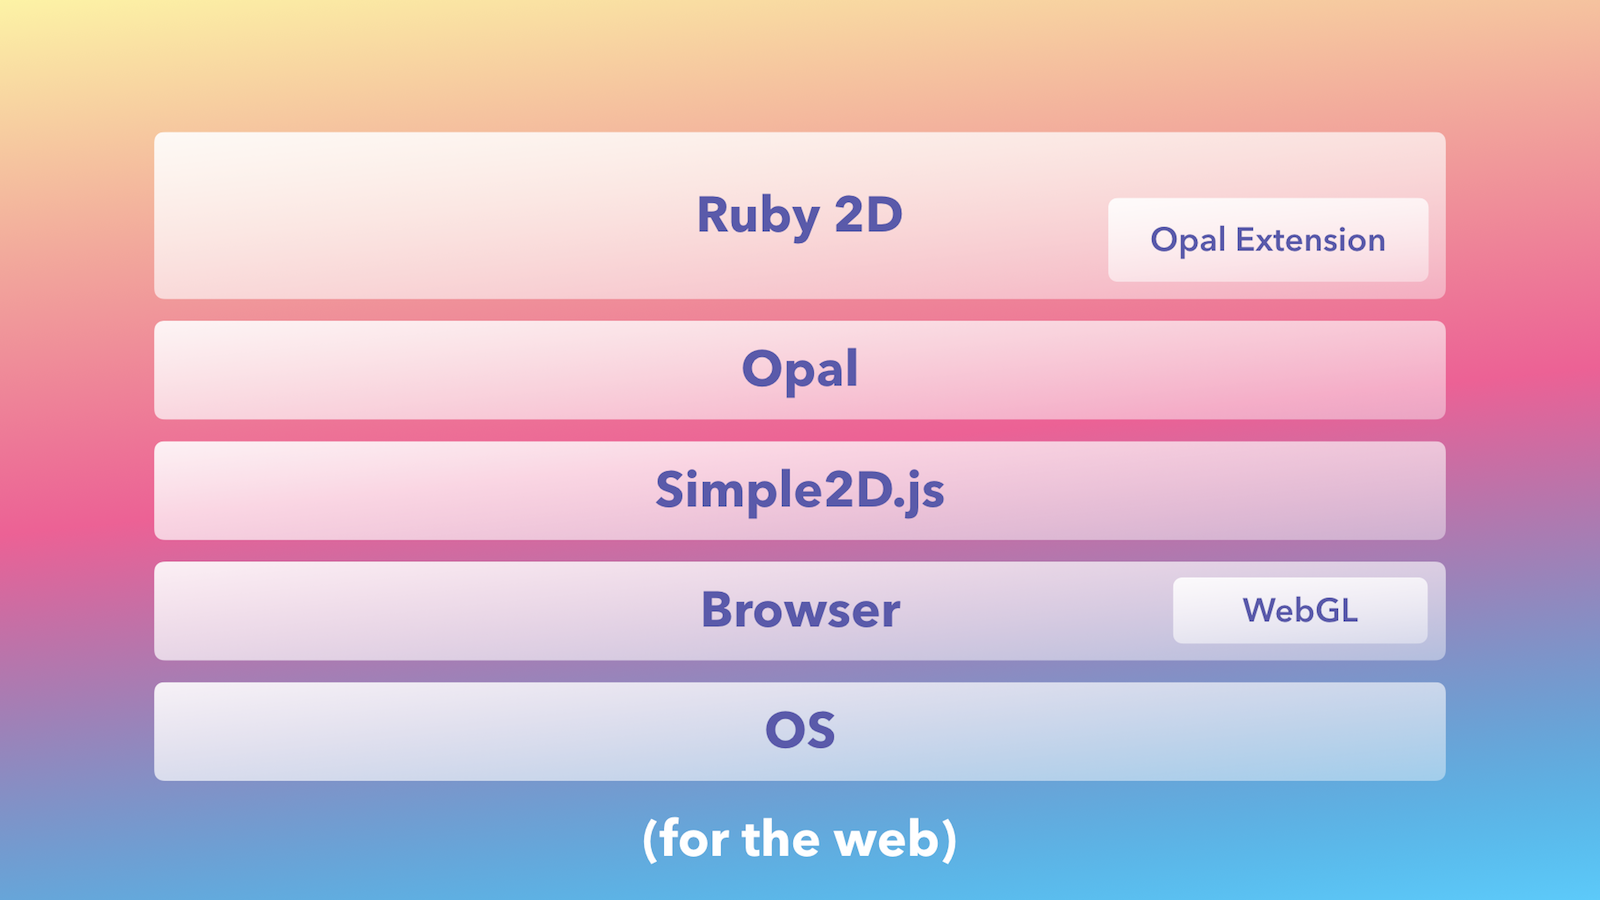
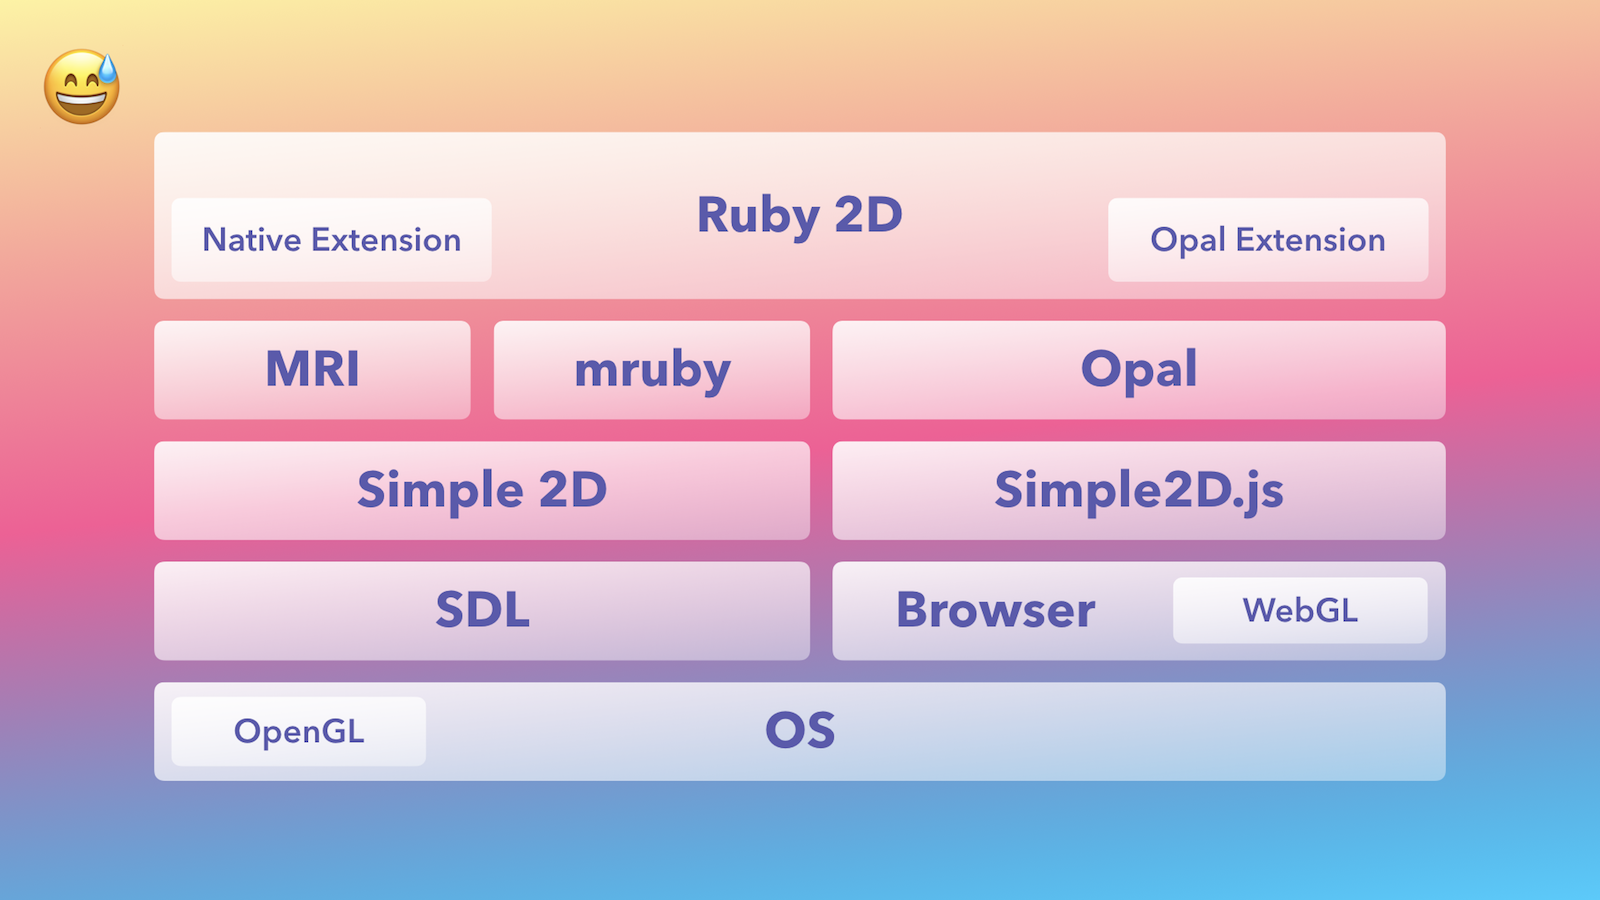
Here's the whole stack for the web, all cleaned up.

Are you familiar with Opal? If not...

[Opal](http://opalrb.com) is a source-to-source compiler so you can run Ruby in your web browser. Let's take a look at how it works.

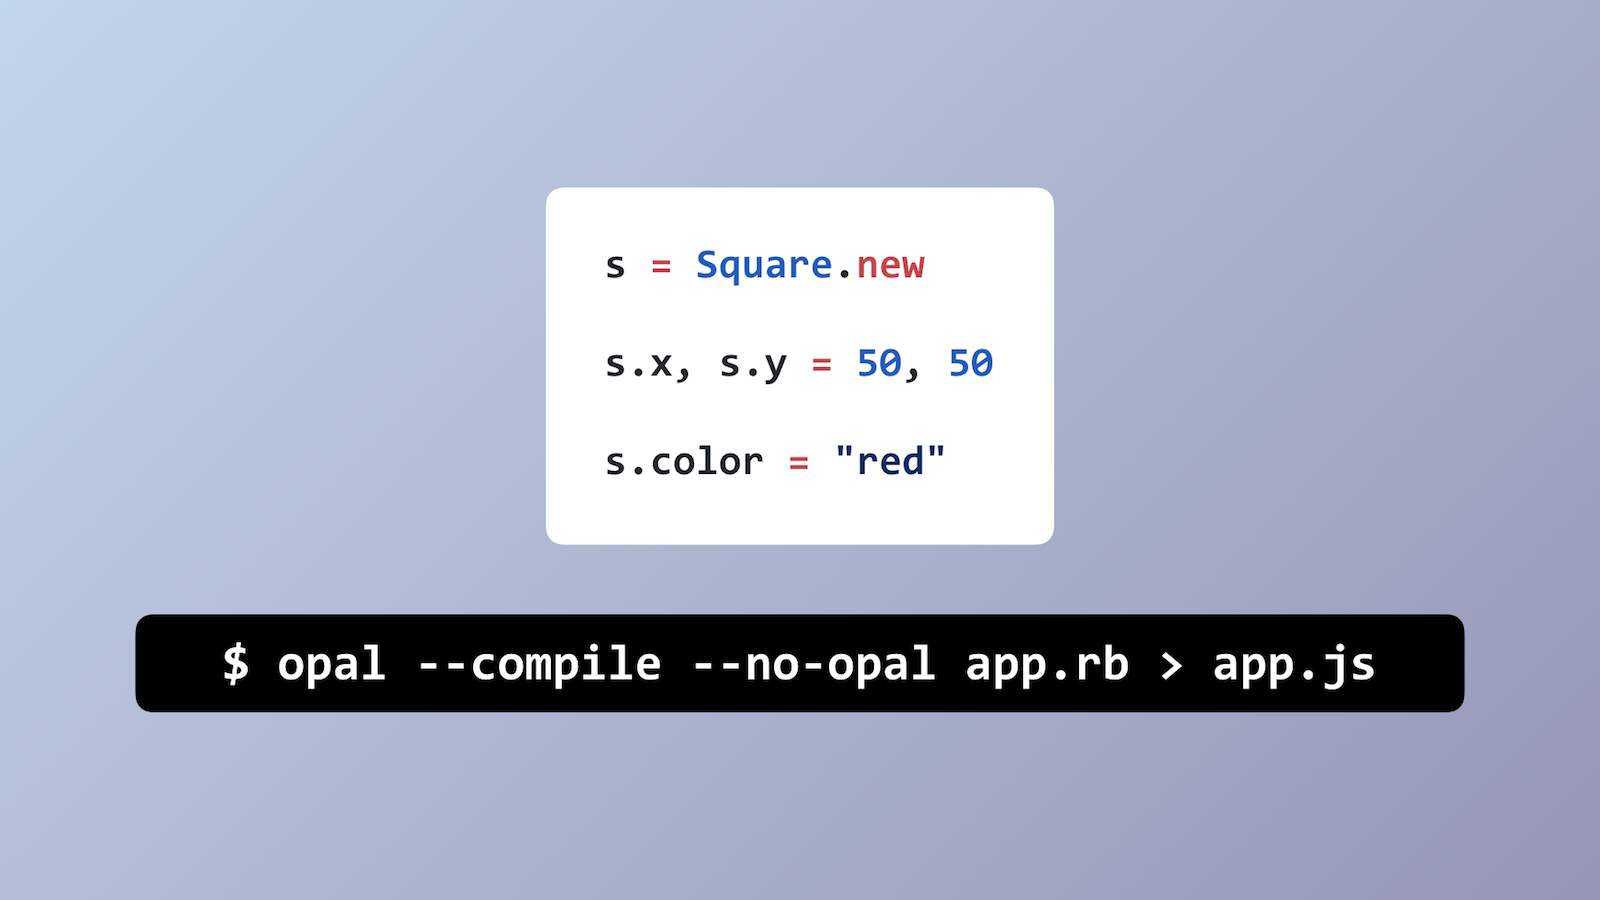
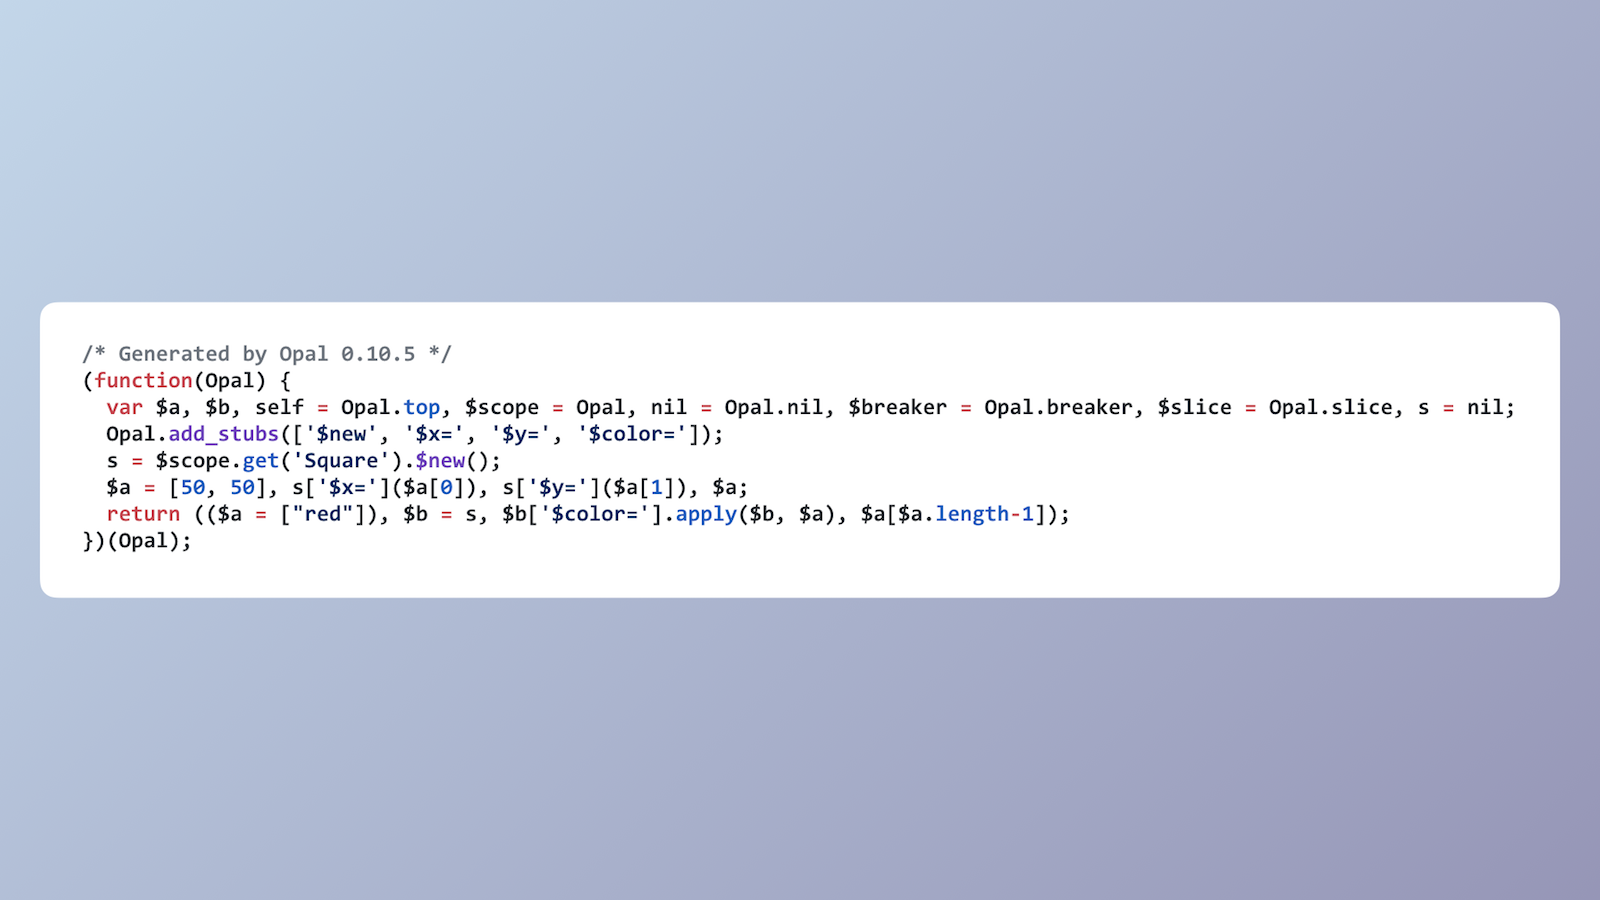
With Opal, we can "compile" Ruby to JavaScript. So, if we take our same "red square" application in Ruby, and run this Opal command to translate only this snippet (and not include the full Opal library, which is rather large)...

...we'll get this generated JavaScript code. It's not meant to be readable, but if you know JavaScript, you can kind of see what's going on. 🧐

If you'd like, [take a look at the code](#web-extension-for-opal) from this slide and the next, with a bit more detail about what's going on.

Like our native extension, we'll have to write one for the web — an Opal extension.

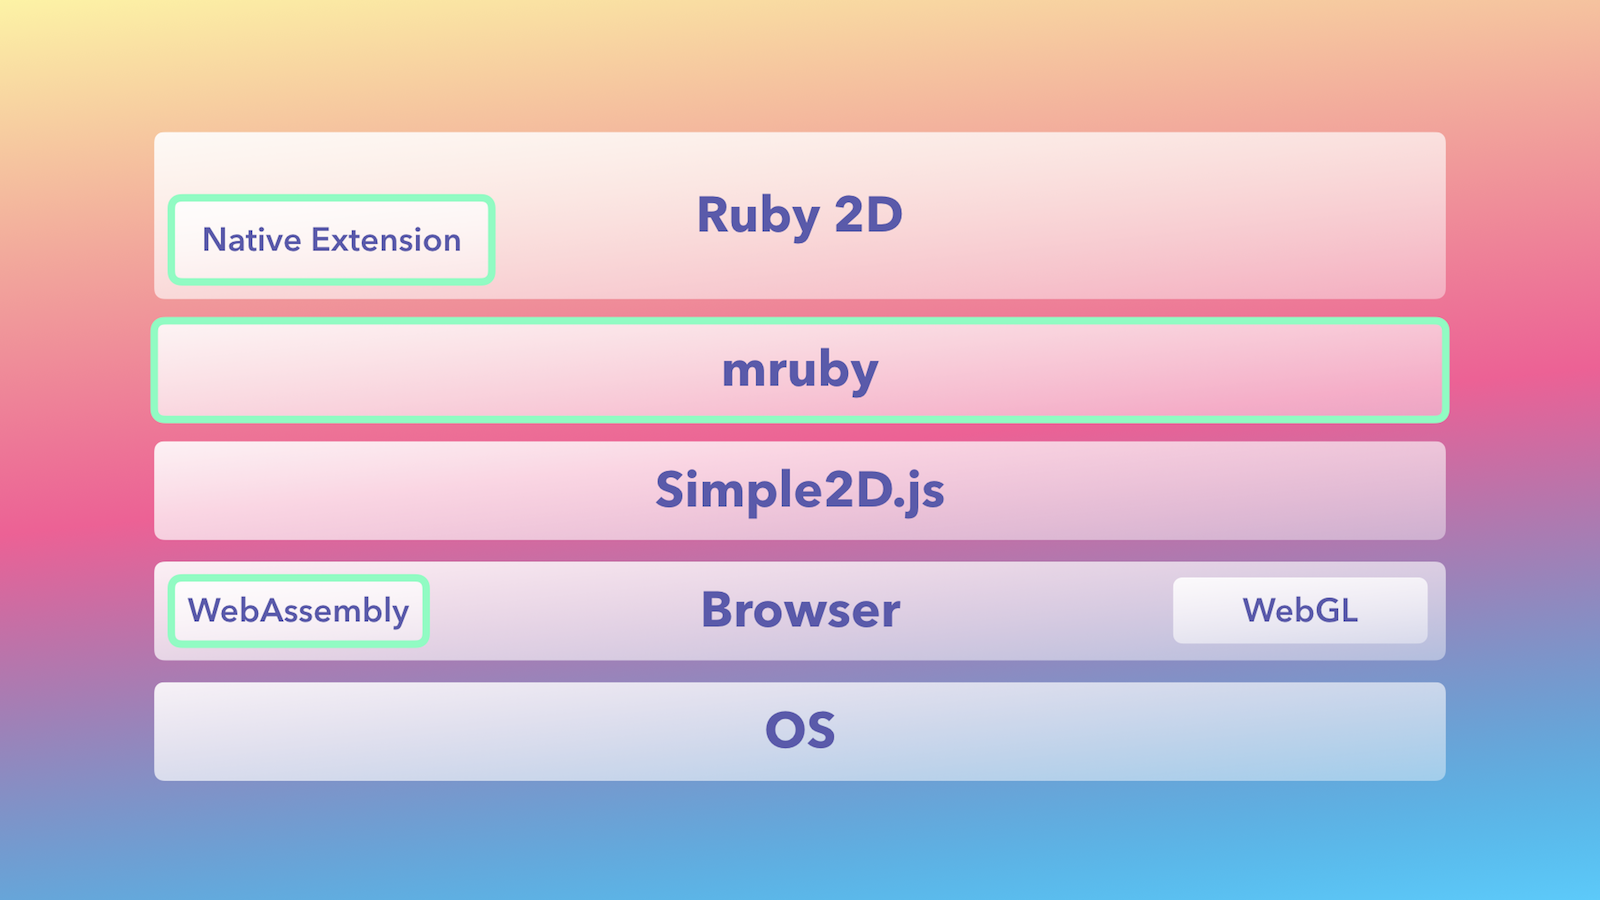
Eariler I said we couldn't use mruby, but actually with [WebAssembly](http://webassembly.org) on the horizon, one day we could compile our Ruby application to "native" code for the browser. This could have a number of exciting advantages, like performance and ease of distribution, but I digress...

And _now_ we're done! Here's the full stack, native and web included. This might seem like a lot is going on here, but every piece is nice and contained, doing exactly what it's suppose to and nothing more (and that's what we like as programmers, right? 🤓).

Now let's talk about that last piece sitting on top — Ruby 2D.

[**Ruby 2D**](http://www.ruby2d.com) is a gem, and it's where we'll create our Ruby graphics and gaming experience. Thanks to all that the gem is built on, we'll be able to make cross-platform 2D applications in Ruby and run them interpreted (with MRI), build them natively (using mruby), and for the web (using Opal). Sweet! 😎

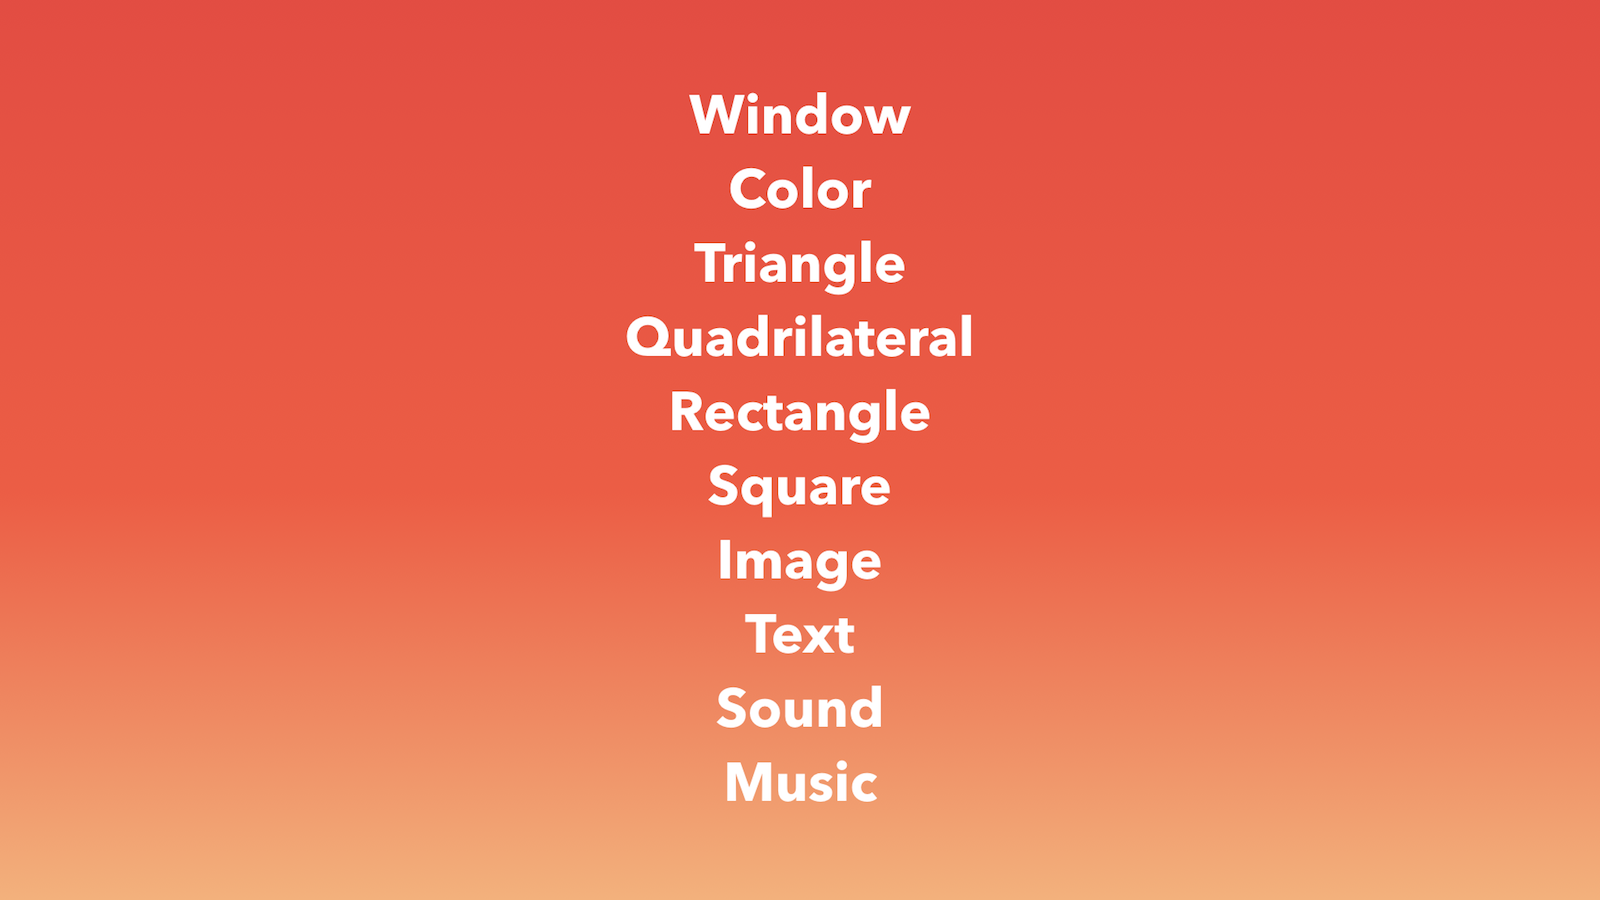
Inside this gem, we'll find a bunch of classes representing all sorts of things, like windows, colors, shapes, sounds, and more. This is our opportunity to construct higher-level concepts from our low-level interfaces.

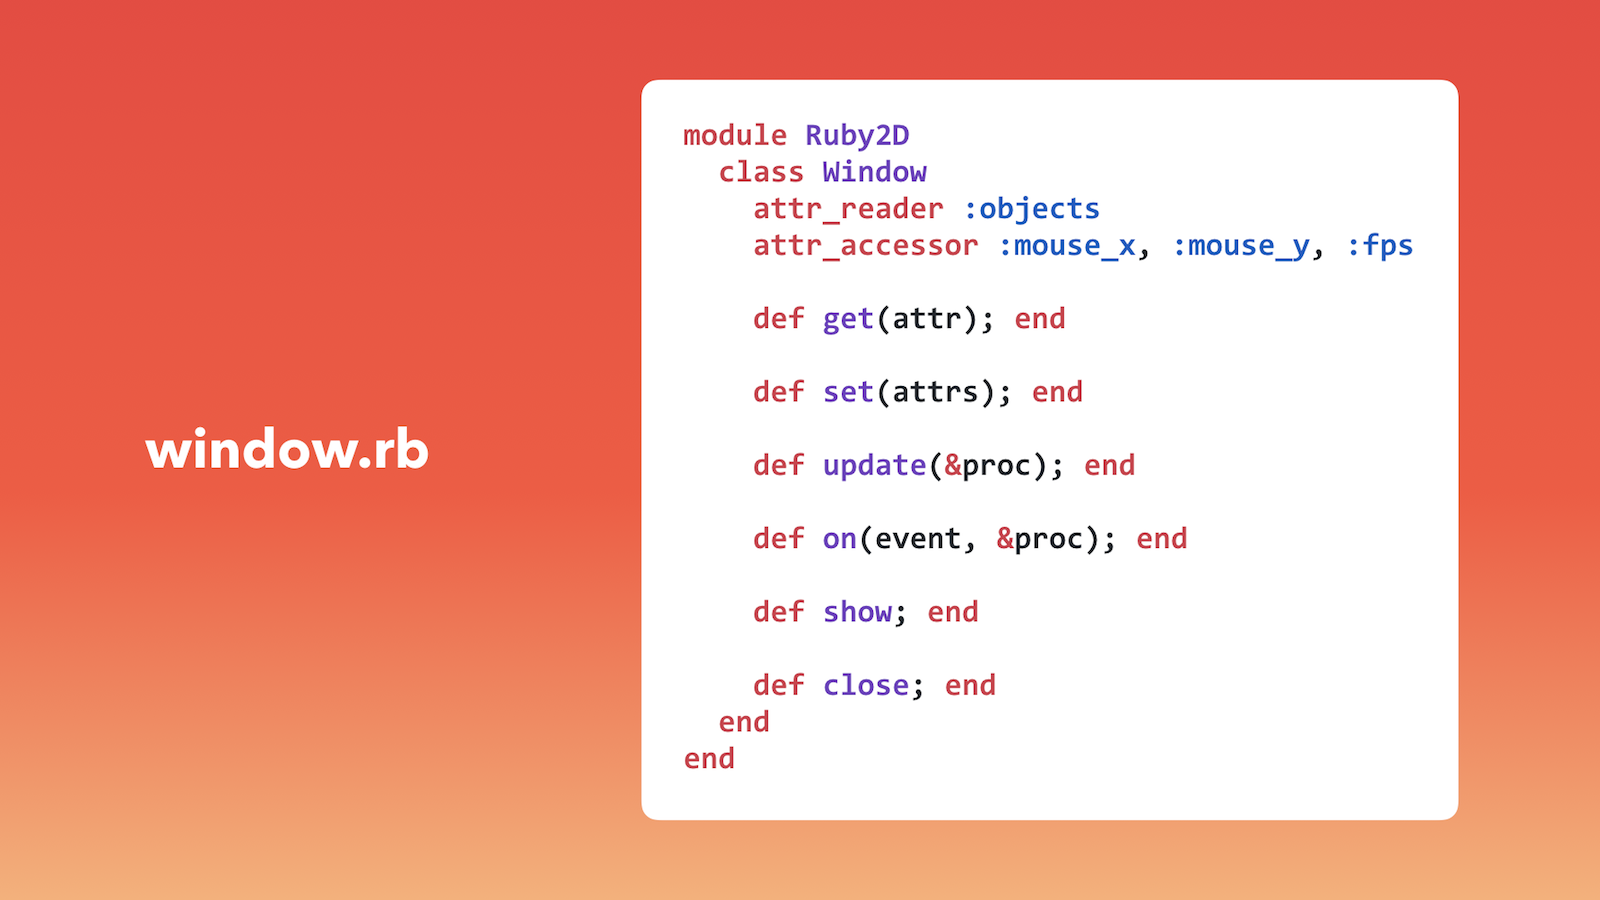
Let's look inside the [`Window` class](https://github.com/ruby2d/ruby2d/blob/master/lib/ruby2d/window.rb) (this is just an outline shown here). We'll find methods for useful things like getting and setting attributes, defining functionality for our update loop, event handlers for inputs, and showing and closing the window.
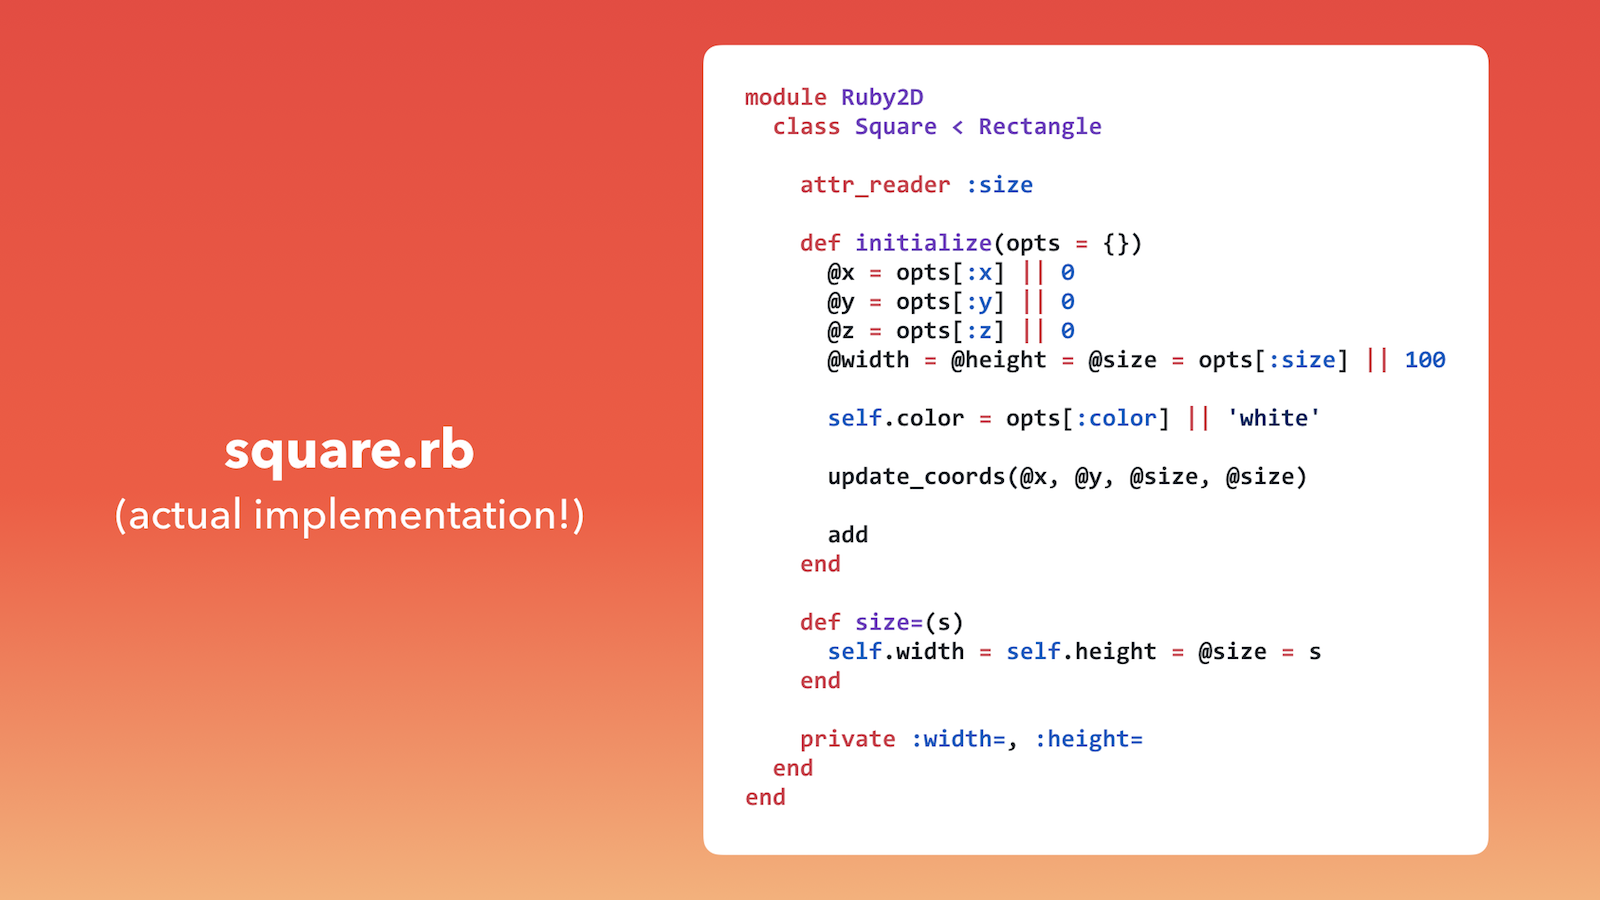
Here's the [`Square` class](https://github.com/ruby2d/ruby2d/blob/master/lib/ruby2d/square.rb) — this is actually the full implementation! You'll see it inherits from the [`Rectangle` class](https://github.com/ruby2d/ruby2d/blob/master/lib/ruby2d/rectangle.rb) and initializes coordinates, size, and color.
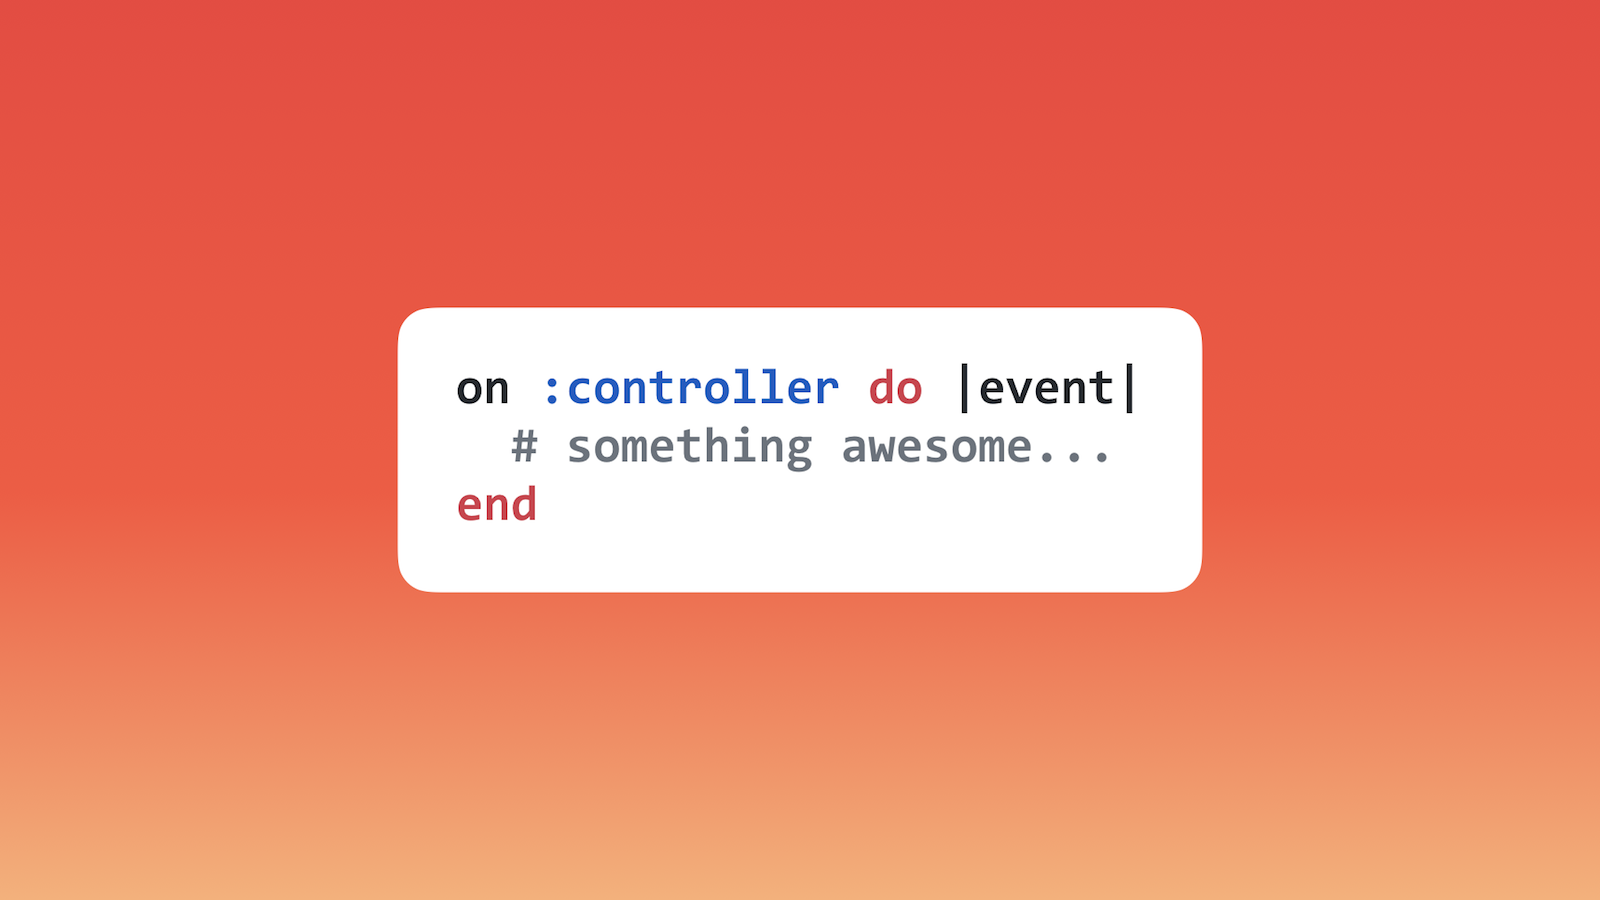
We've seen what the gem looks like on the inside, so now let's see what it's like to actually _use_ it. For me, it's fascinating and fun to think about what a [domain-specific language](https://en.wikipedia.org/wiki/Domain-specific_language), or DSL, could be for graphics and game programming (and Ruby excels at creating DSLs). Yes, we're free to imagine any experience we want, but there's also some great sources of inspiration.

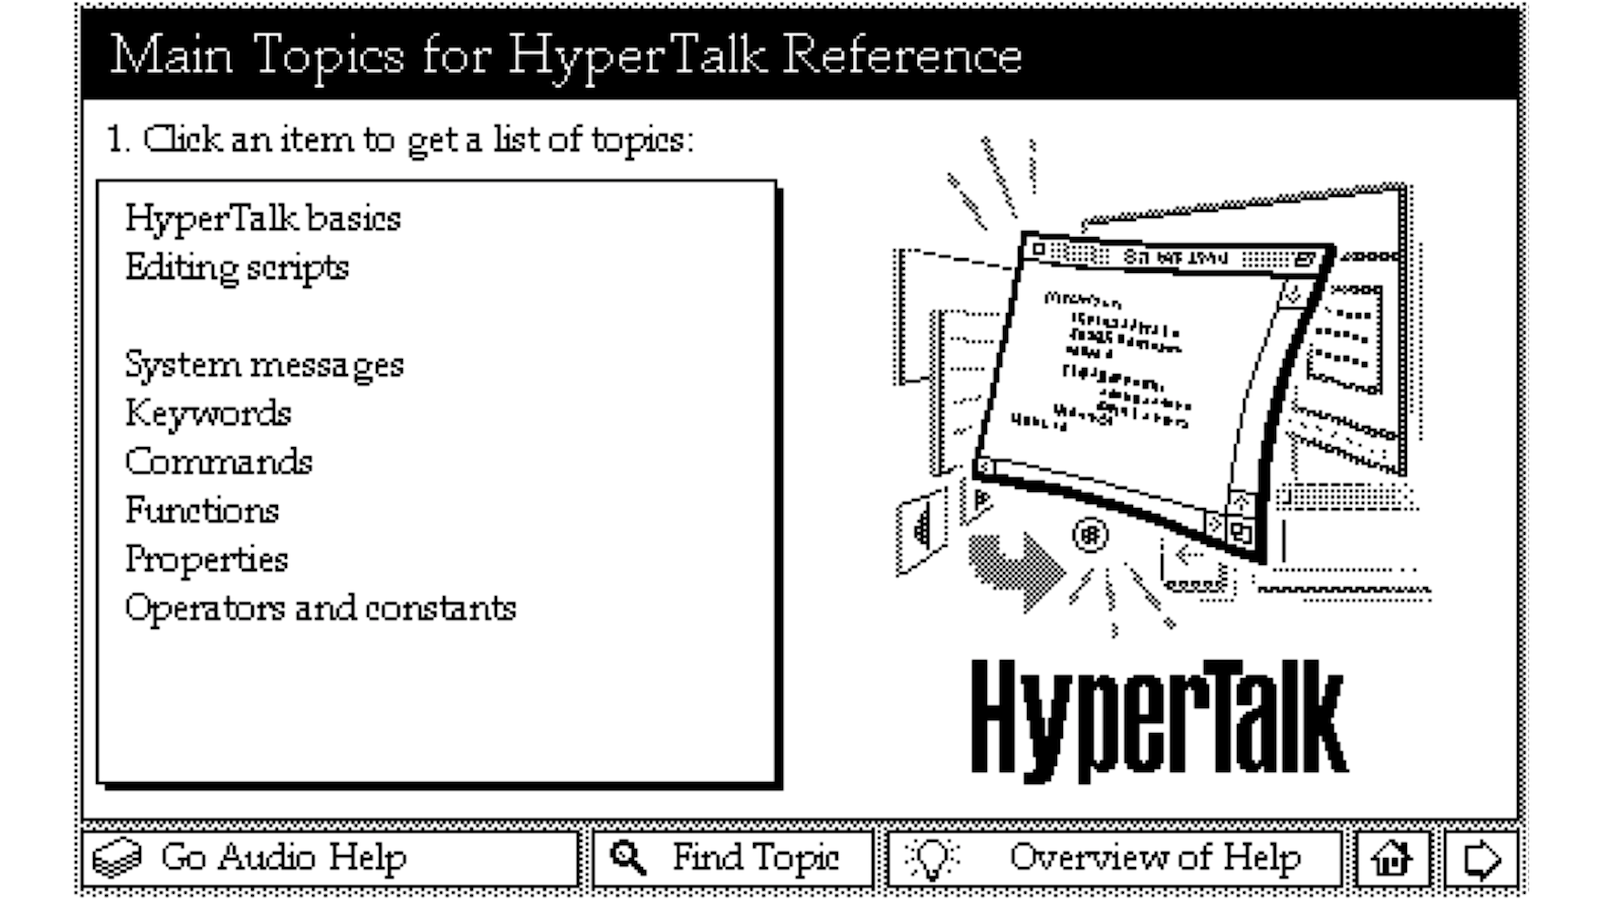
One of these places for immense inspiration is [HyperTalk](https://en.wikipedia.org/wiki/HyperTalk) the scripting language for [HyperCard](https://en.wikipedia.org/wiki/HyperCard), an application introduced for the Macintosh back in 1987, which was kind of like an early web browser where you could create "stacks" of cards and program them to make interactive.

Zachary Schroeder gave a talk about [building HyperCard in Ruby](https://www.youtube.com/watch?v=WtUc4G2QDeQ) at this RubyConf, which was built using [Shoes](http://shoesrb.com), which Jason R. Clark also [gave a talk on](https://www.youtube.com/watch?v=EjN2ep1T6M8) (small 🌎).

HyperTalk was incredibly intuitive and expressive (kind of like Ruby 😉), and was quite revolutionary in its day (30 years ago).

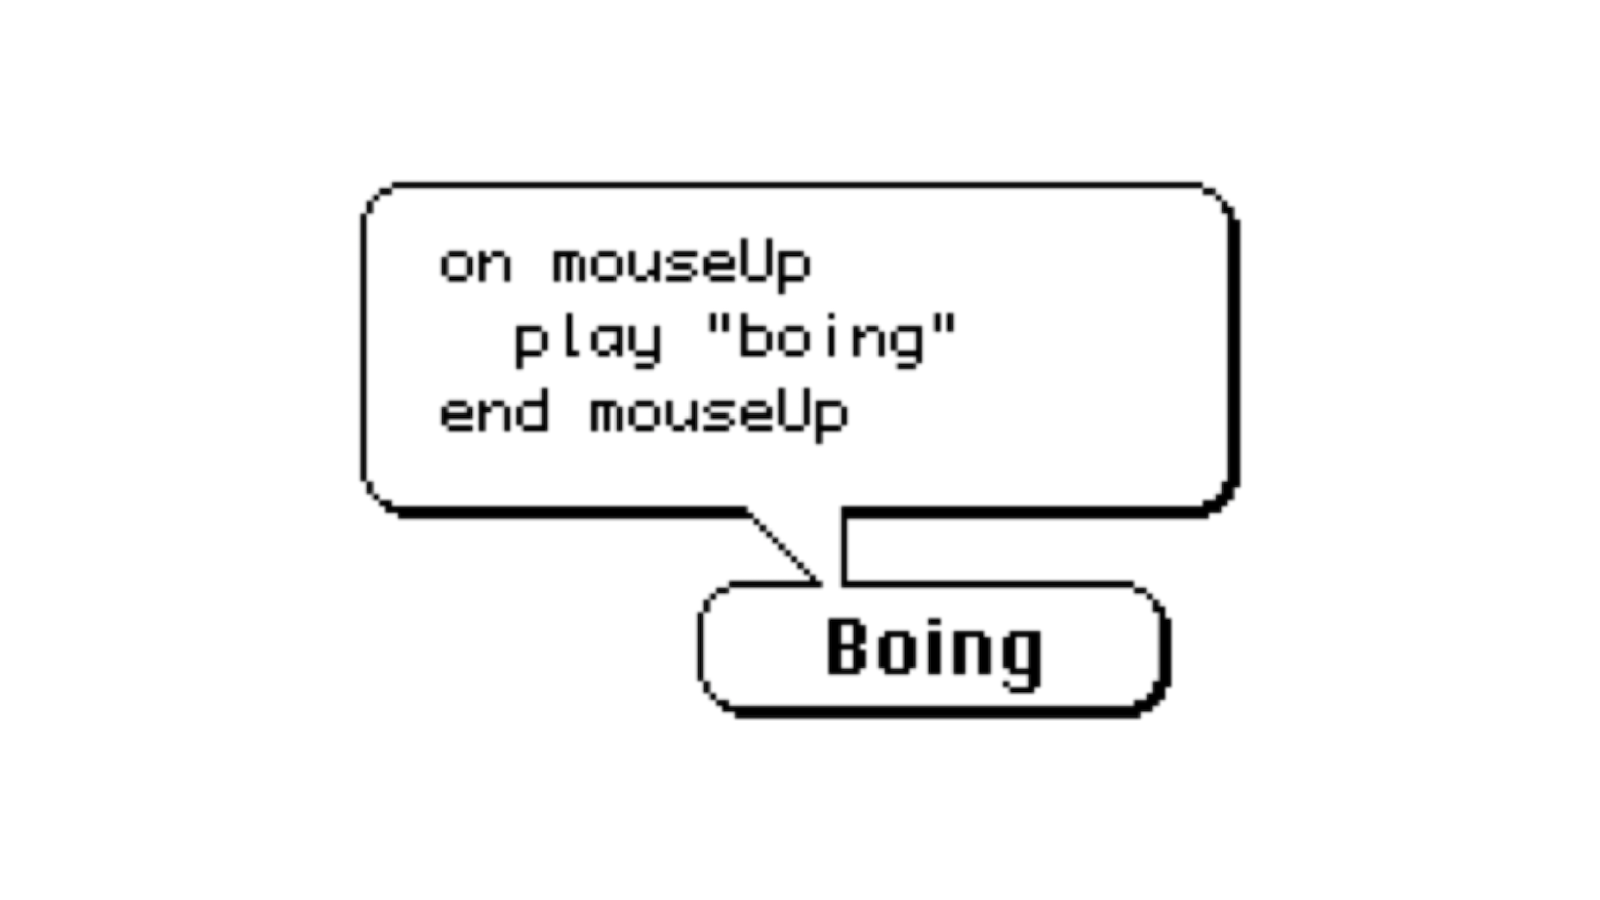
In this example, when the button on screen is clicked with the mouse, the "boing" sound will play after the mouse is released. Easy!

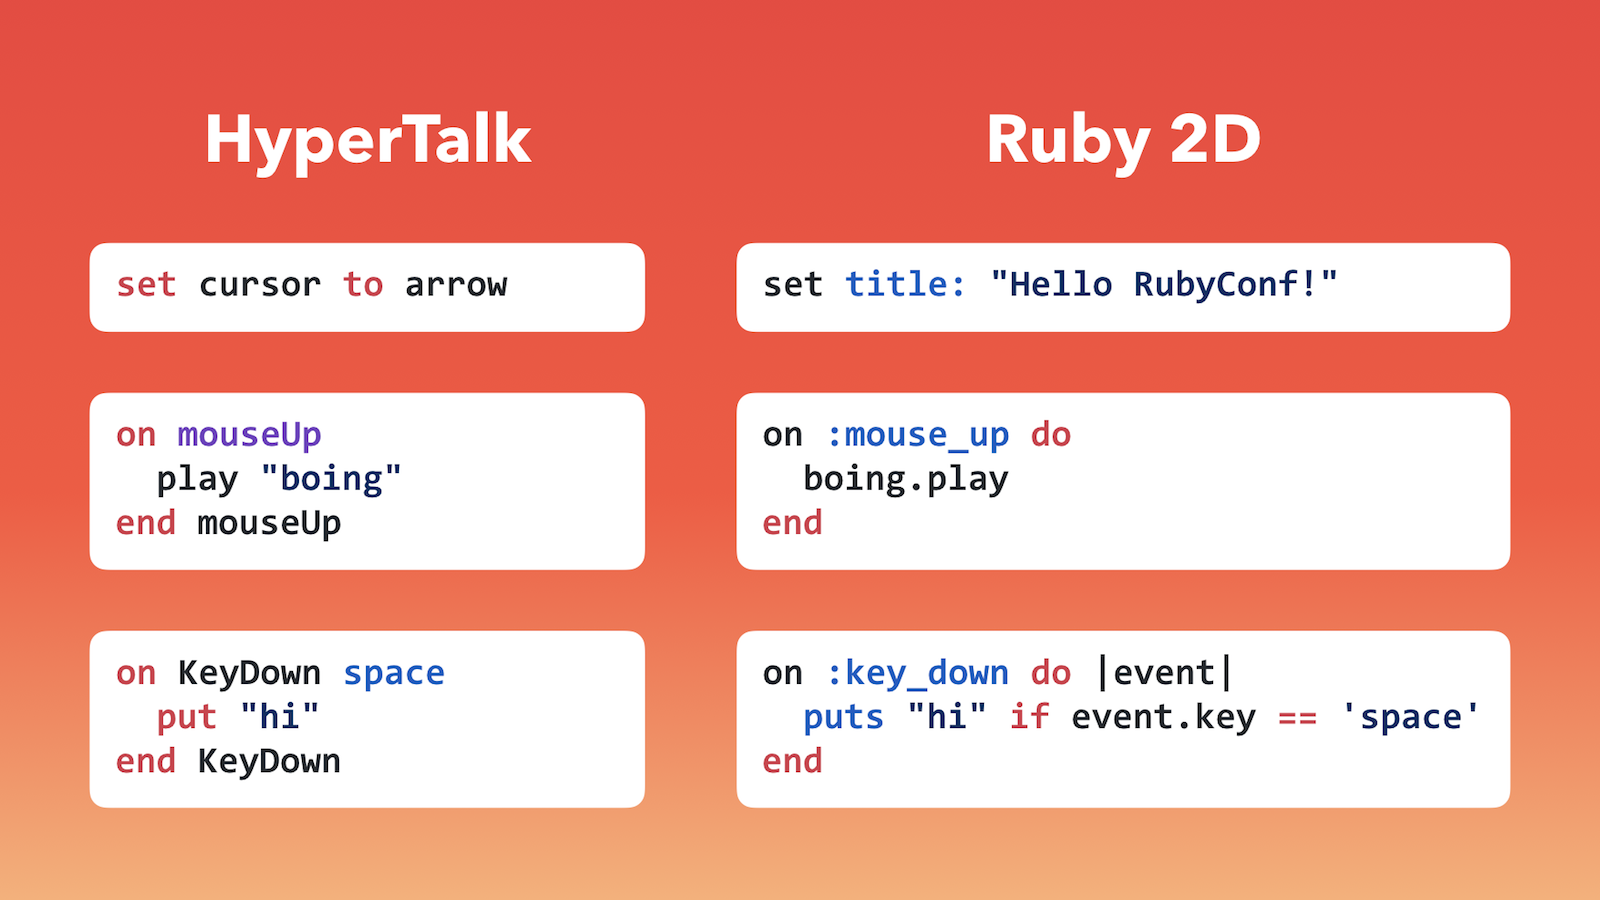
If we were to compare HyperTalk with Ruby 2D's DSL, how would it stack up? Here are a few examples comparing similar features.

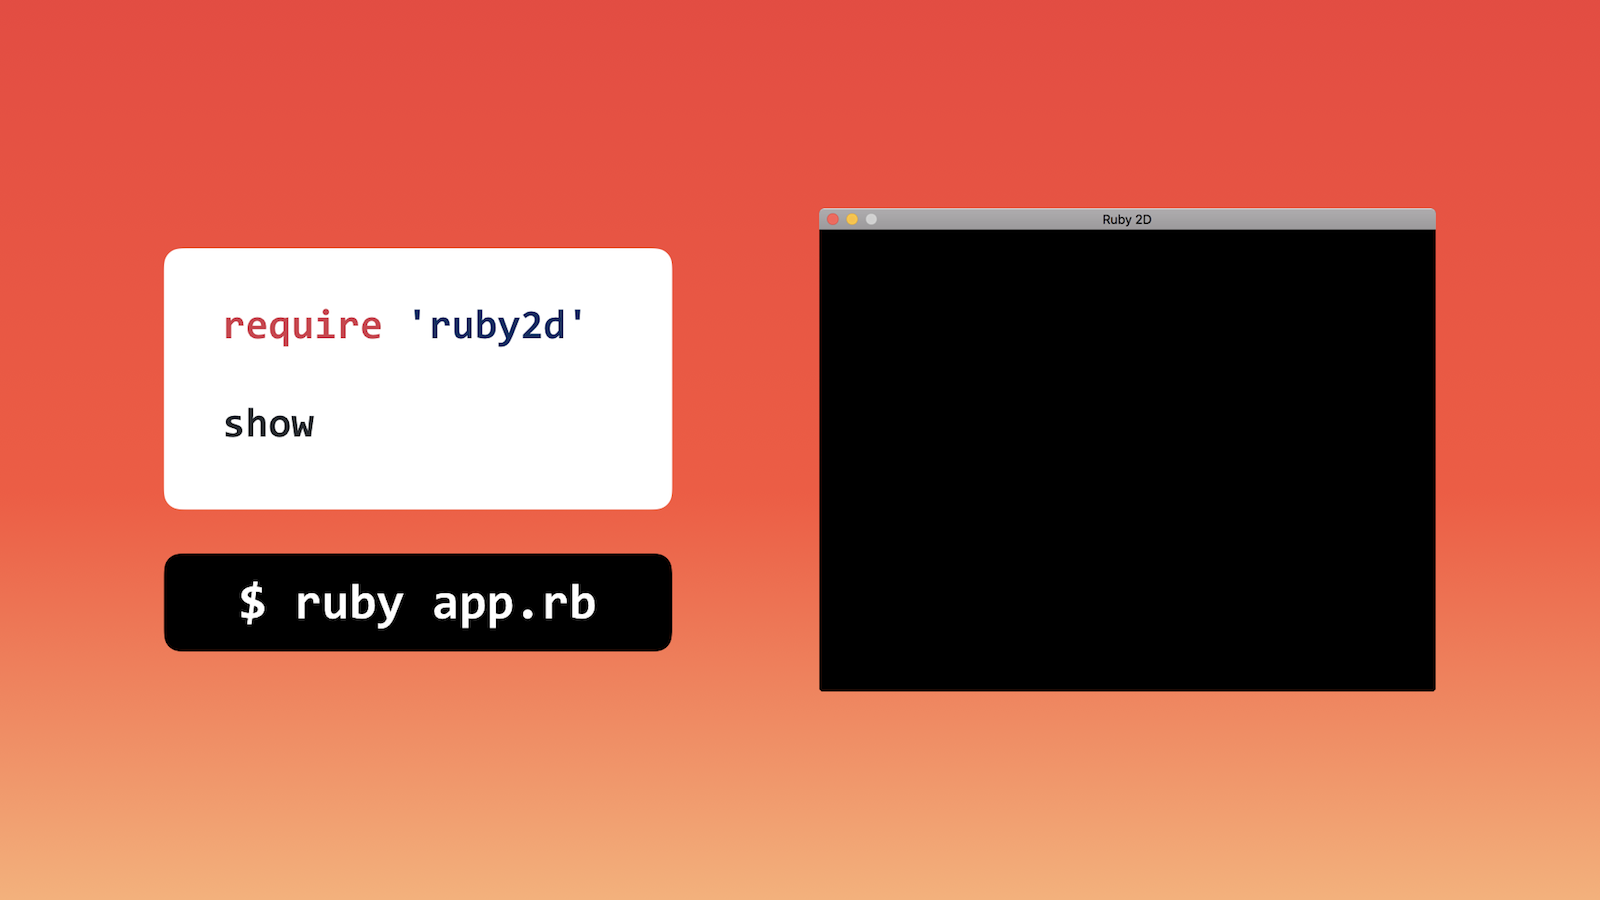
Now let's see Ruby 2D in action. The simplest application we can write has two parts: a `require` statement and a call to the DSL method to `show` the window. Running this like any other Ruby script will launch an empty window, 640-by-480 pixels in size. Simple!


And now, we can finally write our famous "red square" app. 😅

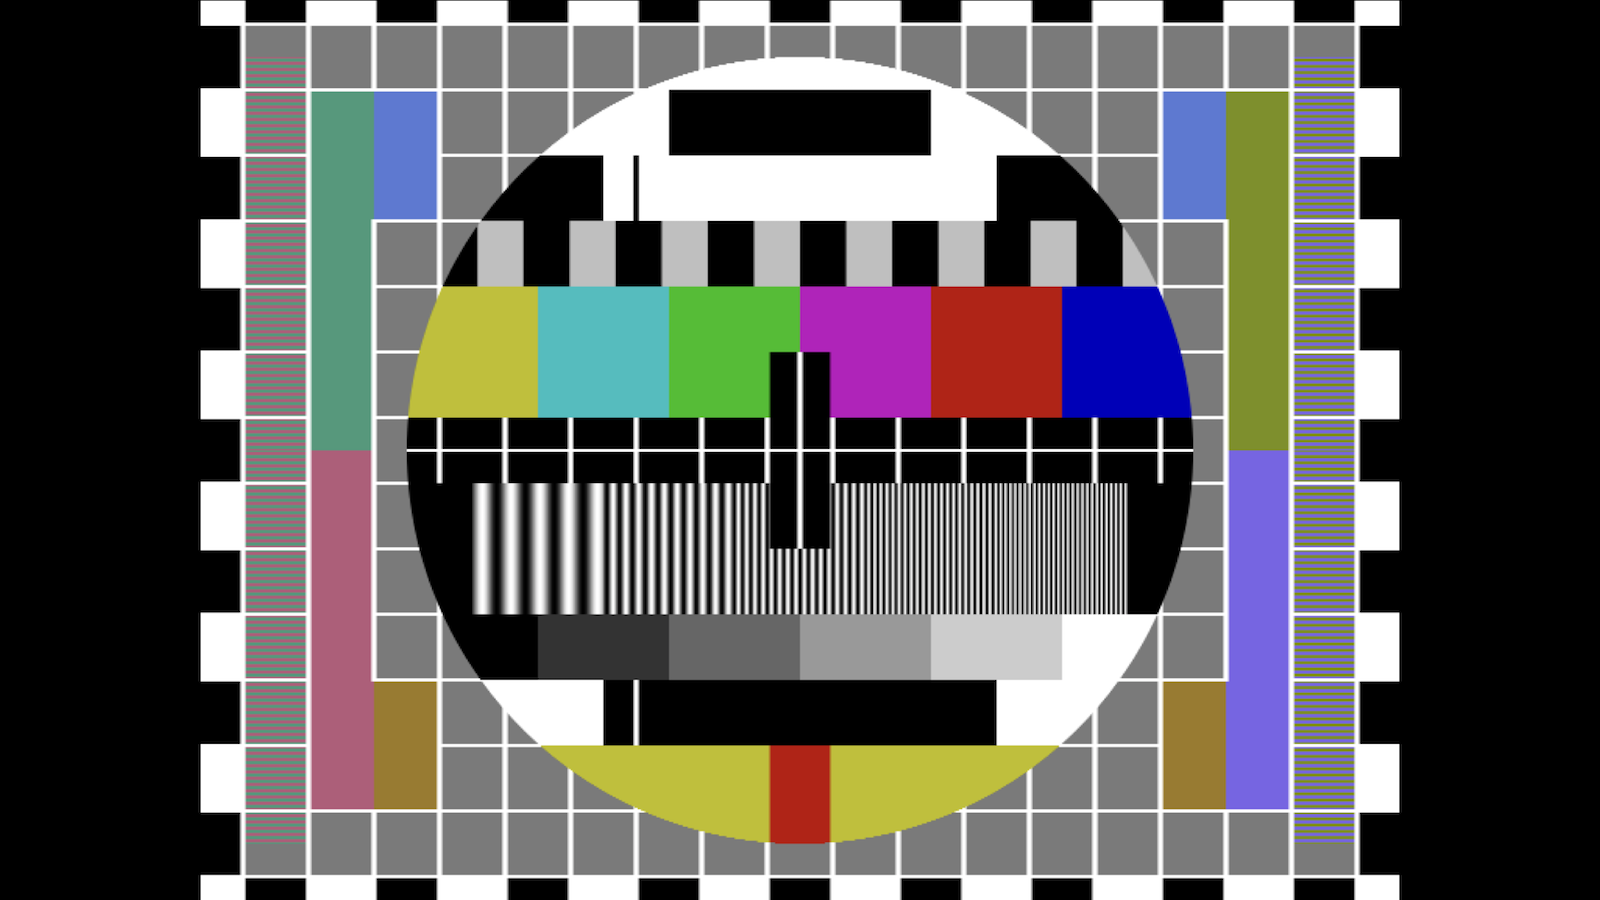
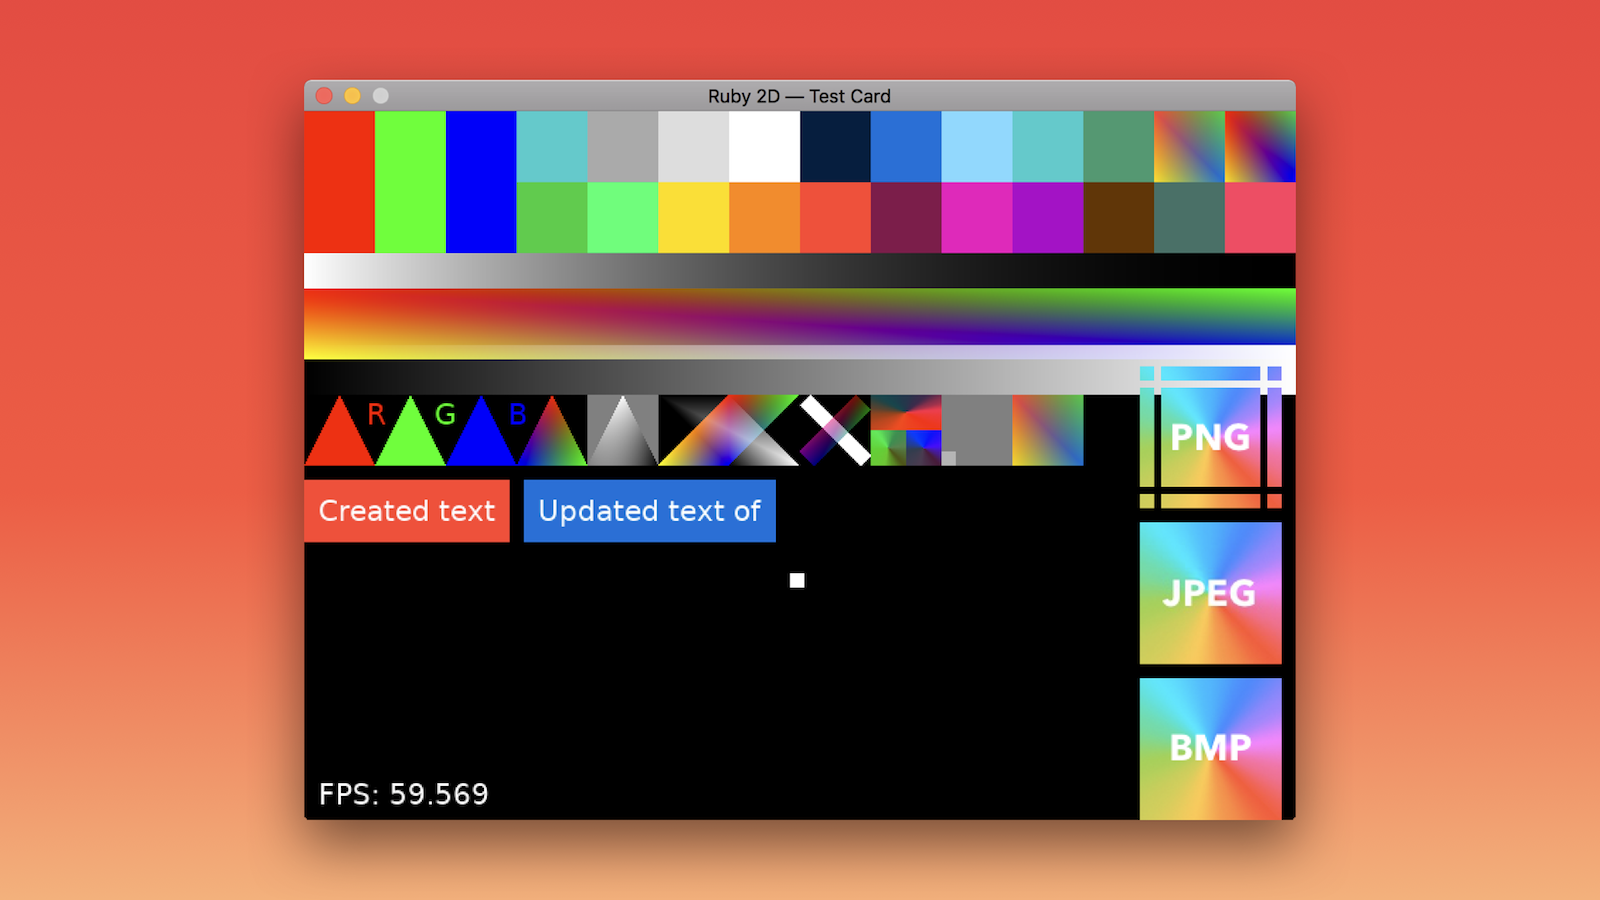
As we add features and functionality, how do we know everything is actually working as intended? Of course we can write unit tests, but in graphics and gaming, we also want to make sure things _look_ correct. That can be a bit more difficult to test, but can take a hint from TV and use a [test card](https://en.wikipedia.org/wiki/Test_card).

Here's [Ruby 2D's test card](https://github.com/ruby2d/ruby2d/blob/master/test/testcard.rb). It includes everything that the gem can render. [We also have tests](https://github.com/ruby2d/ruby2d/tree/master/test) for audio, input events, and more.

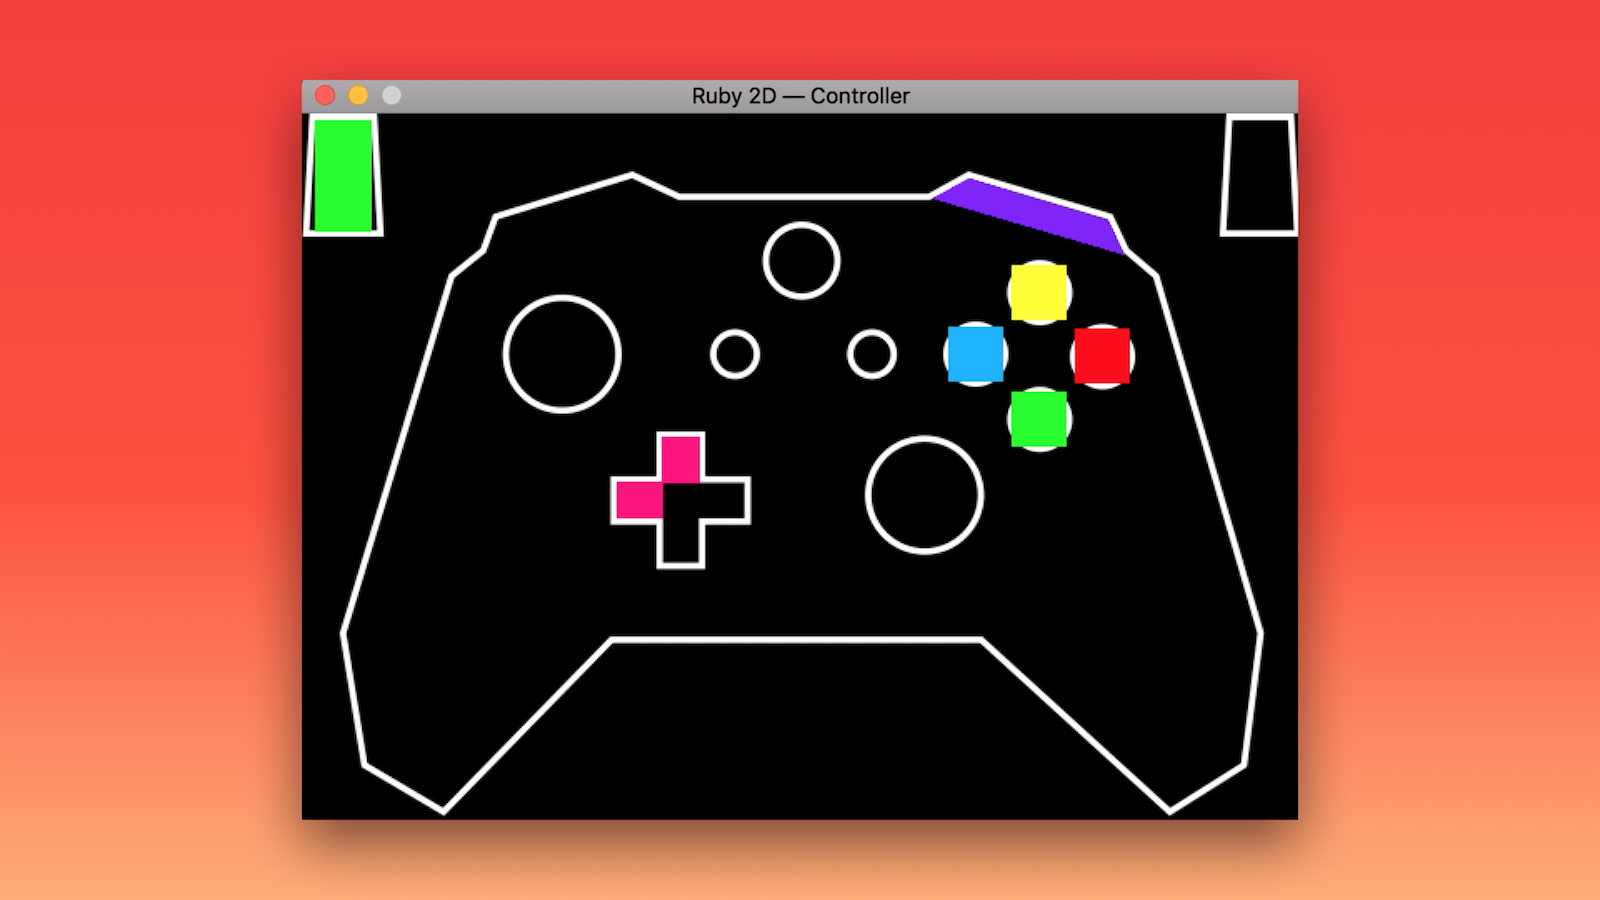
Ruby 2D can do a lot, like automatically detect any game controller, even ones that are plugged in on-the-fly, wired or wireless. This is thanks to [SDL's game controller interface](https://wiki.libsdl.org/CategoryGameController) and the hard work of many contributors who buy and test a wide variety of controller and joystick devices.

Thanks to Ruby, we can make a simple, yet powerful programmer interface to these controllers. 🎮

Working together, Ruby 2D and SDL conveniently map all joysticks and buttons to a generic [Xbox controller layout](https://en.wikipedia.org/wiki/Xbox_360_controller), so you can focus on what you're making, not what all these dang button identifiers mean.

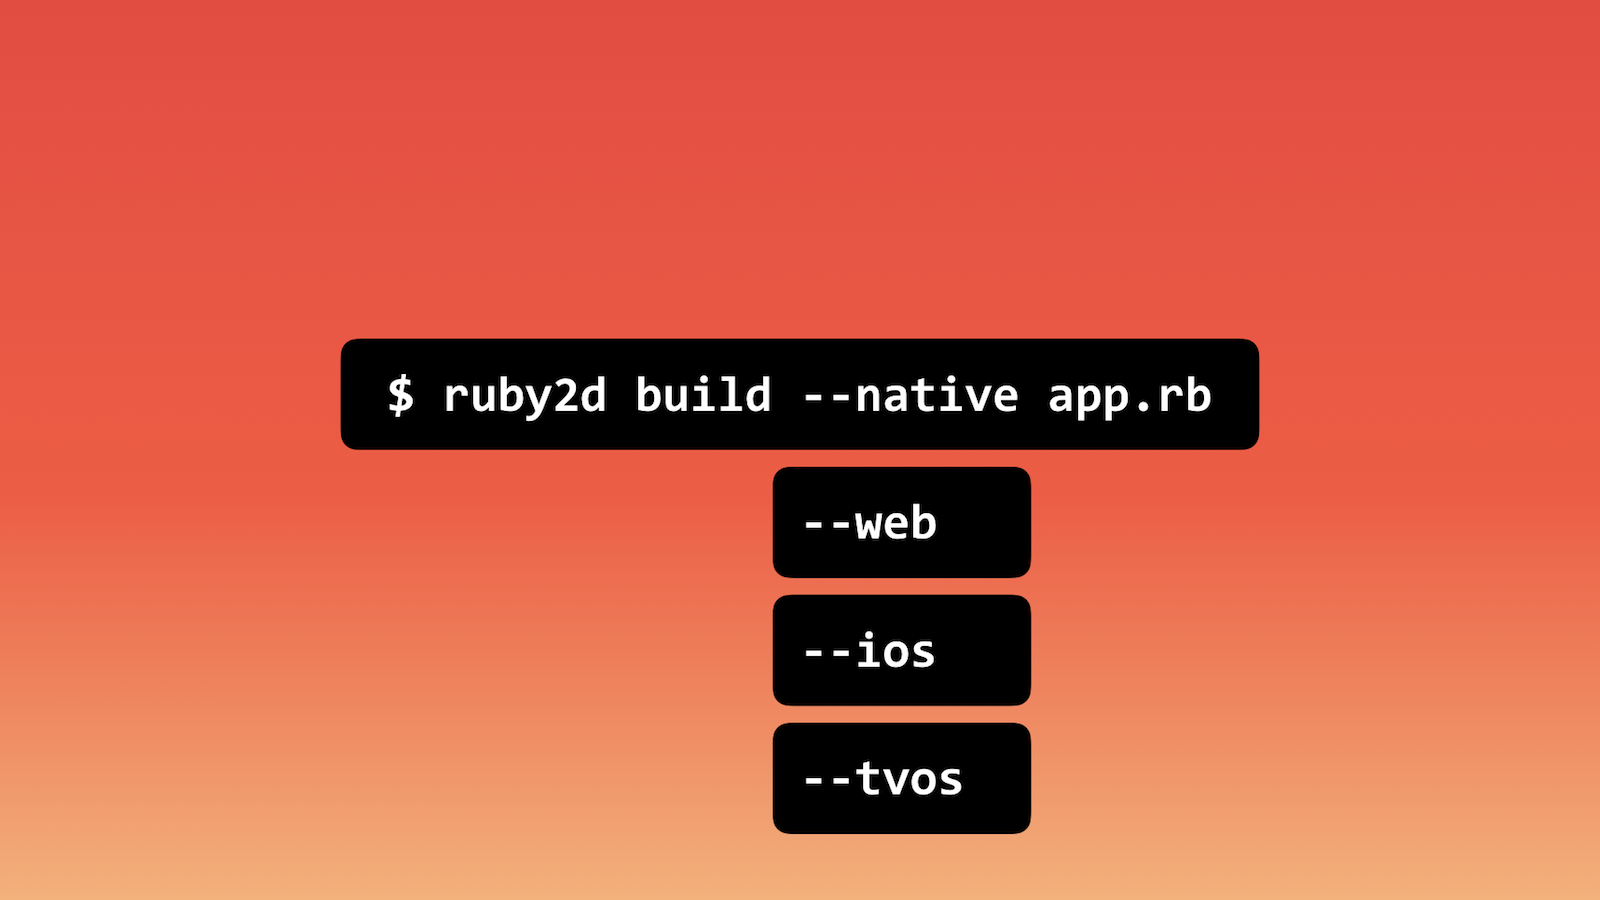
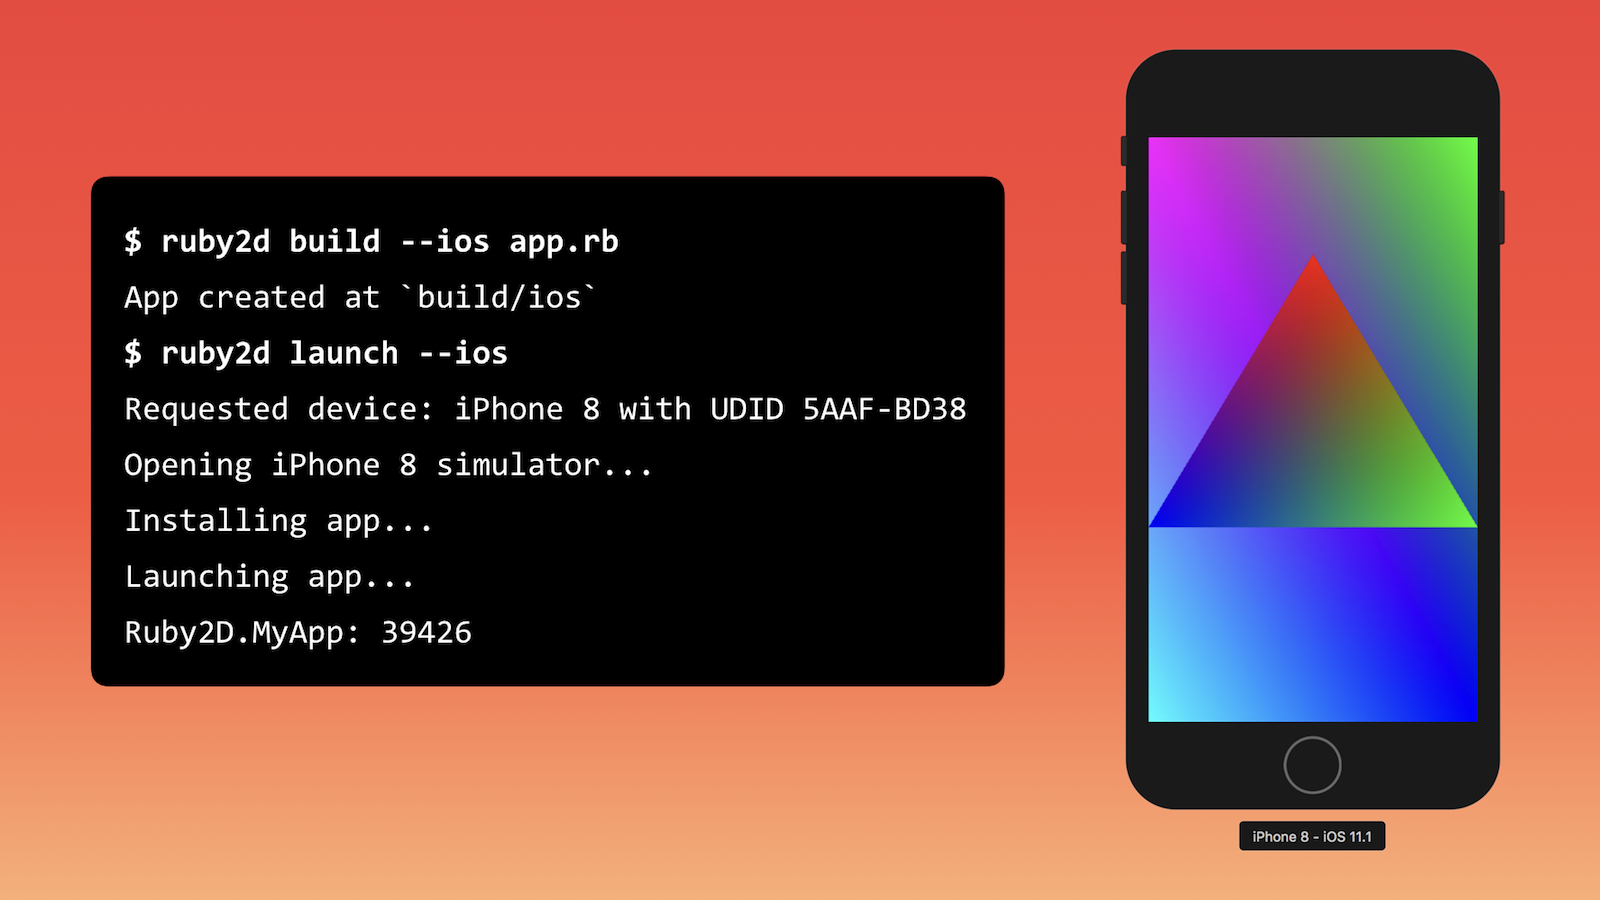
You already know how to run a Ruby 2D app as an interpreted script (using the `ruby` command), but how about building for native and web platforms? The Ruby 2D gem includes an executable, aptly named `ruby2d`. Use this command to `build` your Ruby script, passing an option corresponding to the platform you want to build for, like `--native`, `--web`, `--ios`, `--tvos`. Let's see an example...

To build an app for iOS (an iPhone or iPad), we'll run the `build` command, which will create a `build/` directory, gather the necessary source code and assets, and compile it.

We can then use the `launch` command to conveniently run it. Here, the iPhone 8 simulator is launched with a Ruby 2D app running.

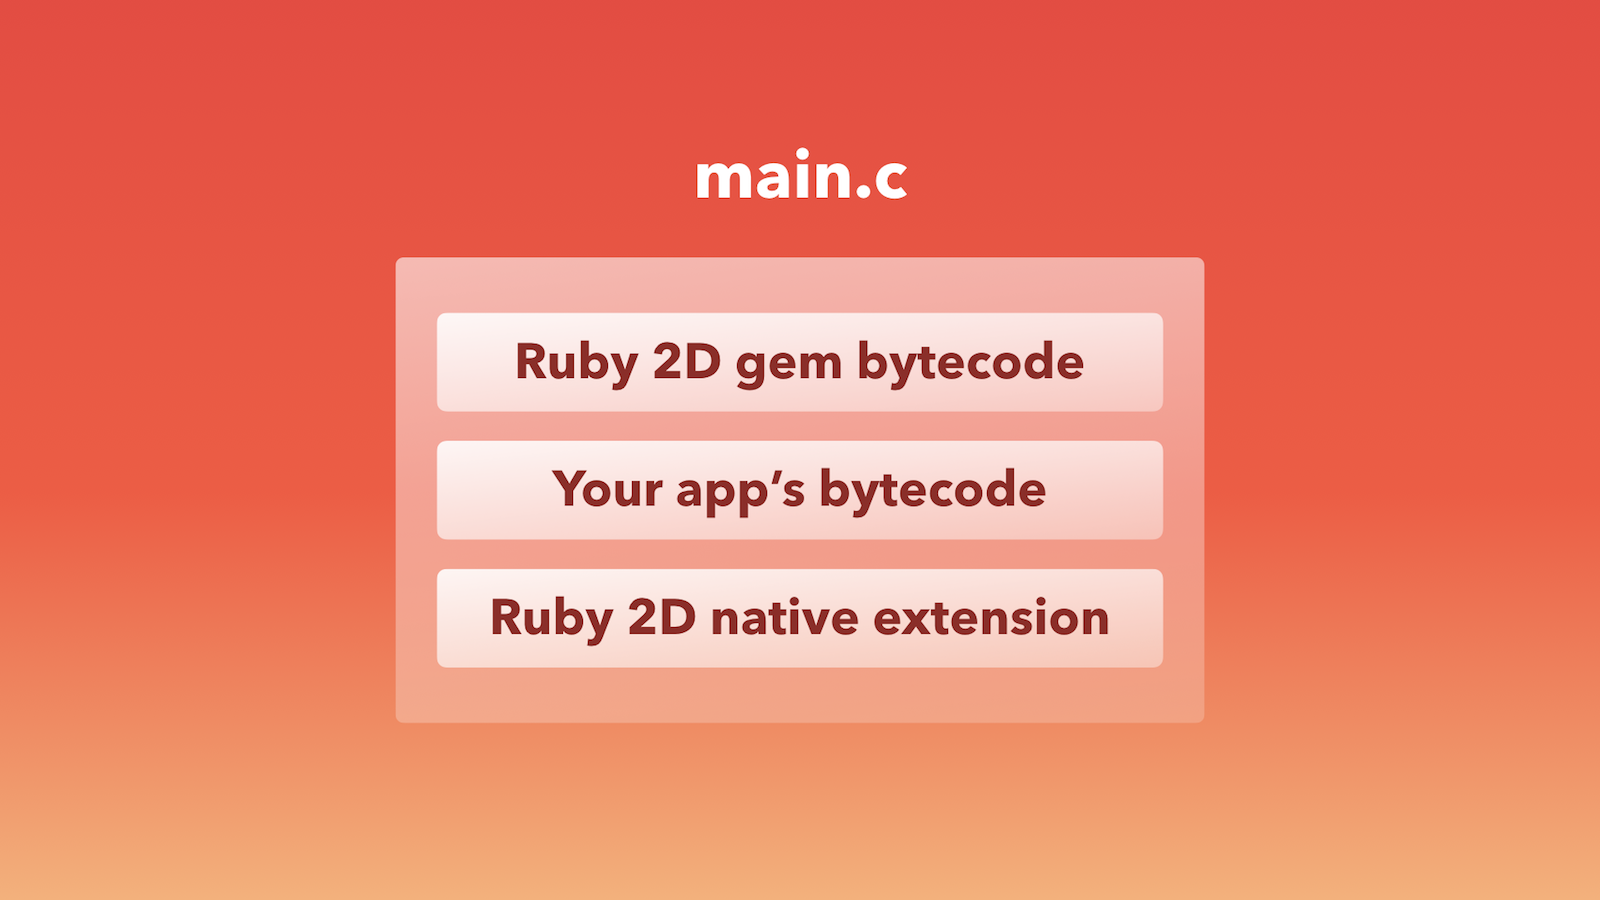
All this is possible by putting three things together into a single C file: the bytecode representation of the Ruby 2D gem's library sources generated by mruby, your app's bytecode, and the native extension we explored earlier.

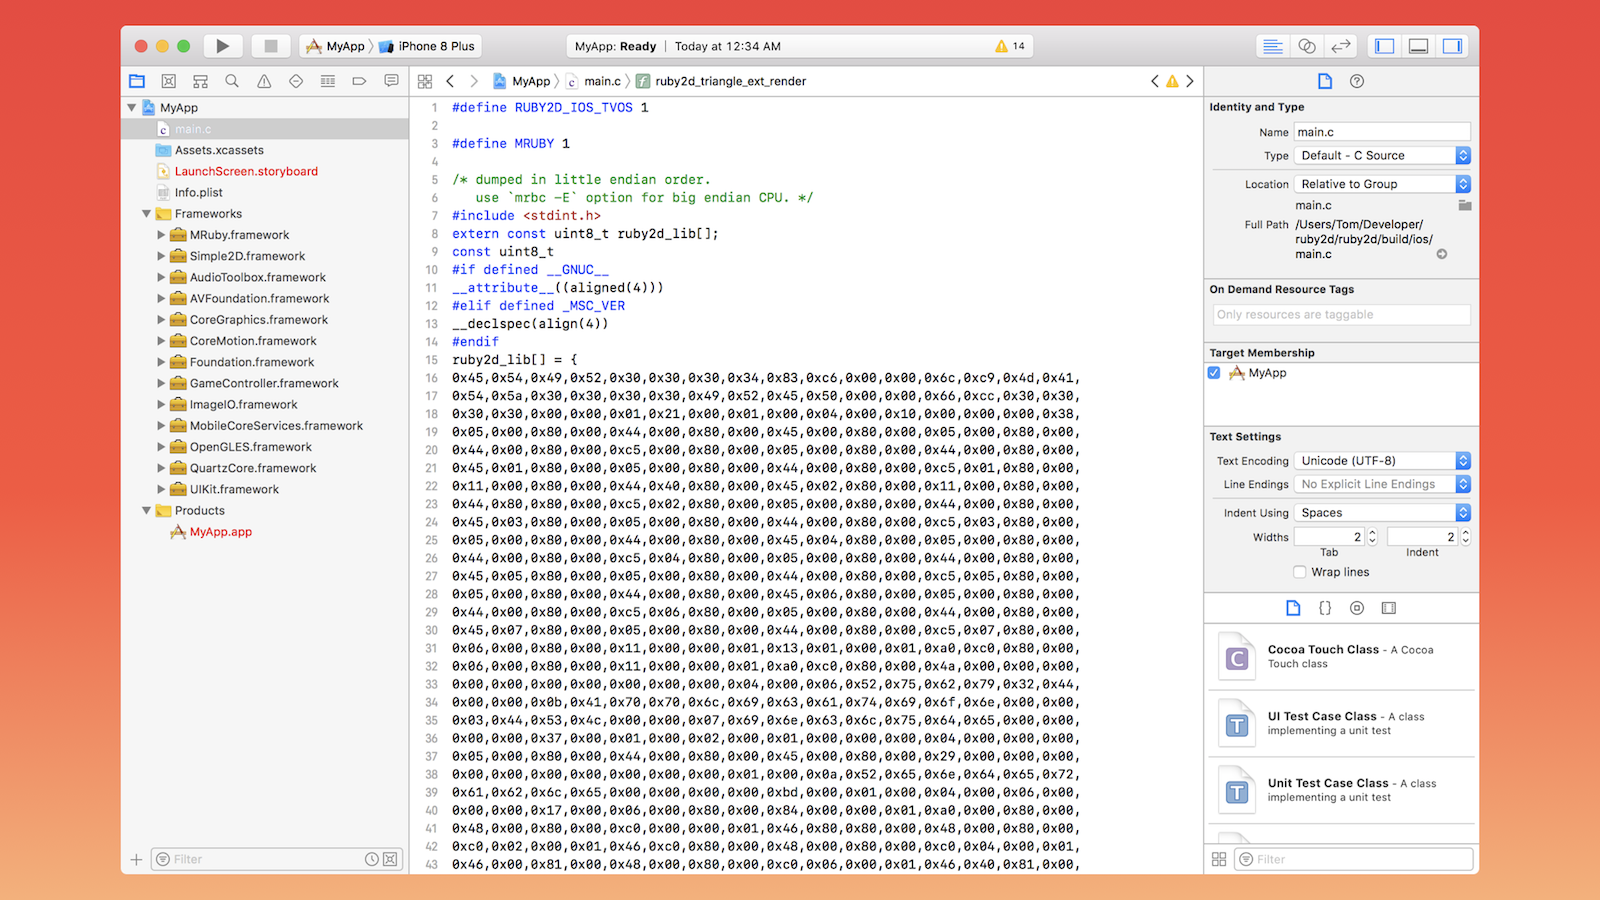
We take this C source file and simply add it to an [Xcode](https://developer.apple.com/xcode/) project. You're free to open it up and build the project right there, change configurations, even publish to the App Store.

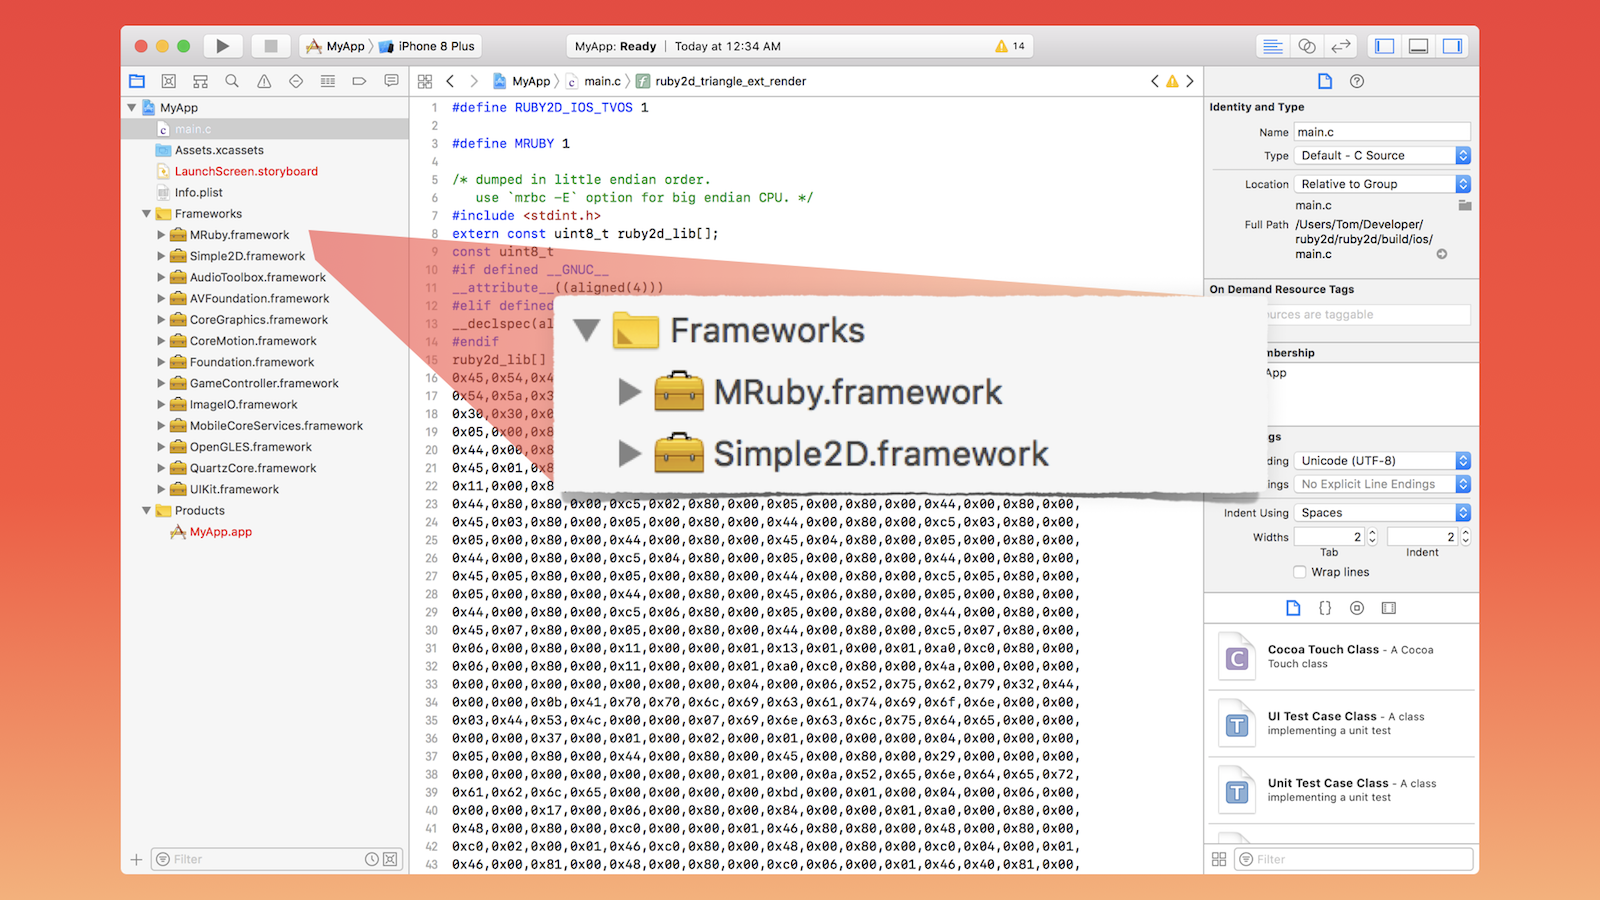
In the Xcode project, you'll notice a couple of necessary frameworks: `Simple2D.framework` ([from the Simple 2D project](https://github.com/simple2d/deps)) and `MRuby.framework` ([a cross-platform build of mruby](https://github.com/ruby2d/mruby-frameworks) for iOS and tvOS).

We've just scratched the surface here — there's a lot more Ruby 2D can do, and even more we can imagine for its future.

As we've seen, Ruby can help us rethink what’s possible for graphics and game development, both in the experience provided to programmers through a simple and expressive interface, and in the very implementation of the tools themselves.

Throughout this talk, we've orbited around the intersection of education, gaming, and graphics. I've got one more demo that nicely combines and blurs all three. But first...

...we have to put Ruby in space!

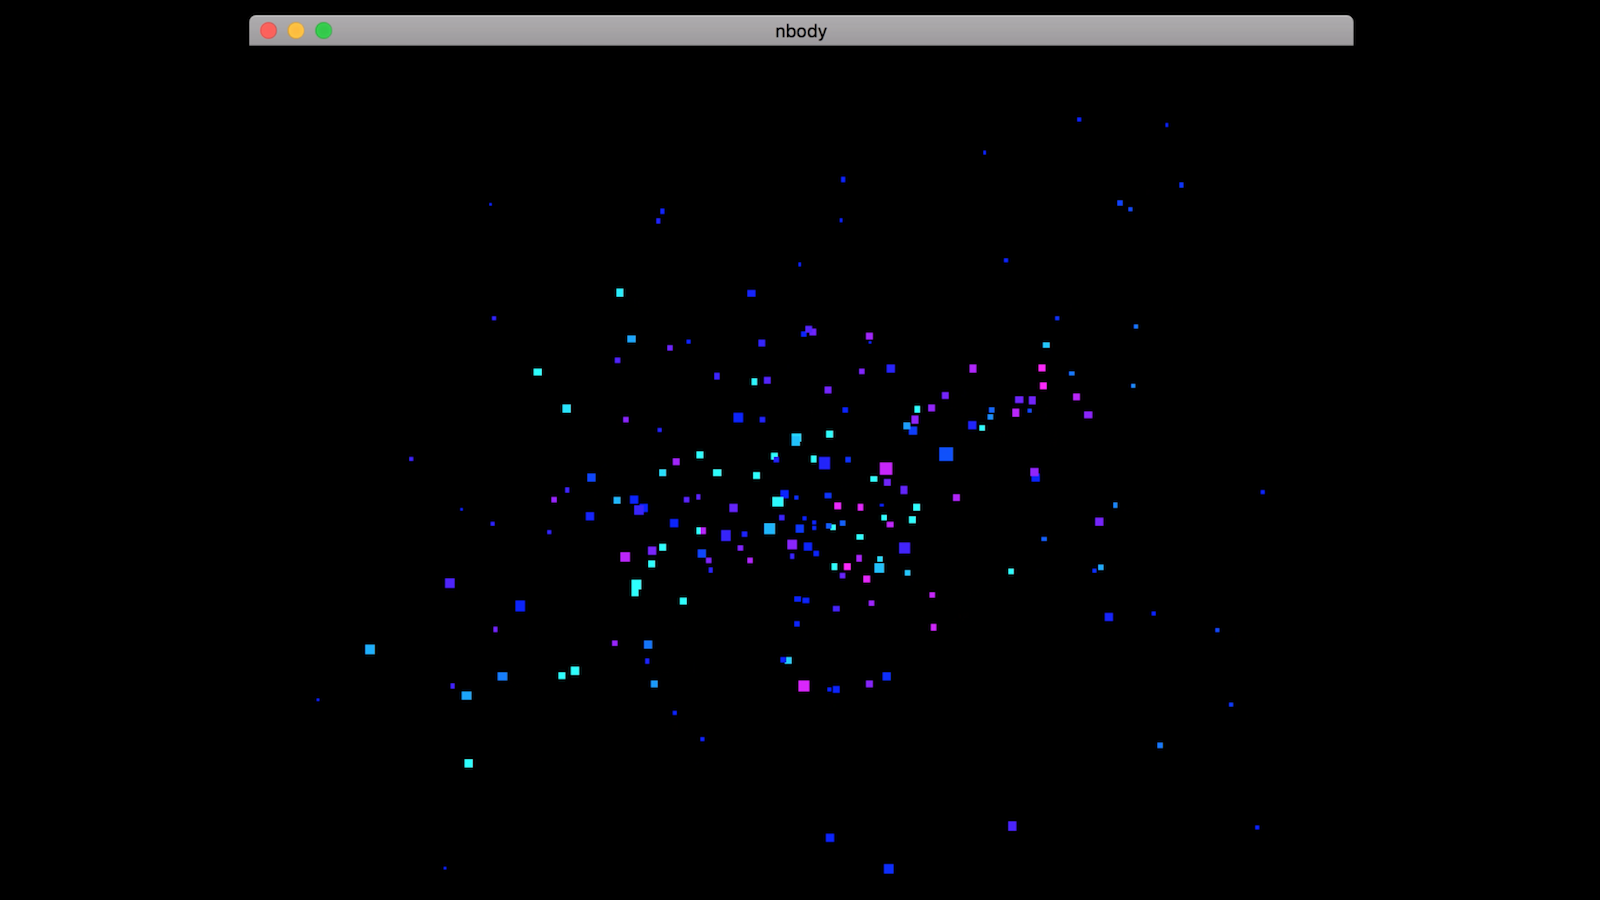
This is an [N-body simulation](https://en.wikipedia.org/wiki/N-body_simulation), used in astrophysics to simulate the influence of physical forces, namely gravity, on celestial bodies. Each square here is a star of different mass, with its color cooresponding to its horizontal velocity.

[Watch the video](https://www.youtube.com/watch?v=bAPHGg87OxA) of it in action and [see the code](https://github.com/blacktm/nbody/blob/master/nbody.rb).

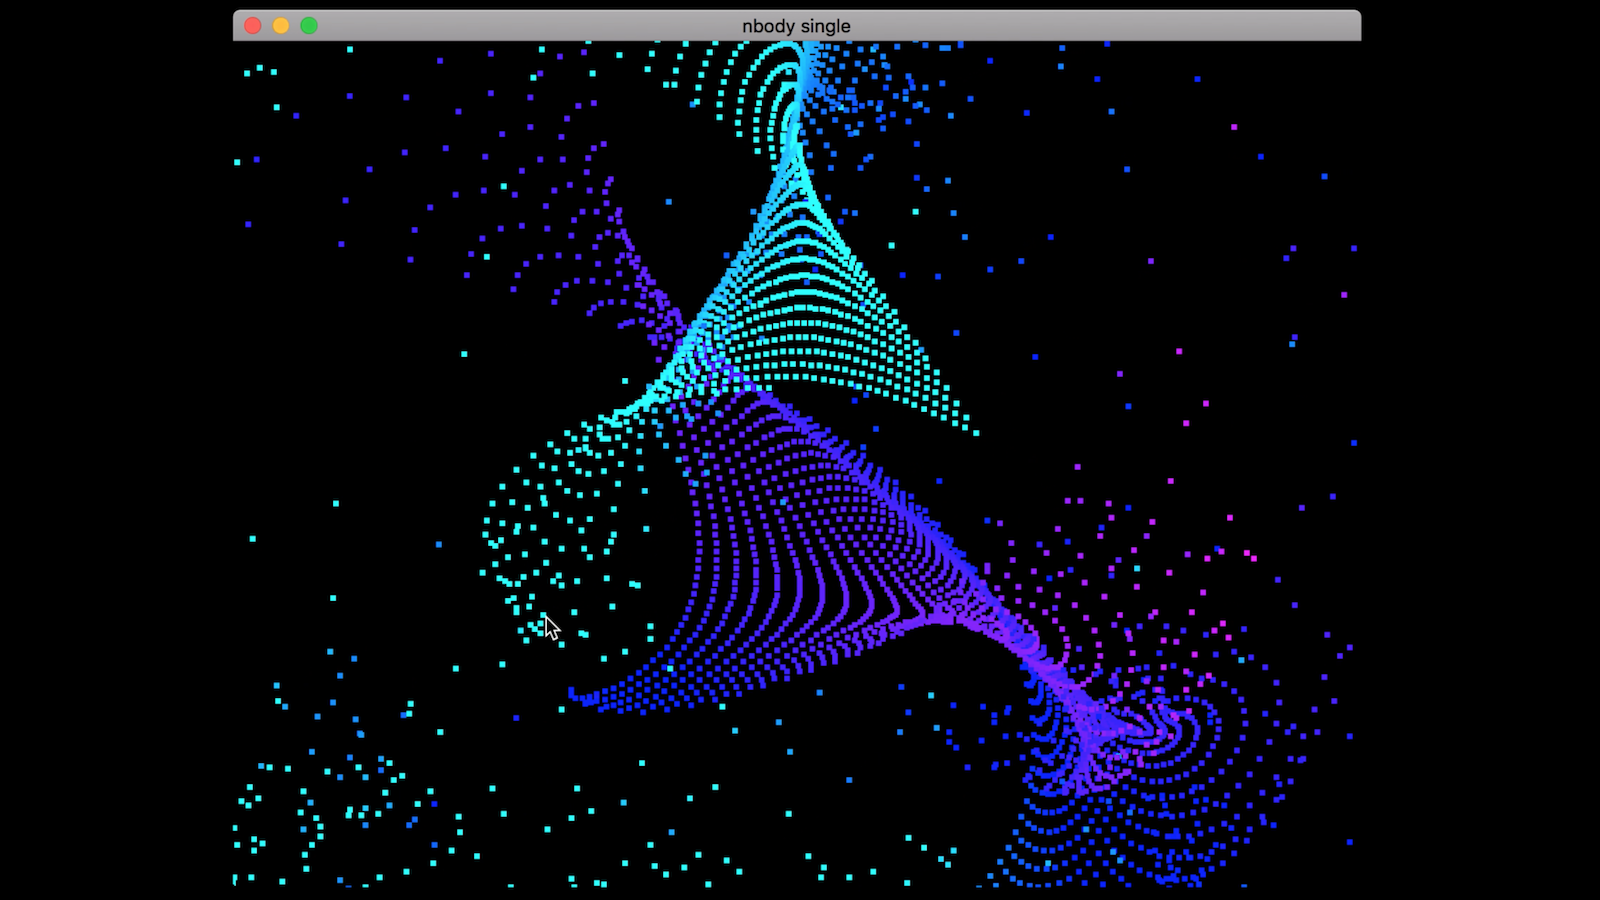
Here's the simulation again, but slightly modified where there's only a single point of gravity — your mouse cursor. The stars begin their lives arranged in a grid, and then race toward your cursor to catch it, but will they?

[Watch this one](https://www.youtube.com/watch?v=XY2SWmcjVnQ) in action and [see the code](https://github.com/blacktm/nbody/blob/master/nbody_single.rb).

As Rubyists, our future is bright! There are so many possibilities for Ruby, beyond just web development, and RubyConf 2017 showcased quite a few of them. I encourage you to check out the videos from the ["Ruby on the Fringe"](http://rubyconf.org/schedule) track.

In the world of Ruby graphics and gaming, we've got a small but growing, supportive community, and we'd love for you to [get involved](https://github.com/ruby2d/ruby2d#contribute)! You can also check out prior [Ruby game development talks](#prior-ruby-game-development-talks), all of which provided a great deal of inspiration for me.

Thanks for checking out my talk. Hope you enjoyed it (and learned something)!